
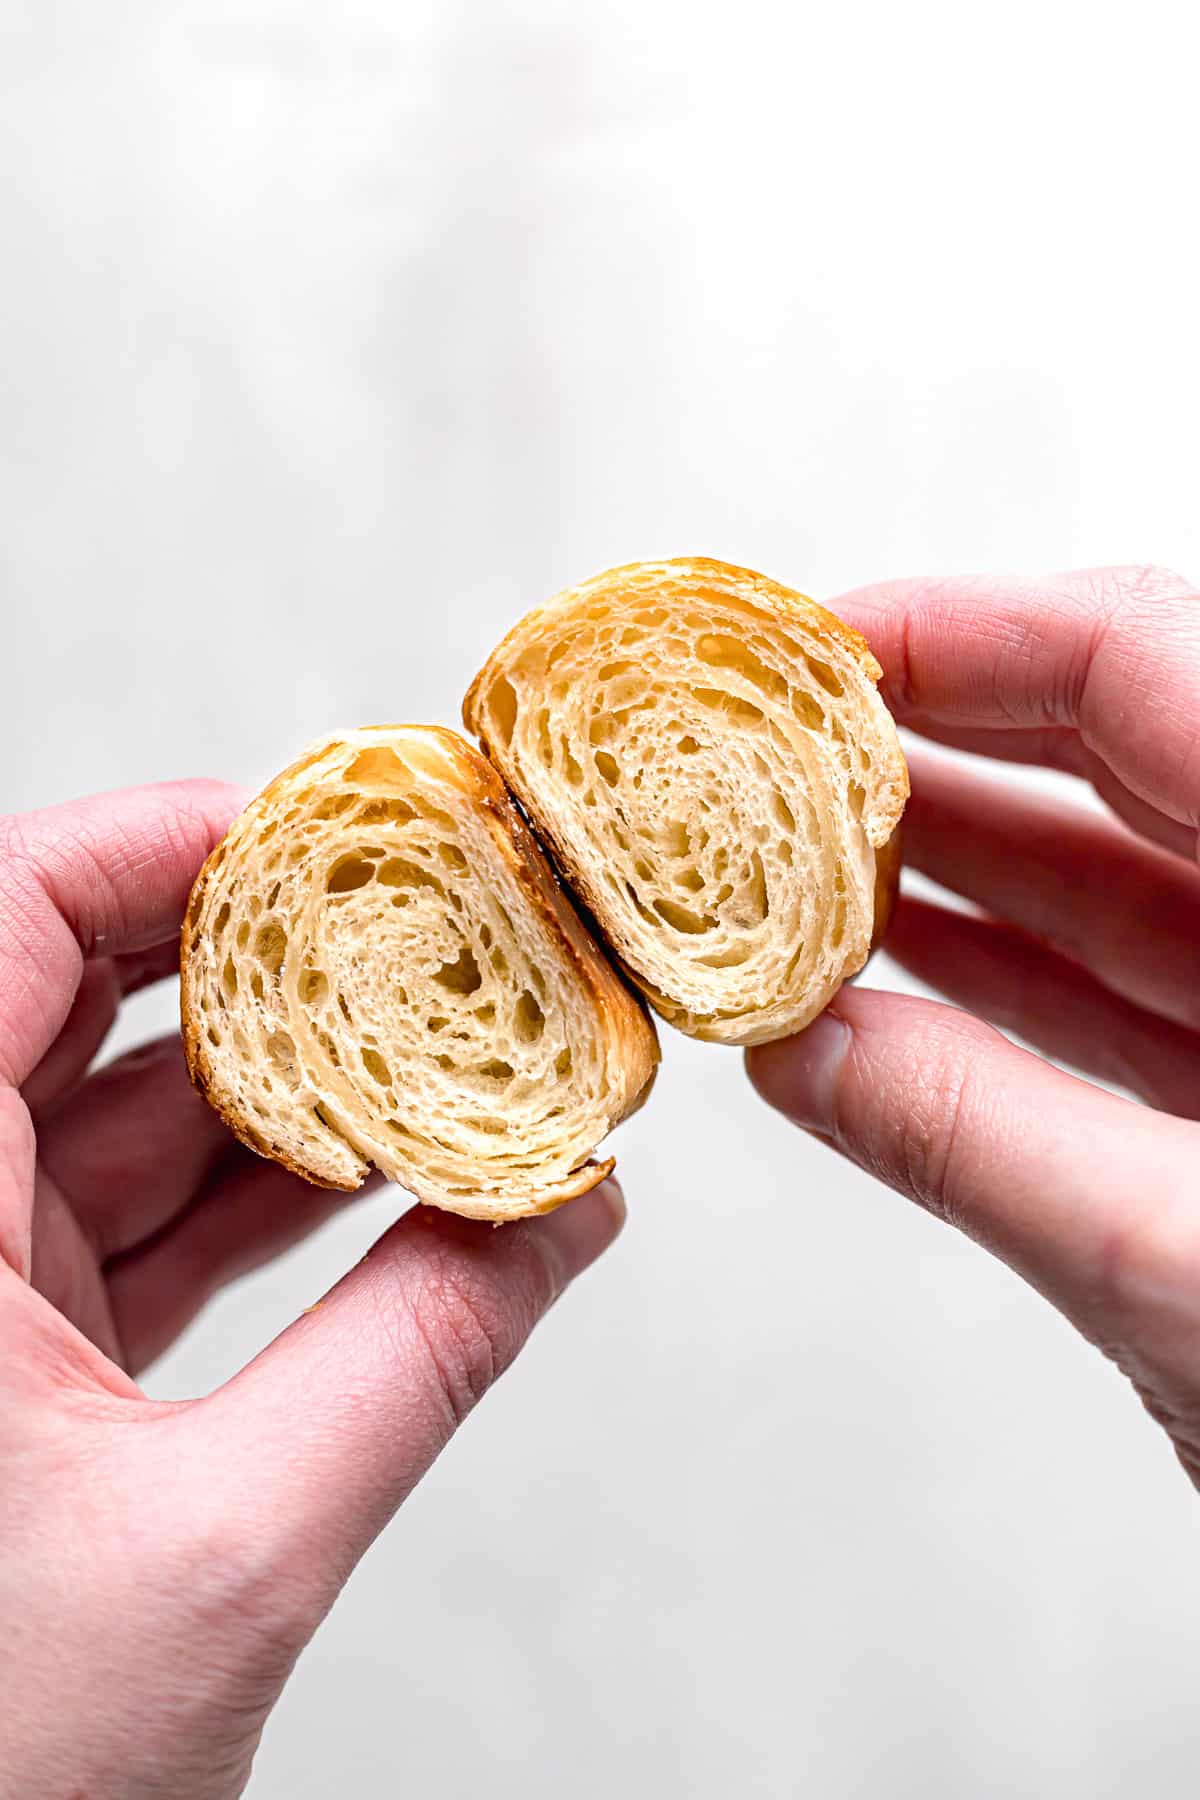
These small batch mini croissants make 12 ultra flaky & buttery pastries that are truly a labor of love and just what you need for your next brunch!

These small batch mini croissants are the perfect recipe if you've been wanting to challenge your baking skills and learn how to make homemade croissants! It is quite a long process, so I have supplemented the instructions with plenty of step-by-step photos. If you're up for the challenge, you'll be rewarded with 12 small buttery pastries that taste like they came fresh from a professional bakery!
For more brunch recipes, try Small Batch Buttermilk Blueberry Muffins, Strawberries & Cream Stuffed French Toast, and Roasted Strawberry Cinnamon Rolls.
Jump to Recipe

Ingredient Notes

- Water: You'll need about ⅔ cup of lukewarm water for the croissant dough.
- Yeast: You can use active dry or instant yeast.
- Sugar: You'll need a bit of granulated sugar to help activate the yeast.
- Malt Powder: Non-diastatic malt powder is added primarily for flavor, and to help keep the interior soft for longer. I like to use King Aruthur's.
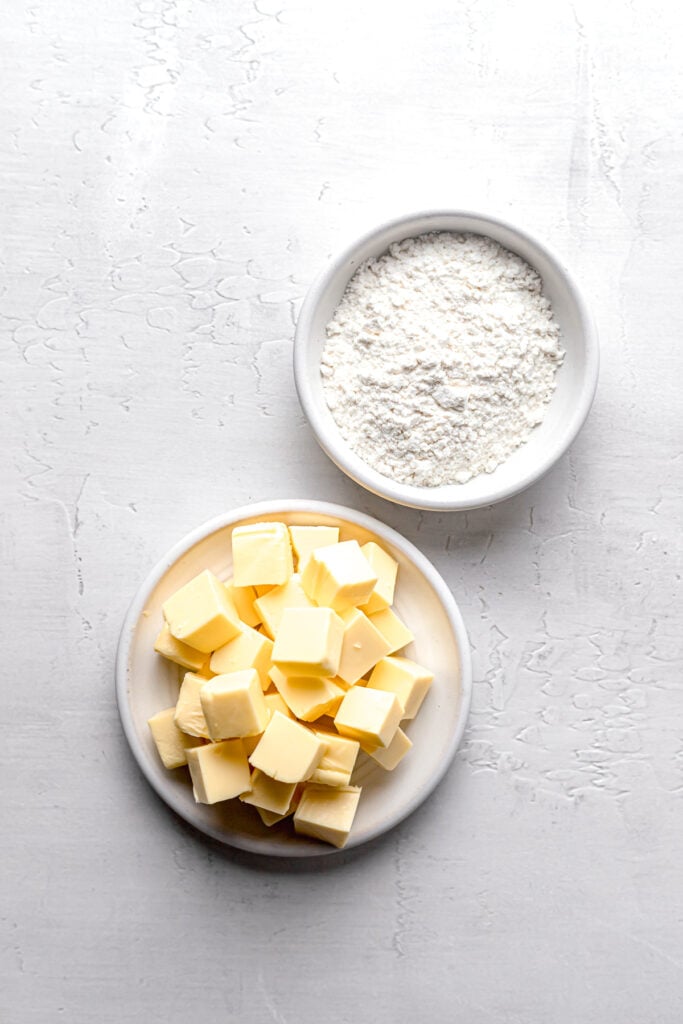
- Butter: The butter is truly the most important ingredient in this recipe - be sure to use a high-quality brand! Kerrygold is my go-to.
- Flour: You'll need all-purpose flour for the dough, as well as for the butter block to keep the butter from melting during the lamination process.
See recipe card for full information on ingredients and individual quantities.
Step by Step Instructions
Croissants can be daunting with all of the folding, rolling, and chilling. Don't stress, I've broken down the recipe, lamination process, and shaping with step-by-step photos! I highly recommend looking over these and reading the recipe card all the way through before starting.
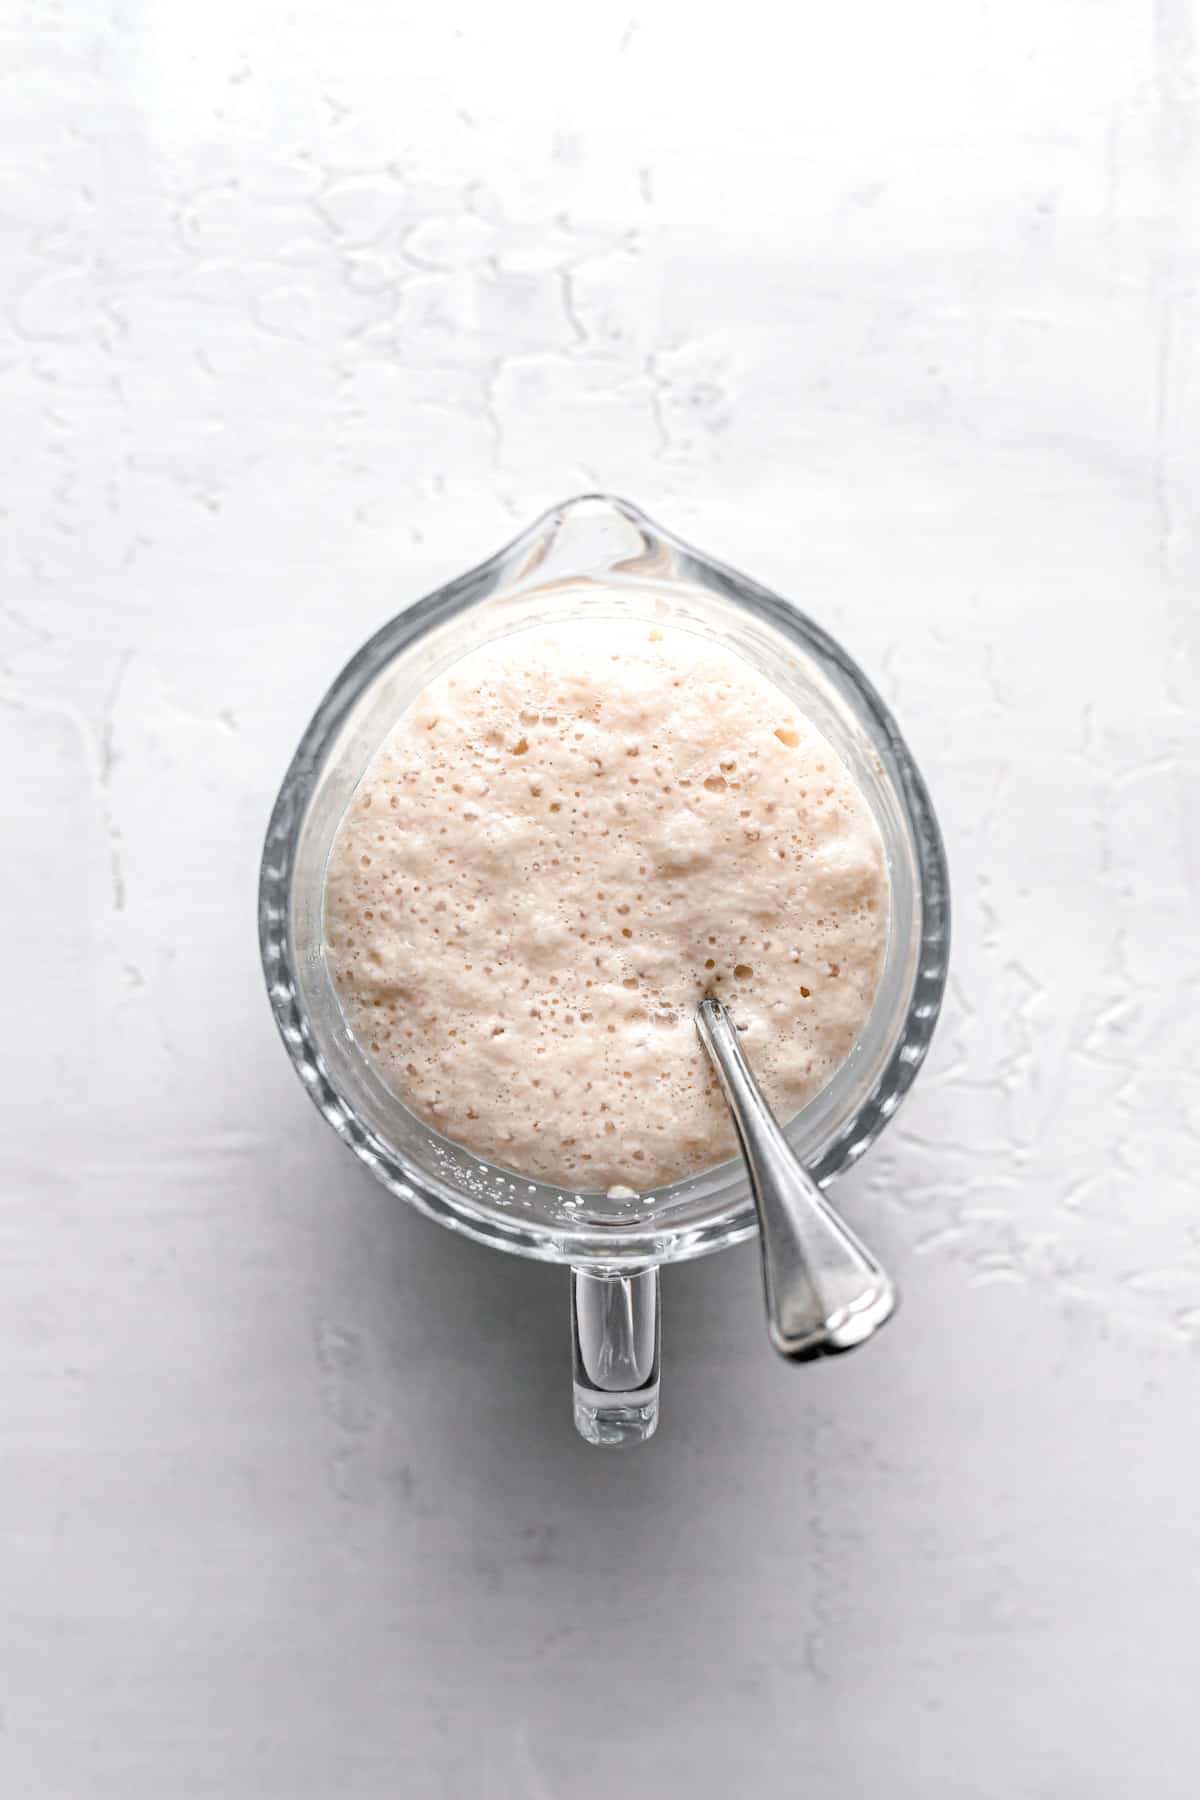
STEP 1: Activate the yeast. In a liquid measuring cup, combine lukewarm water, granulated sugar, and yeast. Set aside for a few minutes to activate.
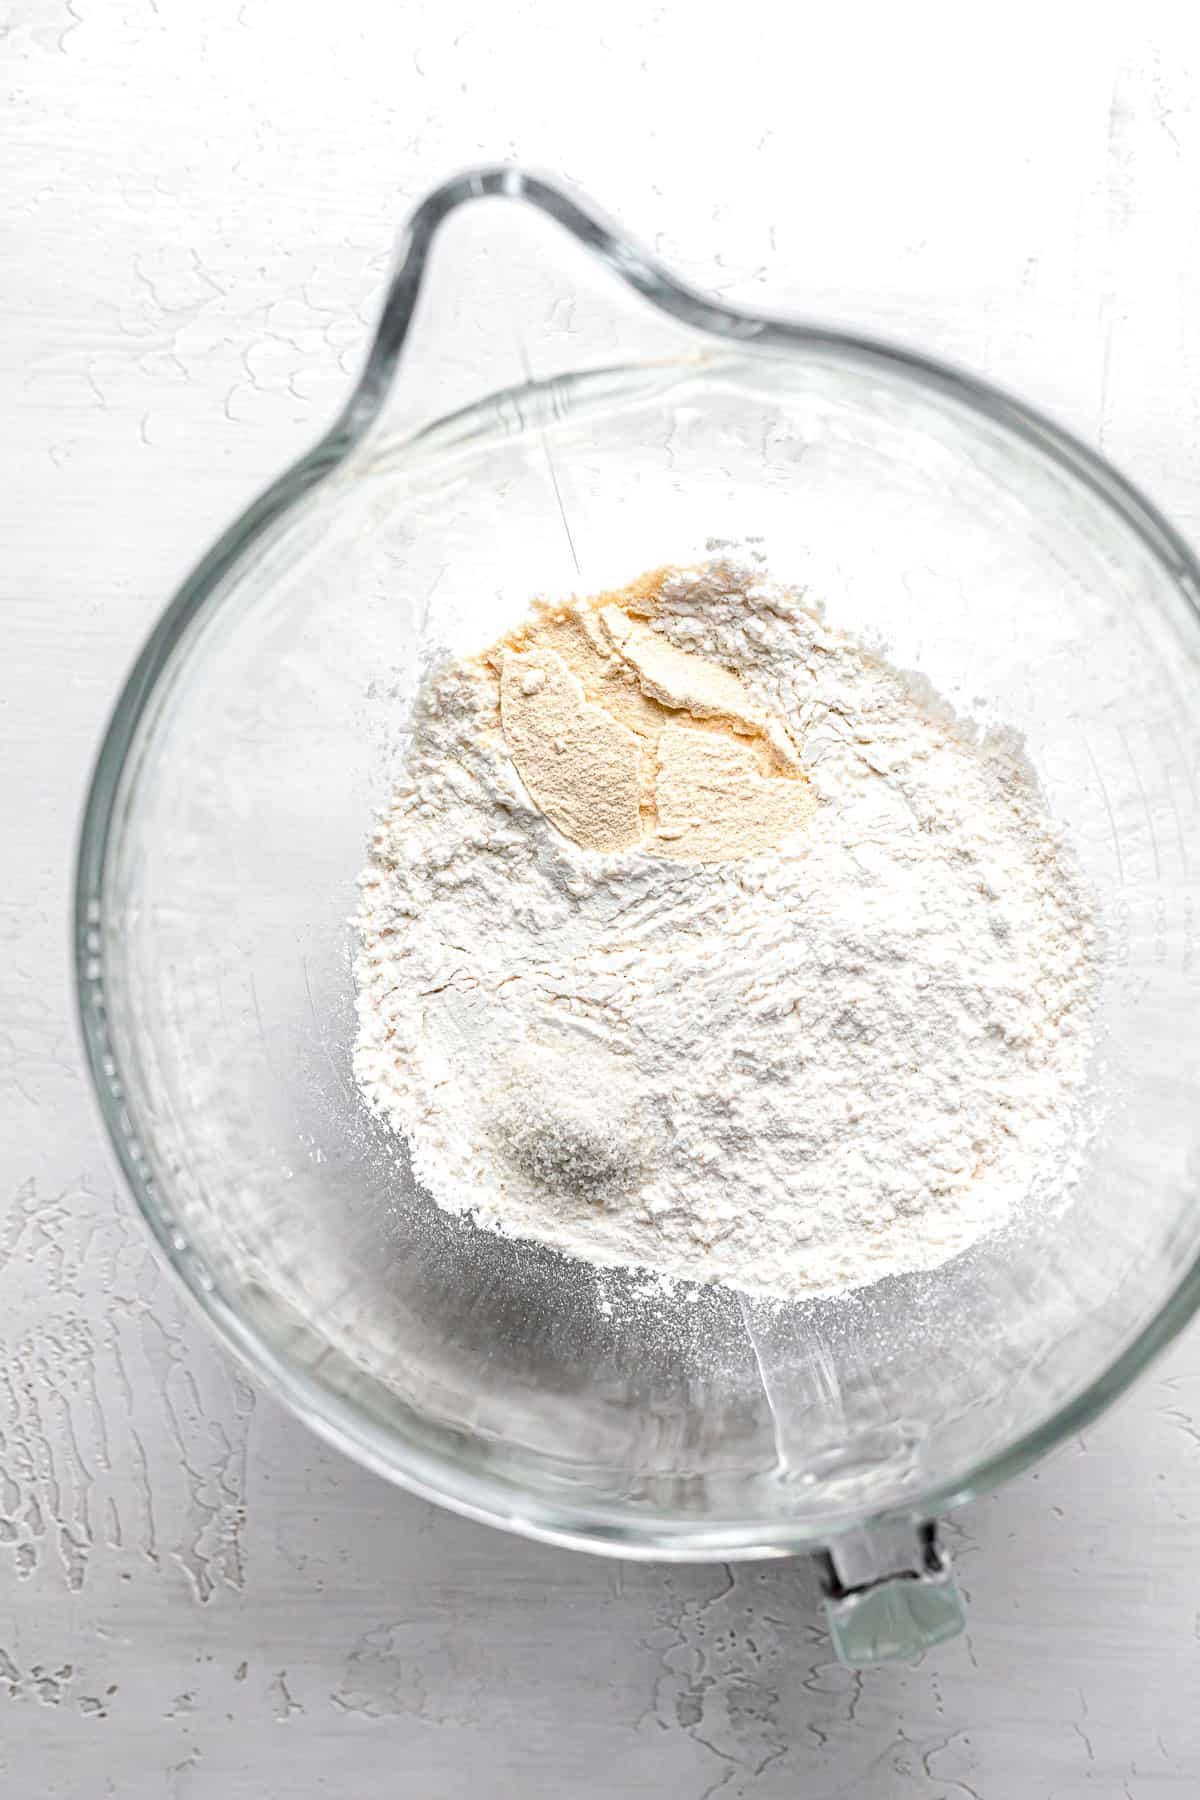
STEP 2: Combine dry ingredients. In the bowl of a stand mixer fitted with the dough hook, combine the flour, malt powder, and salt.

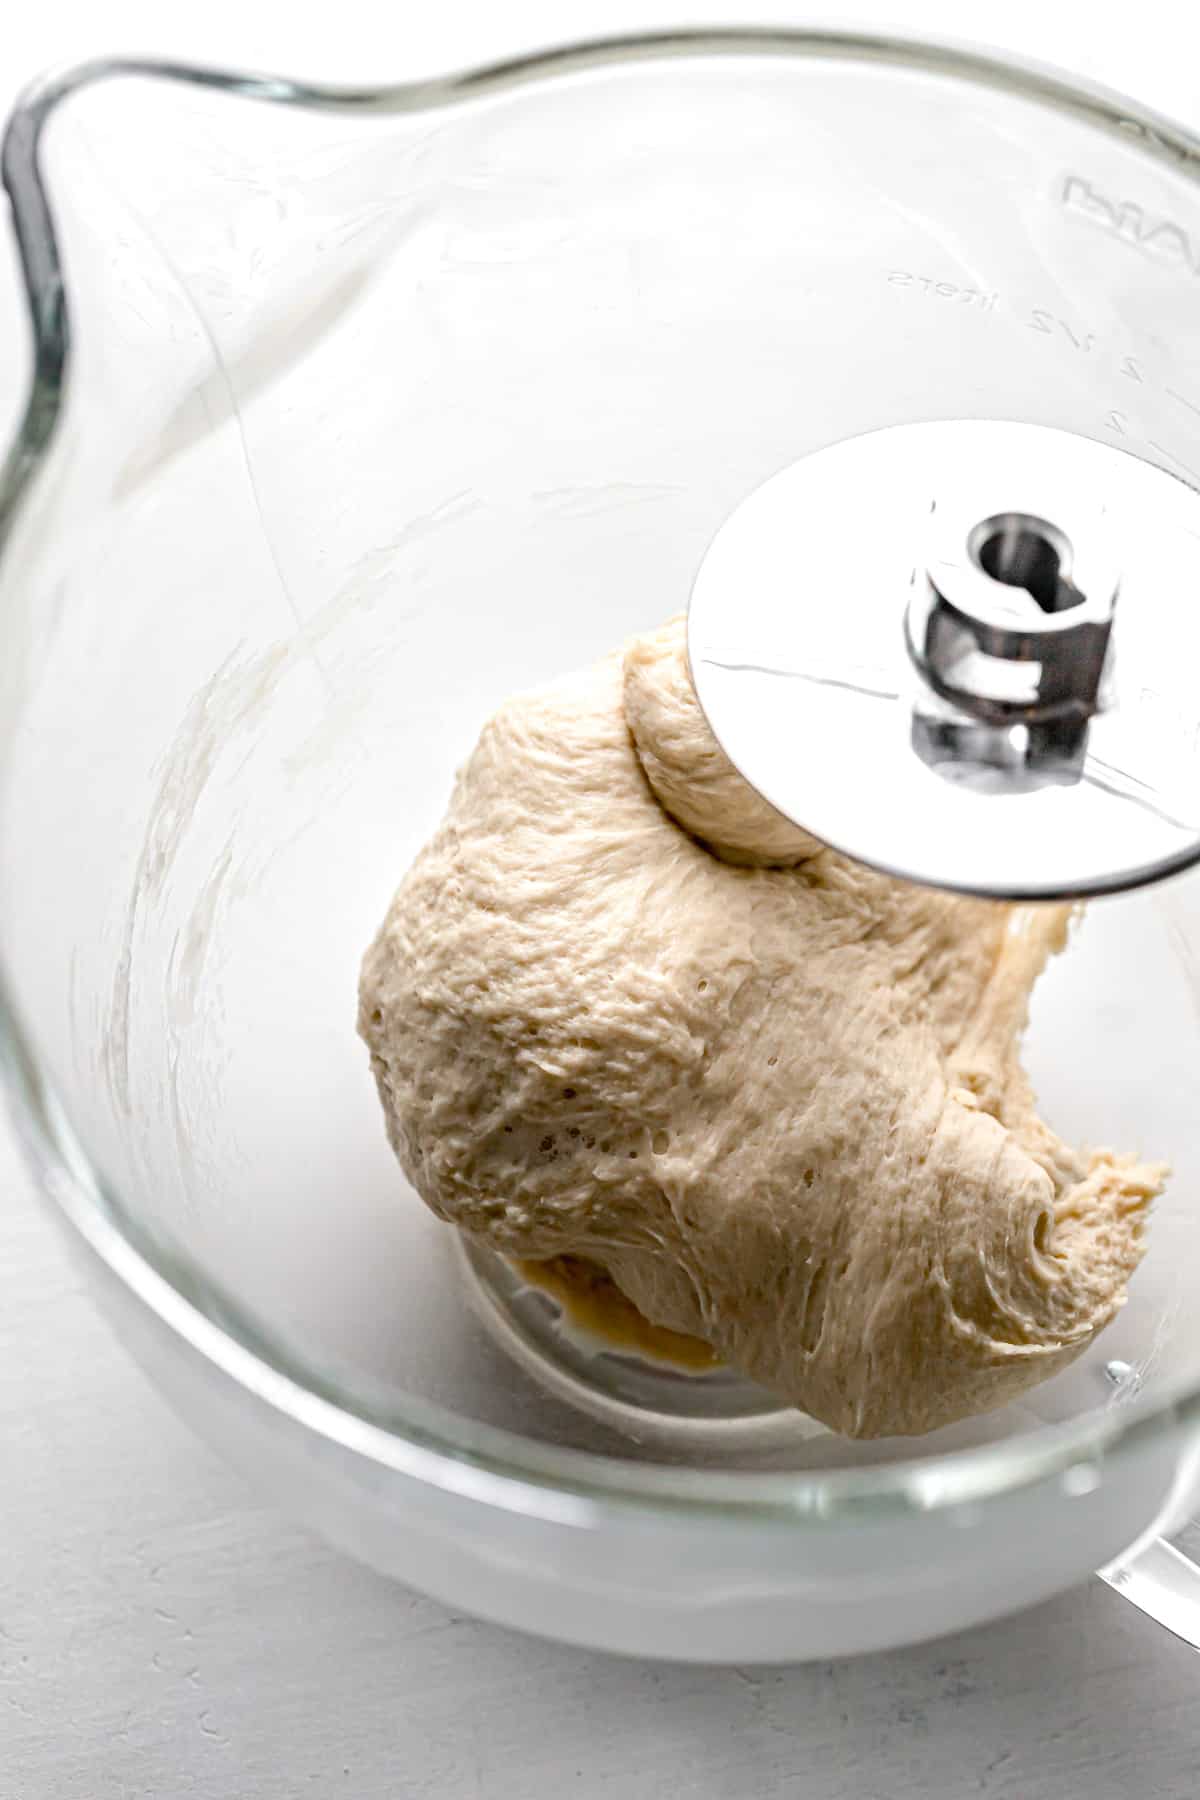
STEP 3: Mix in yeast mixture & butter. Add in the activated yeast mixture and melted butter.
STEP 4: Knead the dough. Mix on low-medium speed for 5 minutes until smooth.
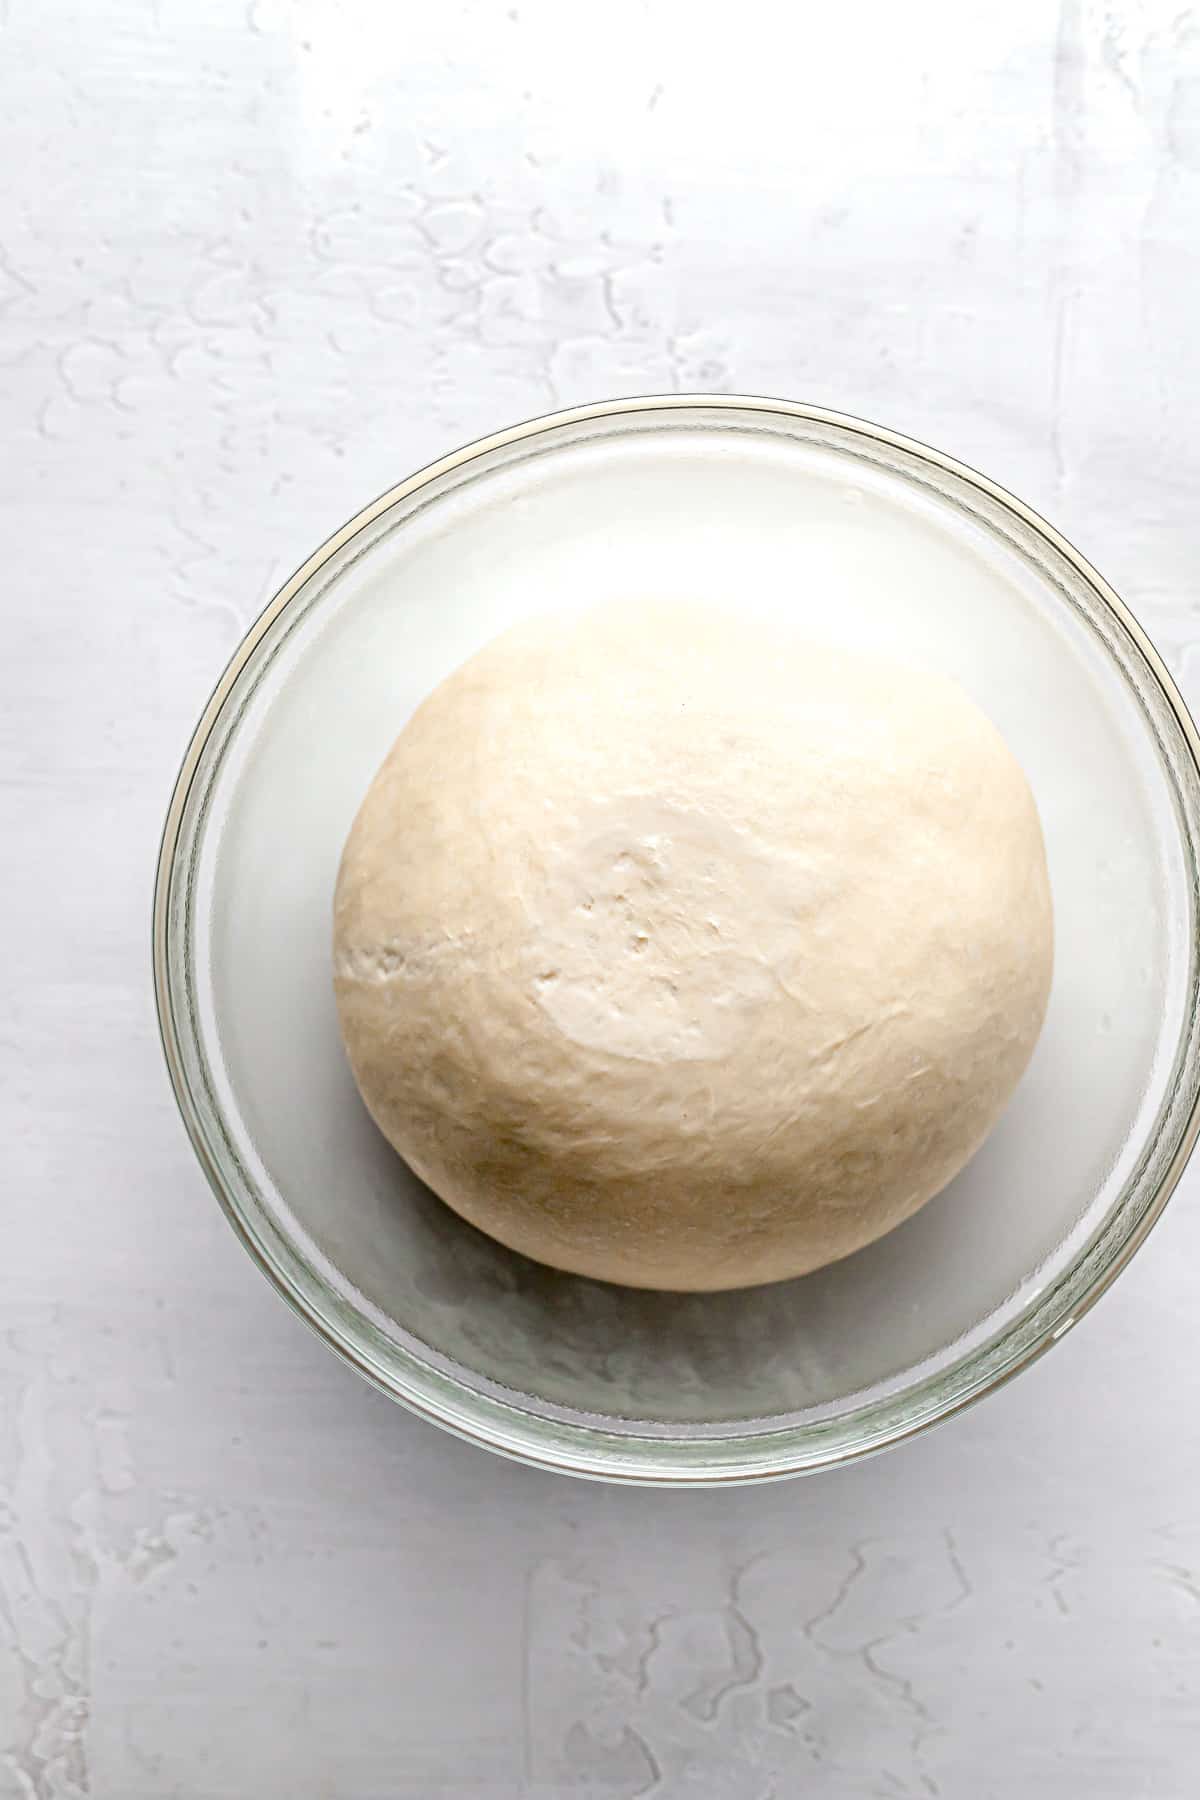
STEP 5: Rest the dough. Transfer the dough to a lightly greased bowl, cover, and chill in the fridge for about 30 minutes.
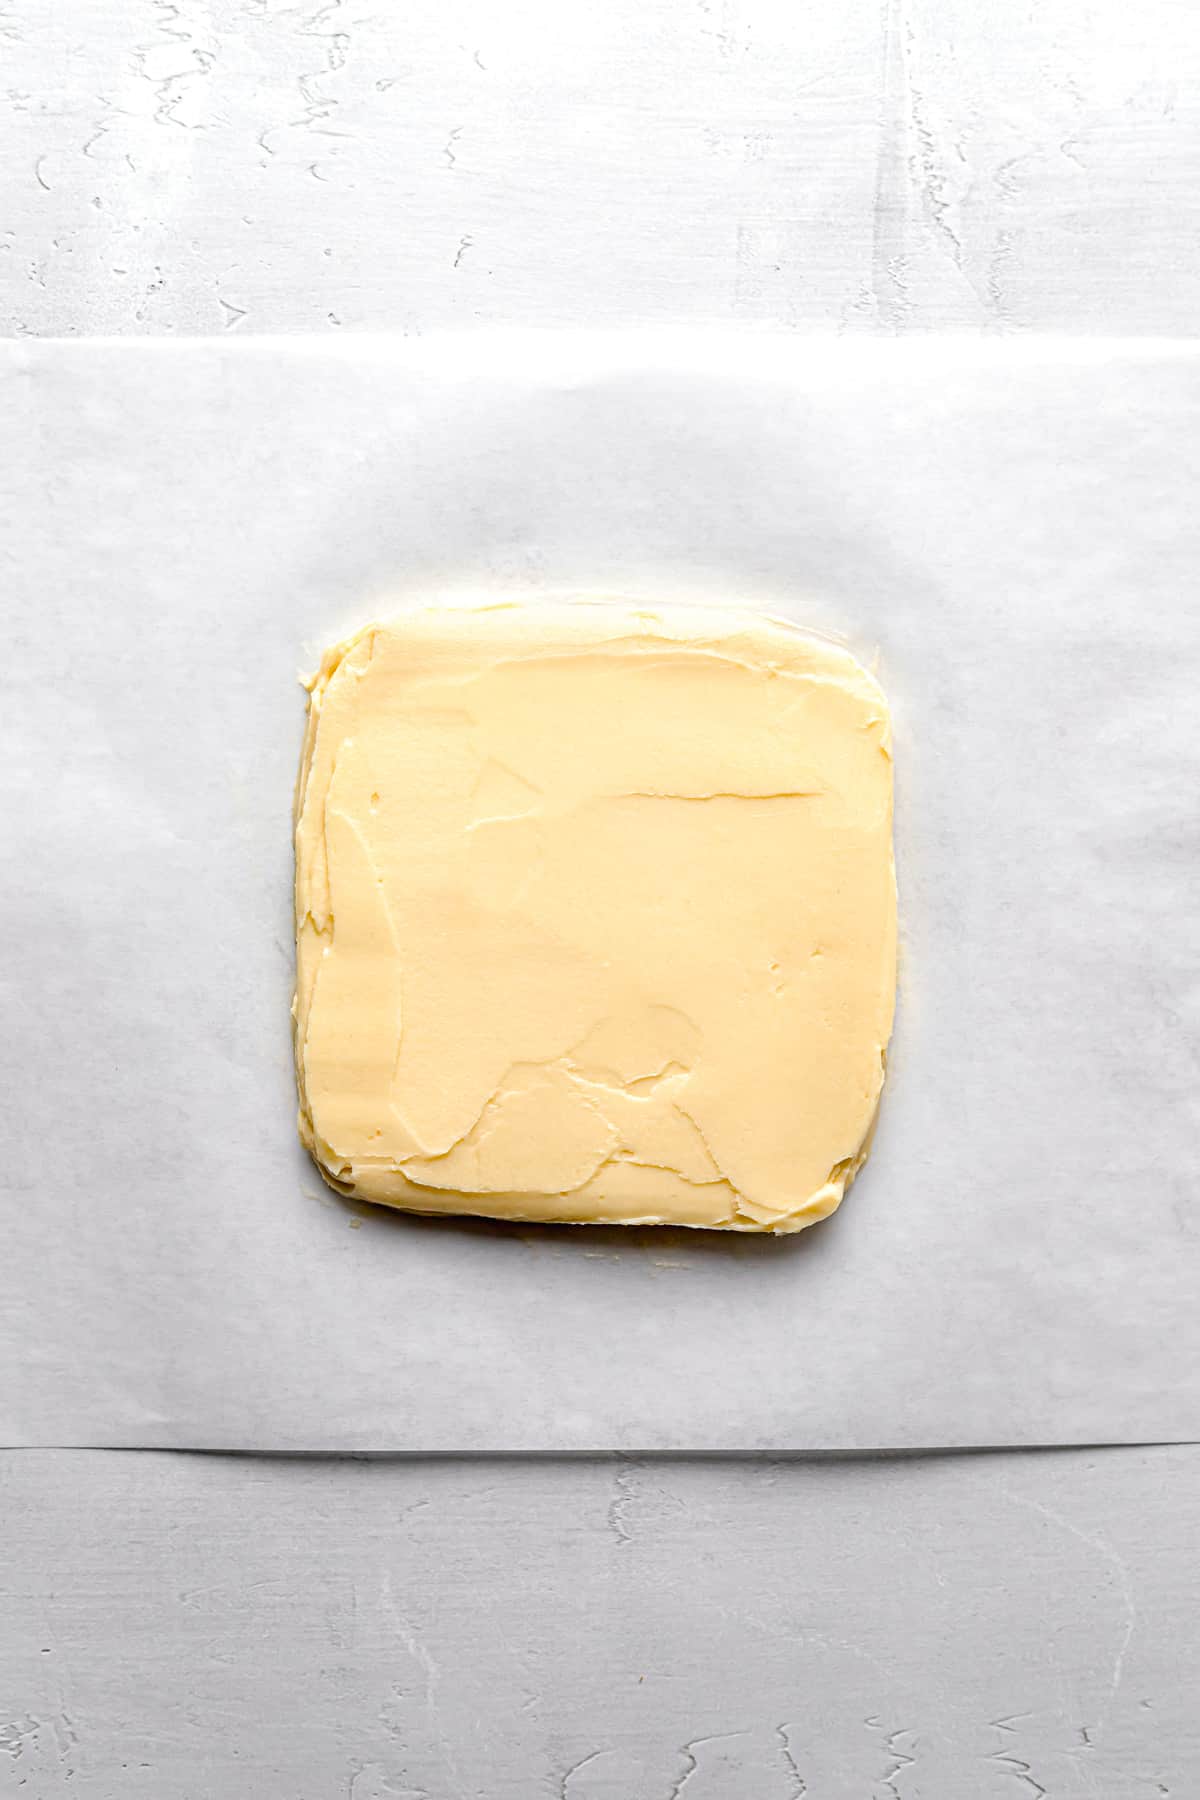
STEP 6: Make the butter block. In the bowl of a stand mixer fitted with the paddle attachment, beat the butter on low speed until smooth. Add in the flour and mix until fully combined. Transfer the butter mixture to a piece of parchment paper. Using an offset spatula, spread it out into 5" square. Place in the fridge to chill for 30 minutes.
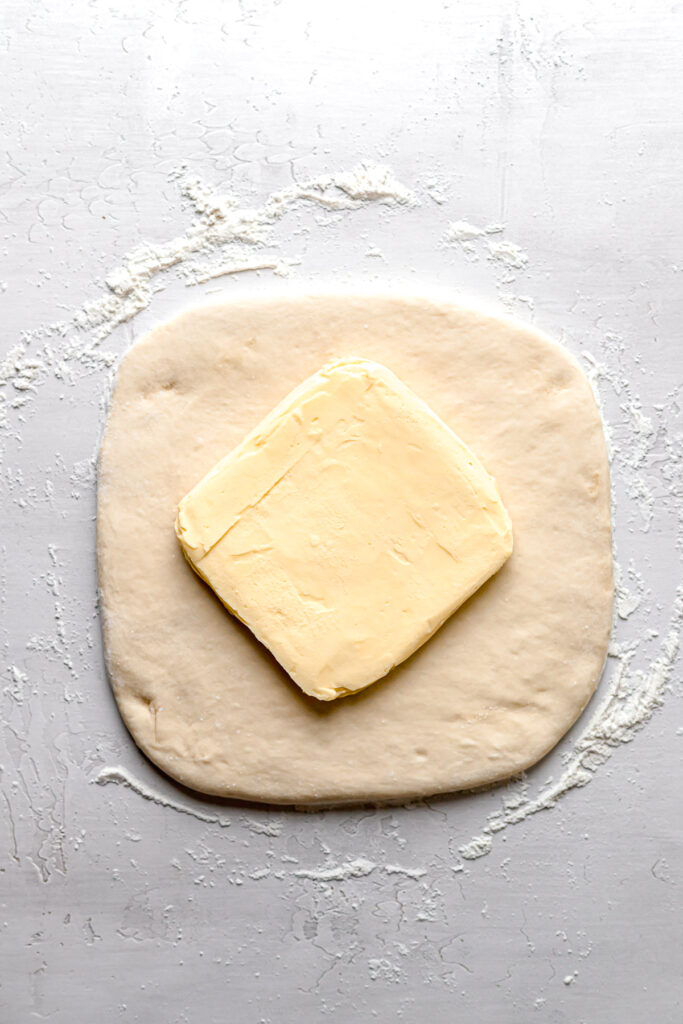
STEP 7: Add butter block to dough. On a lightly floured surface, roll the dough out into a 9" square. Place the butter block in the center of the dough with a corner facing you (like a diamond).
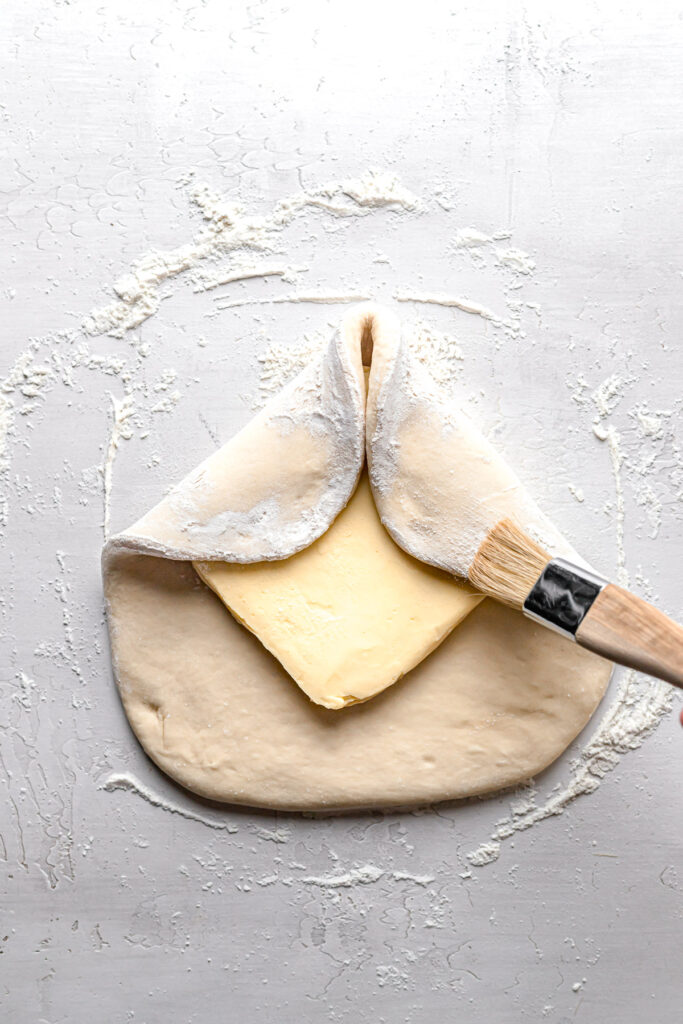
STEP 8: Add butter block to dough. Brush away any excess flour.
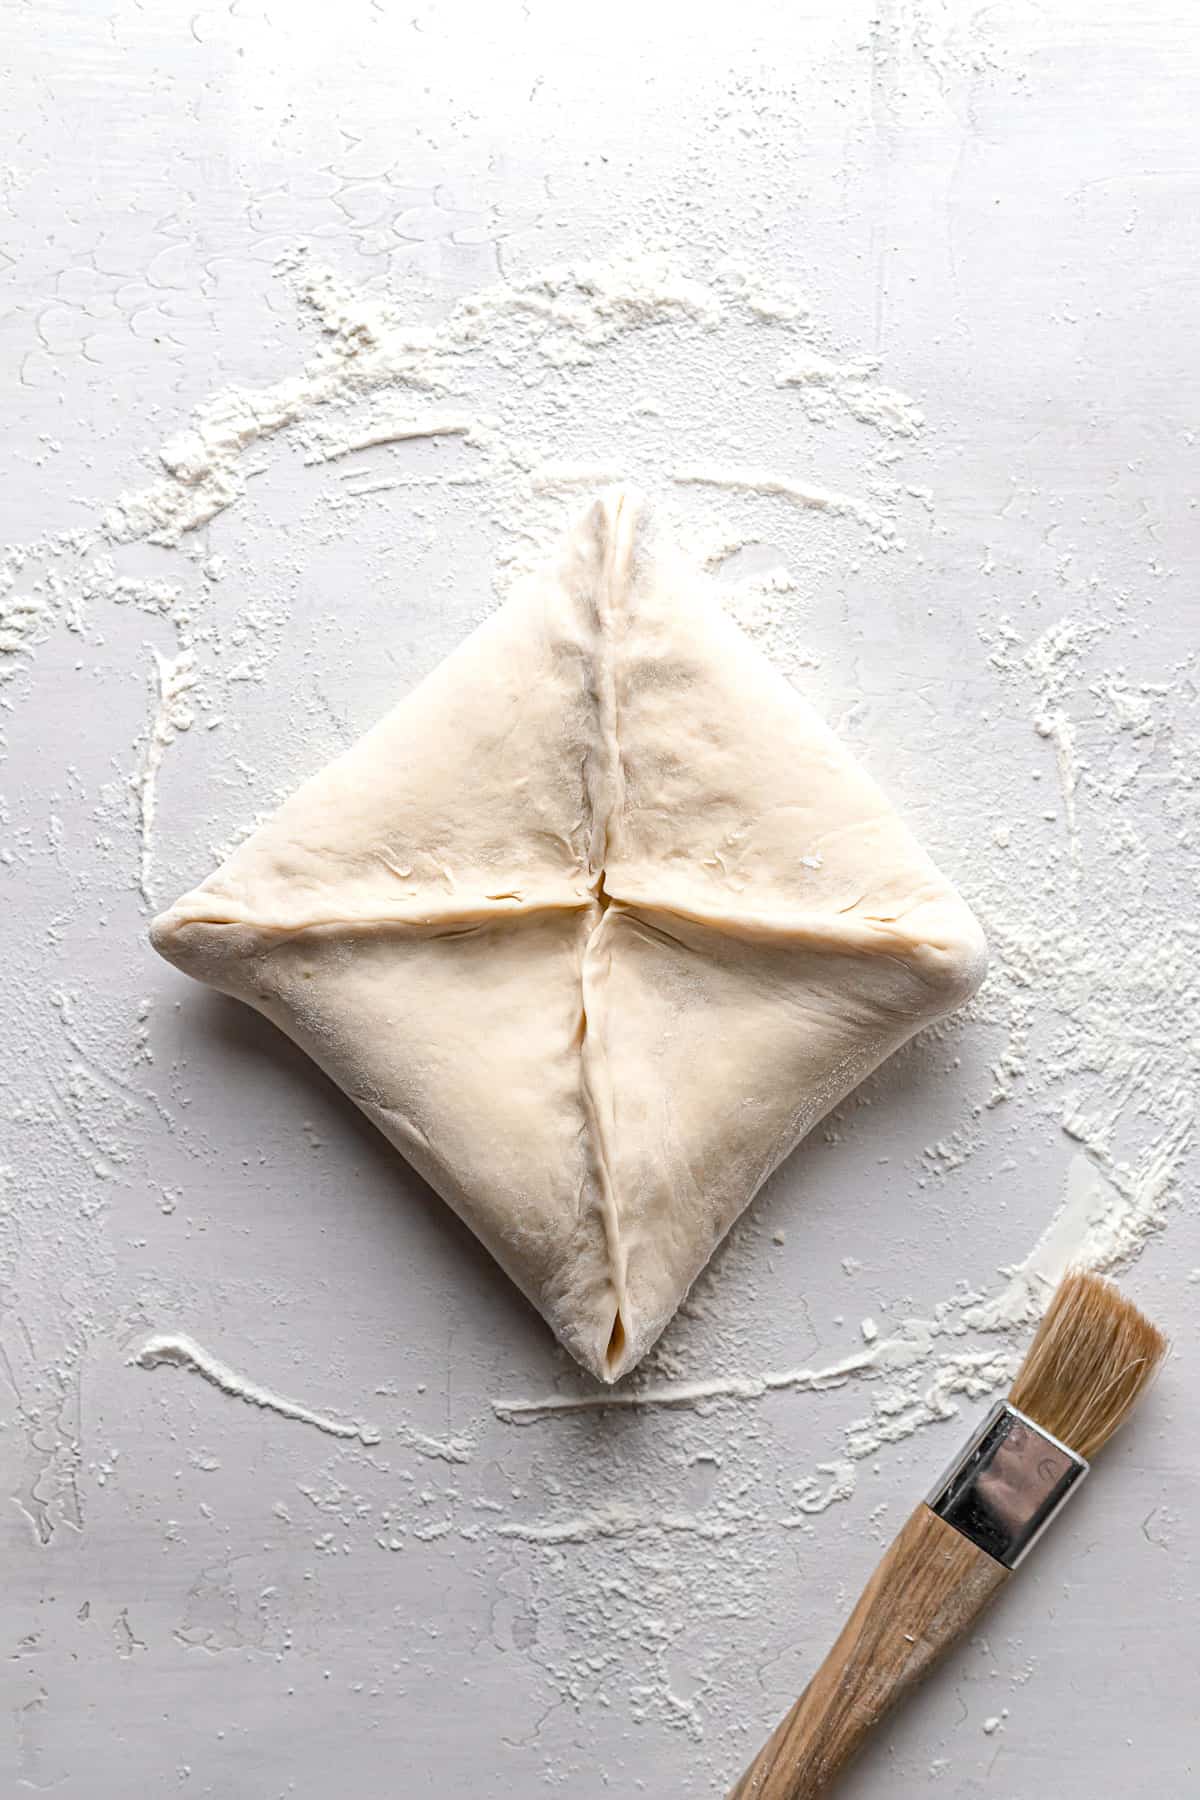
STEP 9: Encase the butter block. Pull the dough over the butter block and pinch the seams together (use water to seal them).
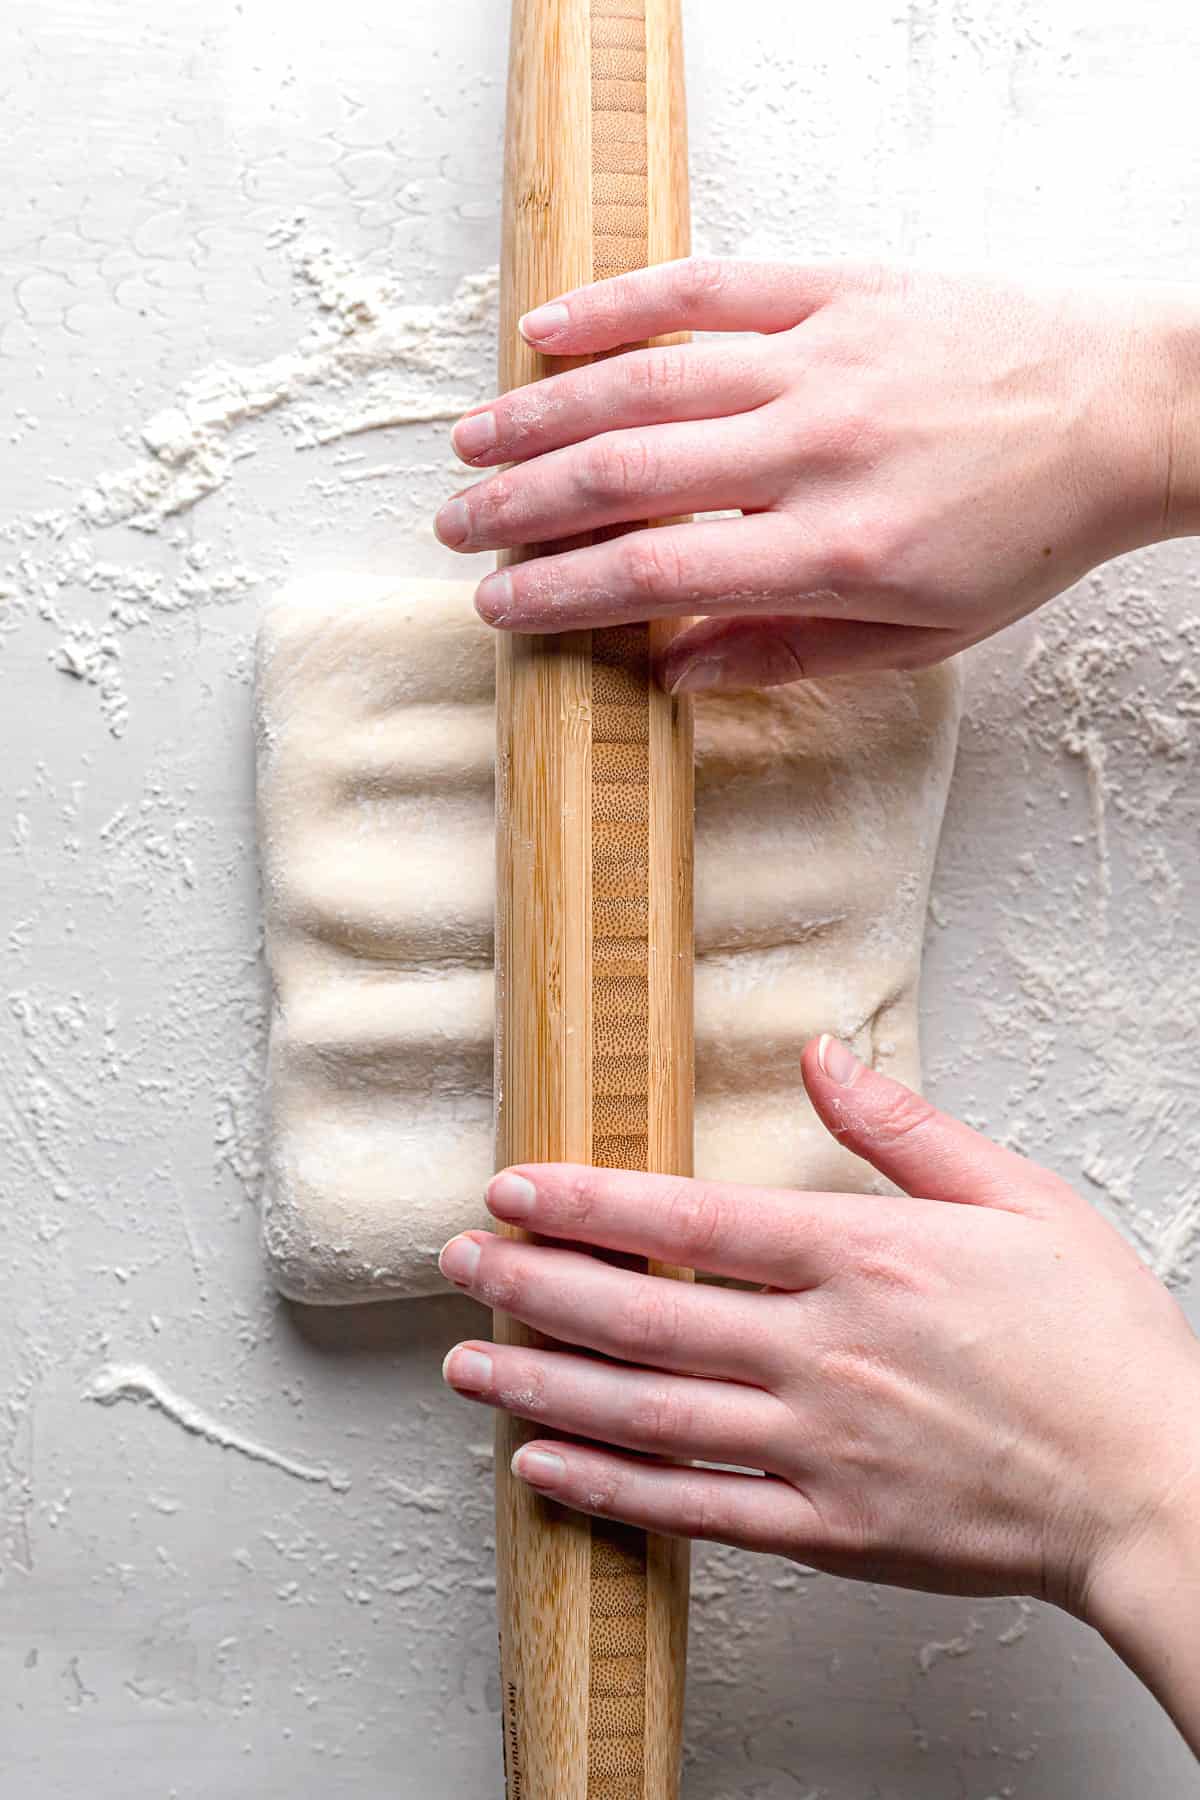
STEP 10: Press rolling pin into dough. Turn the dough over and press several vertical and horizontal indentions with your rolling pin (as pictured above). This encourages the butter block to roll evenly with the dough.
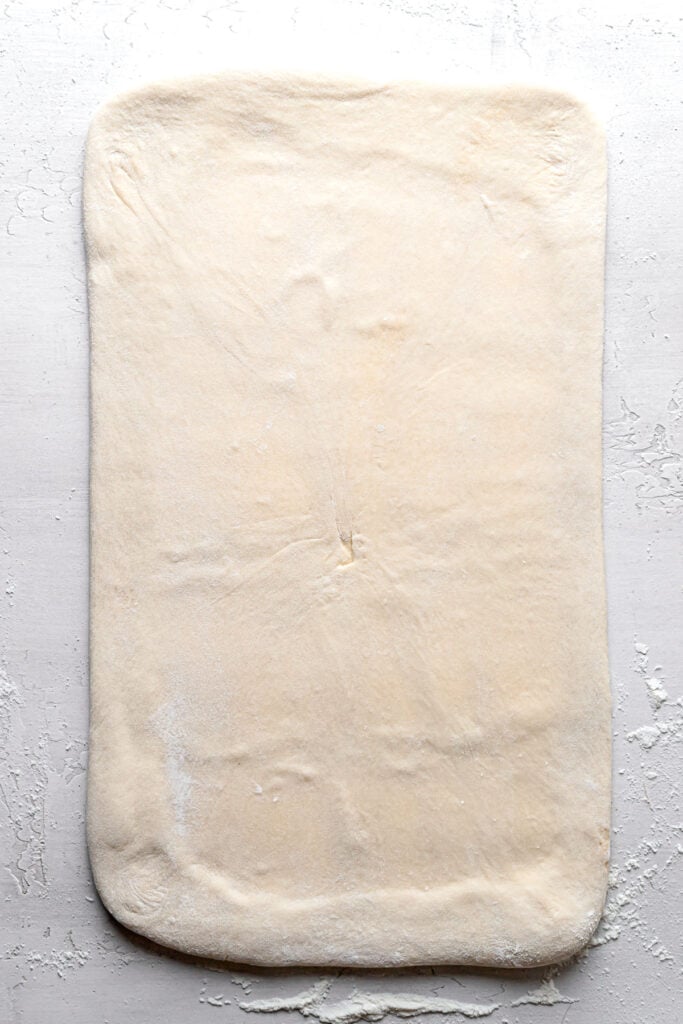
STEP 11: First Fold. Roll the dough out to 16"x9", turning the dough over every once in a while.*
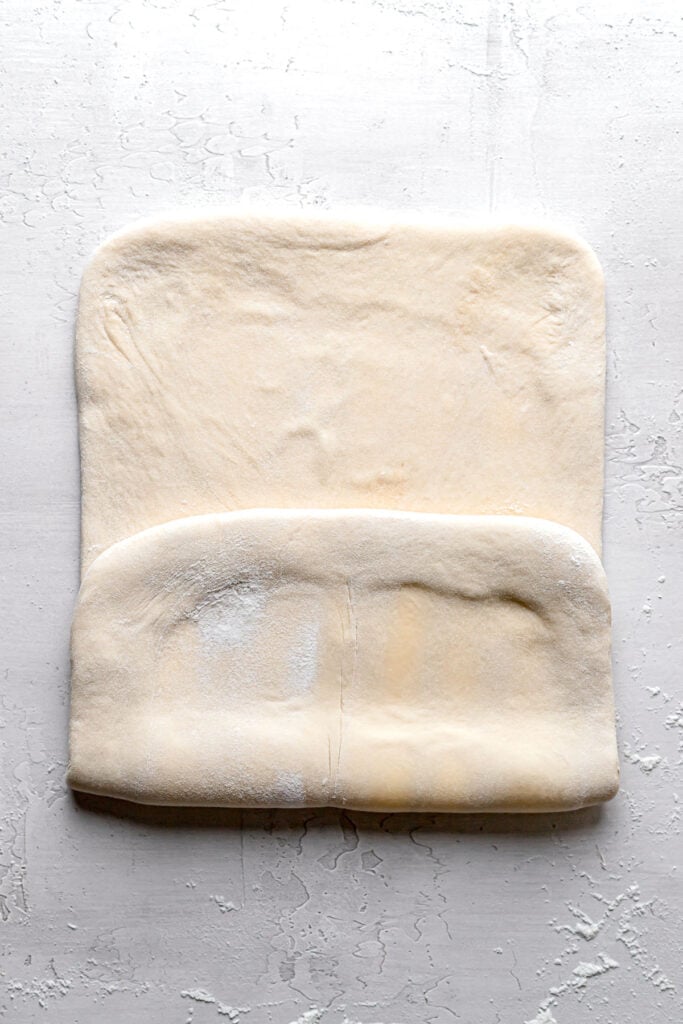
STEP 12: First Fold. Once the dough is at the correct measurements, fold the bottom third over the middle.
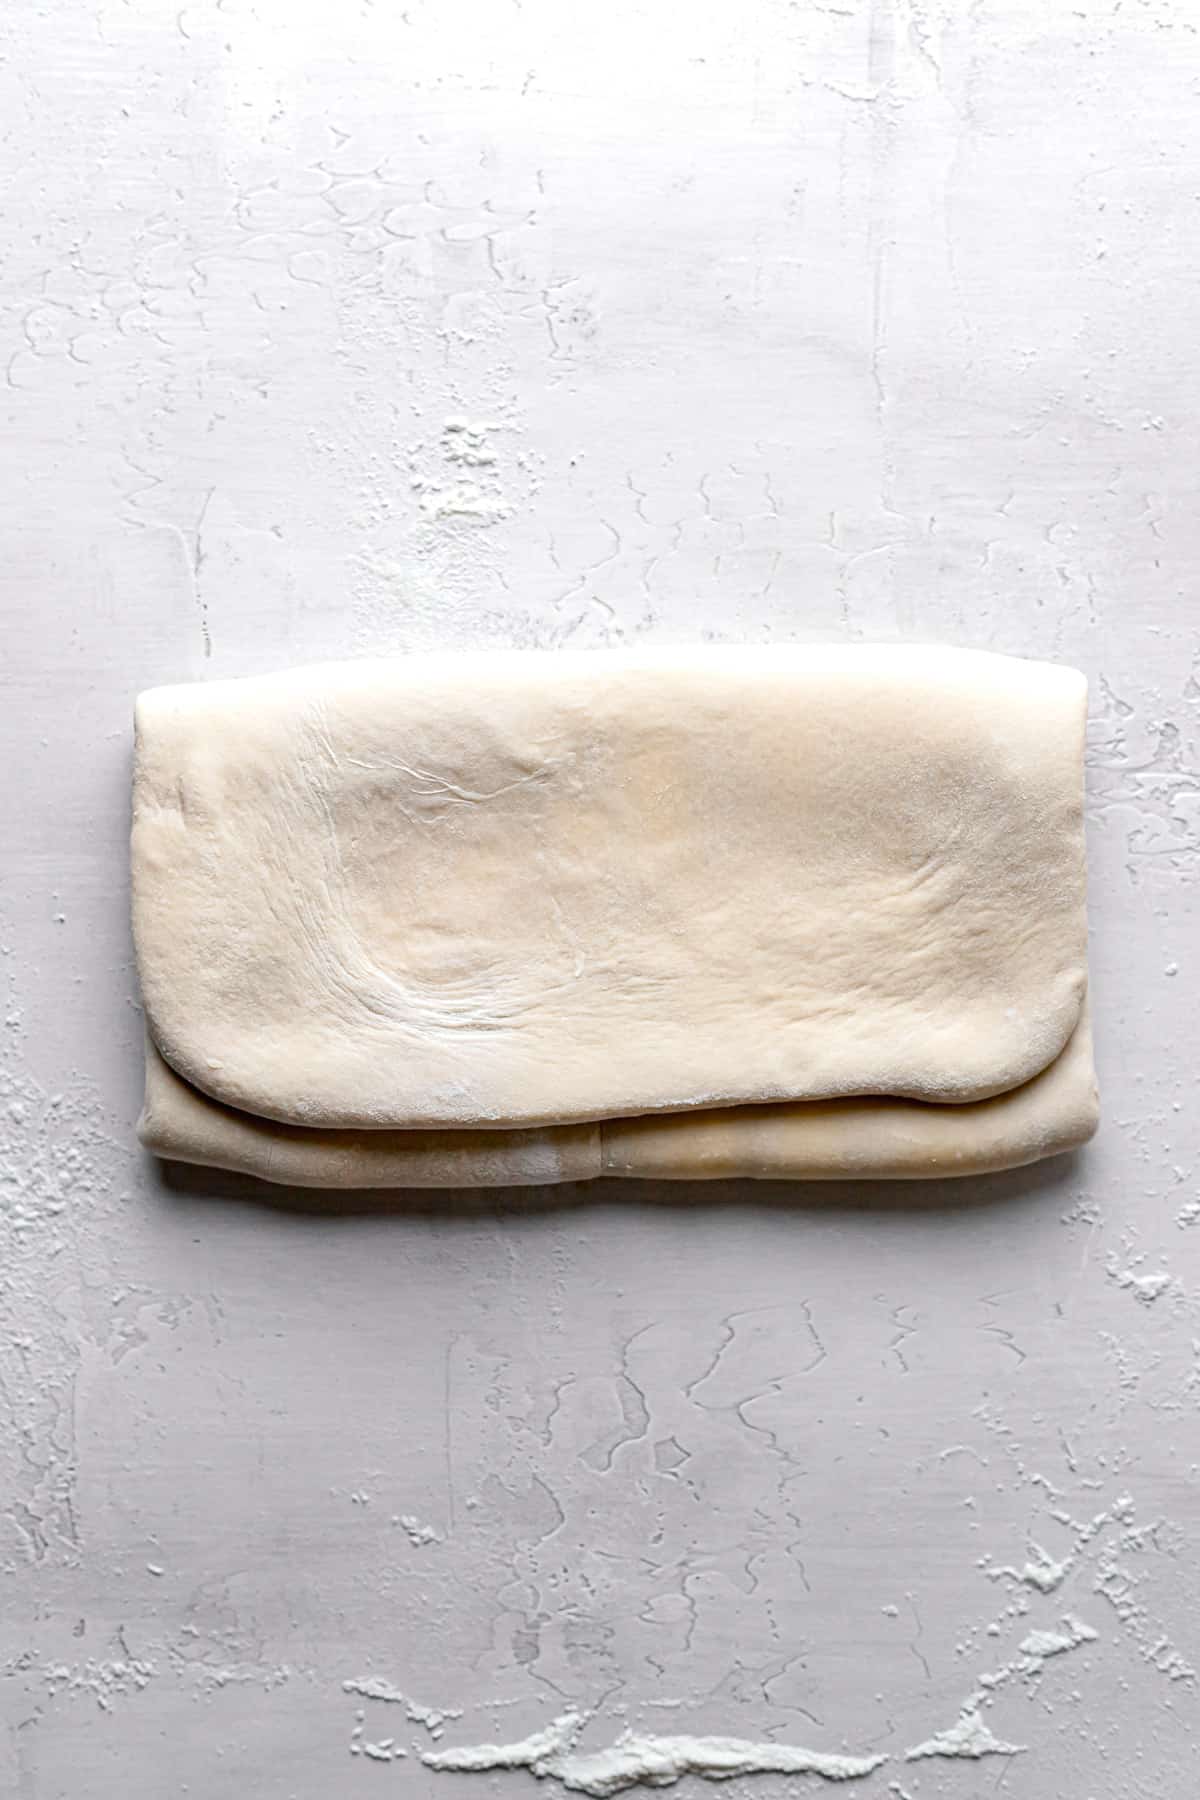
STEP 13: First - Fourth Fold. Then, the top third over. This is called a letter fold. Repeat this rolling and folding process one more time. Wrap the dough in plastic wrap and chill for 30 minutes. Repeat this rolling and folding process two more times. Wrap the dough in plastic wrap and chill overnight.
STEP 14: Cut the dough in half. After the dough has chilled overnight, cut it in half and place one half on a lightly floured surface and the second half back in the fridge.

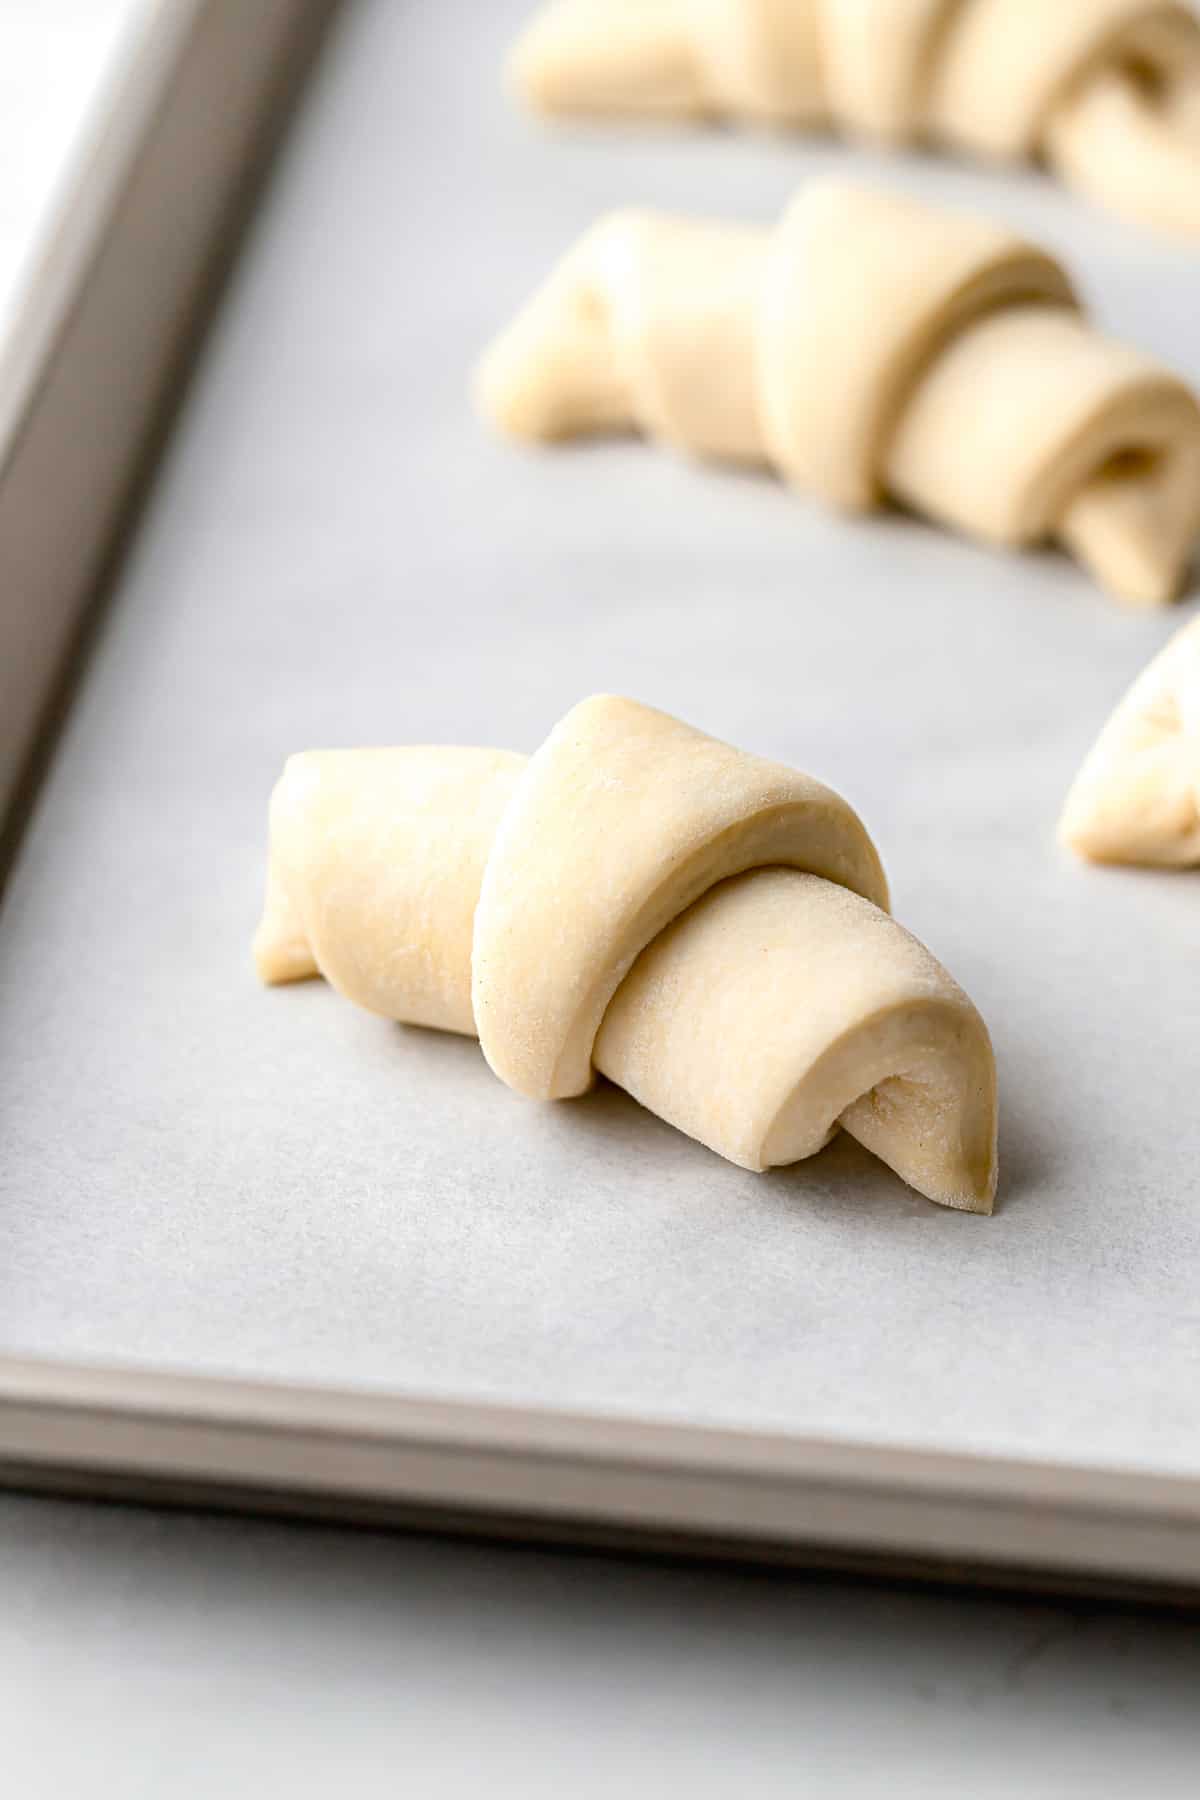
STEP 15: Shape the croissants. Roll the first half out to 14"x6". Using a pizza cutter or round pastry cutter, trim the edges off of all sides. Cut out 4-5 triangles (use a ruler to get straight lines). At the bottom of each triangle, cut a ½" notch. Roll each triangle up, ensuring the tip holds underneath the croissant. If it won't stay, use a bit of water to help it stick.
STEP 16: Bake the croissants. Place the shaped croissants on a parchment lined baking sheet, cover loosely with plastic wrap, and place in the fridge to chill one last time for 30 minutes. Repeat this process with the second half of the dough, as well as the dough scraps. Take the chilled croissants out of the fridge and let rise for about 1 hour. Towards the end of the proof time, preheat the oven to 425 degrees F. When the croissants are done rising, brush them with an egg wash and bake for 10 minutes. Turn the oven down to 350 degrees F and continue baking for another 5-8 minutes.
Expert Baking Tips
- If using instant yeast, it will activate much faster.
- It is extremely important that the dough and butter are both equally cold. If one seems to be warmer than the other, place it back in the fridge for a few minutes.
- It's important to be as precise as possible with your measurements, so be sure to use a ruler!
- These croissants are best enjoyed the day they are made but can be stored at room temperature for 2-3 days or in the freezer for up to 3 months.

Recipe FAQs
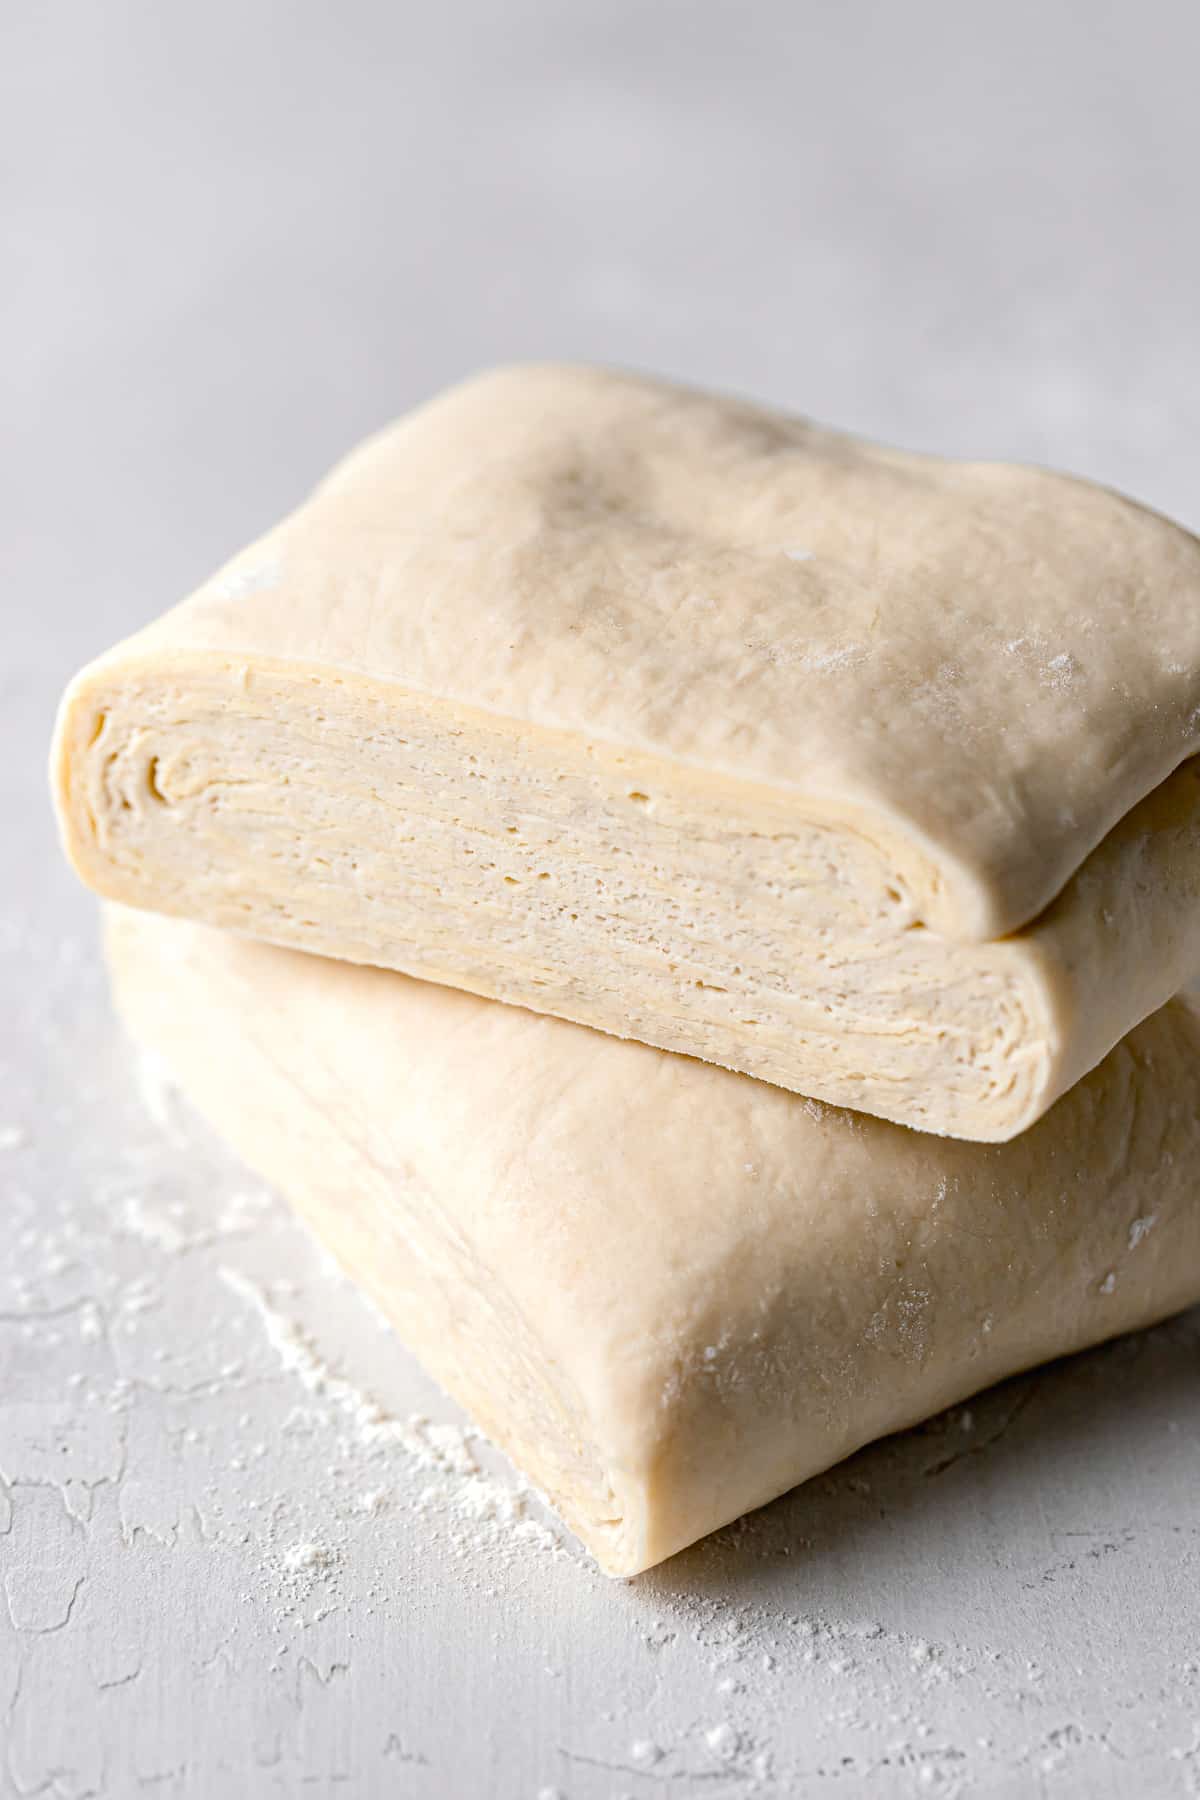
Laminating dough is the process of rolling and folding dough with a butter block multiple times to achieve hundreds of layers dough & butter. These layers are essential to achieving ultra flaky croissants. As the croissants bake, the butter layers create steam and push the dough layers upwards, creating flakes of buttery goodness!
These croissants are best enjoyed the day they are made but can be stored at room temperature for 2-3 days or in the freezer for up to 3 months.

Baking in Grams
All of the recipes on this blog are carefully developed with gram measurements so you can easily recreate them in your own kitchen with success. Volume measurements are extremely inaccurate and leave room for significant errors. Not all measuring cups are made equally, so your one cup of flour will be different from my one cup of flour. By providing precise measurements in grams (aside from minor ingredients, which are given in tsp/tbsp), you can make these recipes accurately and with less cleanup! All you need is this kitchen scale.
If this still isn't enough to convince you, I have provided volume measurements in the recipe card. If you are interested in understanding the conversions, this is the best conversion chart.
But trust me, once you try baking in grams you'll never turn back!
Happy baking! x
Other brunch recipes you'll love

If you tried this recipe, I'd love to know how it turned out for you! Leave a star rating & review below and post a picture (or video!) on Instagram and tag me so I can see your bakes! Not ready to make this recipe yet? Click the heart button on the right of your screen to save it for later 🙂
📖 Recipe

Small Batch Mini Croissants
Ingredients
For the croissant dough:
- 150 g (⅔ cup) water, lukewarm
- 20 g (1 ½ tablespoon) granulated sugar
- 7 g (2 ¼ teaspoon) active dry or instant yeast
- 260 g (2 cups + 2 tbsp) all-purpose flour
- 28 g (3 tablespoon) non-diastatic malt powder
- 1 teaspoon salt
- 28 g (2 tablespoon) unsalted butter, melted
For the butter block:
- 140 g (9 tablespoon) unsalted butter, room temp
- 30 g (¼ cup) all-purpose flour
For the egg wash:
- 1 egg
- 1 tablespoon water
Instructions
For the croissant dough:
- In a liquid measuring cup, combine lukewarm water, granulated sugar, and yeast. Set aside for a few minutes to activate.*
- In the bowl of a stand mixer fitted with the dough hook, combine the flour, malt powder, and salt.
- Add in the activated yeast mixture and melted butter.
- Mix on low-medium speed for 5 minutes until smooth.
- Transfer the dough to a lightly greased bowl, cover, and chill in the fridge for about 30 minutes.
- Meanwhile, make the butter block.
For the butter block:
- In the bowl of a stand mixer fitted with the paddle attachment, beat the butter on low speed until smooth.
- Add in the flour and mix until fully combined.
- Transfer the butter mixture to a piece of parchment paper.
- Using an offset spatula, spread it out into 5" square.
- Place in the fridge to chill for 30 minutes.
For the lamination process:
- On a lightly floured surface, roll the dough out into a 9" square.
- Place the butter block in the center of the dough with a corner facing you (like a diamond).
- Pull the dough over the butter block and pinch the seams together (use water to seal them).
- Turn the dough over and press several vertical and horizontal indentions with your rolling pin (as pictured above). This encourages the butter block to roll evenly with the dough.
- First Fold: Roll the dough out to 16"x9", turning the dough over every once in a while.*
- Once the dough is at the correct measurements, fold the bottom third over the middle, then the top third over. This is called a letter fold.
- Second fold: Repeat this rolling and folding process one more time.
- Wrap the dough in plastic wrap and chill for 30 minutes.
- Third fold: Repeat this rolling and folding process again.
- Fourth fold: Repeat this rolling and folding process again.
- Wrap the dough in plastic wrap and chill overnight.
For shaping and baking:
- After the dough has chilled overnight, cut it in half and place one half on a lightly floured surface and the second half back in the fridge.
- Roll the first half out to 14"x6".
- Using a pizza cutter or round pastry cutter, trim the edges off of all sides.
- Cut out 4-5 triangles (use a ruler to get straight lines).
- At the bottom of each triangle, cut a ½" notch.
- Roll each triangle up, ensuring the tip holds underneath the croissant. If it won't stay, use a bit of water to help it stick.
- Place the shaped croissants on a parchment lined baking sheet, cover loosely with plastic wrap, and place in the fridge to chill one last time for 30 minutes.
- Repeat this process with the second half of the dough, as well as the dough scraps.
- Take the chilled croissants out of the fridge and let rise for about 1 hour.
- Towards the end of the proof time, preheat the oven to 425 degrees F.
- When the croissants are done rising, brush them with an egg wash and bake for 10 minutes.
- Turn the oven down to 350 degrees F and continue baking for another 5-8 minutes.
- Allow them to cool for a few minutes and enjoy!
Notes
- If using instant yeast, it will activate much faster.
- It is extremely important that the dough and butter are both equally cold. If one seems to be warmer than the other, place it back in the fridge for a few minutes.
- It's important to be as precise as possible with your measurements, so be sure to use a ruler!
- These croissants are best enjoyed the day they are made but can be stored at room temperature for 2-3 days or in the freezer for up to 3 months.
Heela says
I really want to make this, but i can't find non-diastatic malt powder i my area. Is there a substitute?
Maurice Roper says
Can you make this recipe with sourdough starter and how much in grams
Thank you