
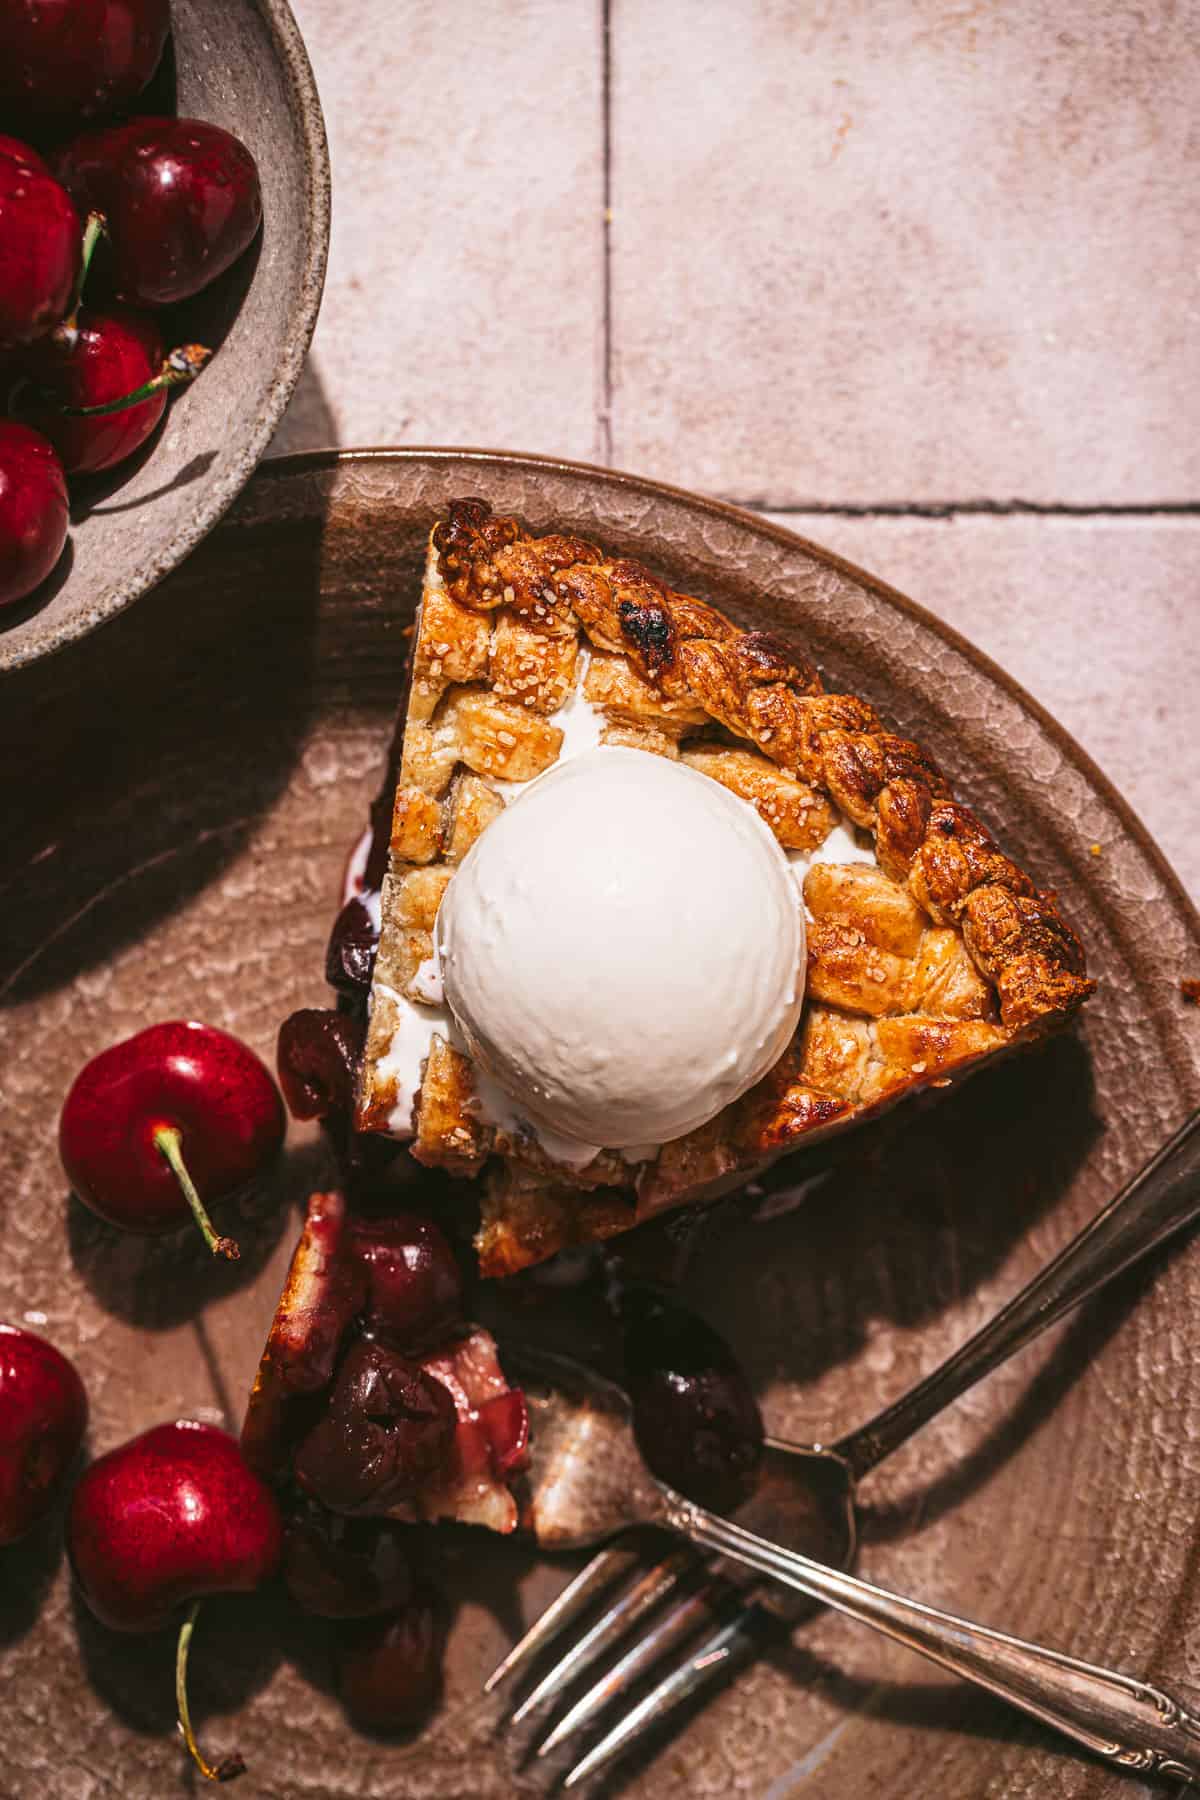
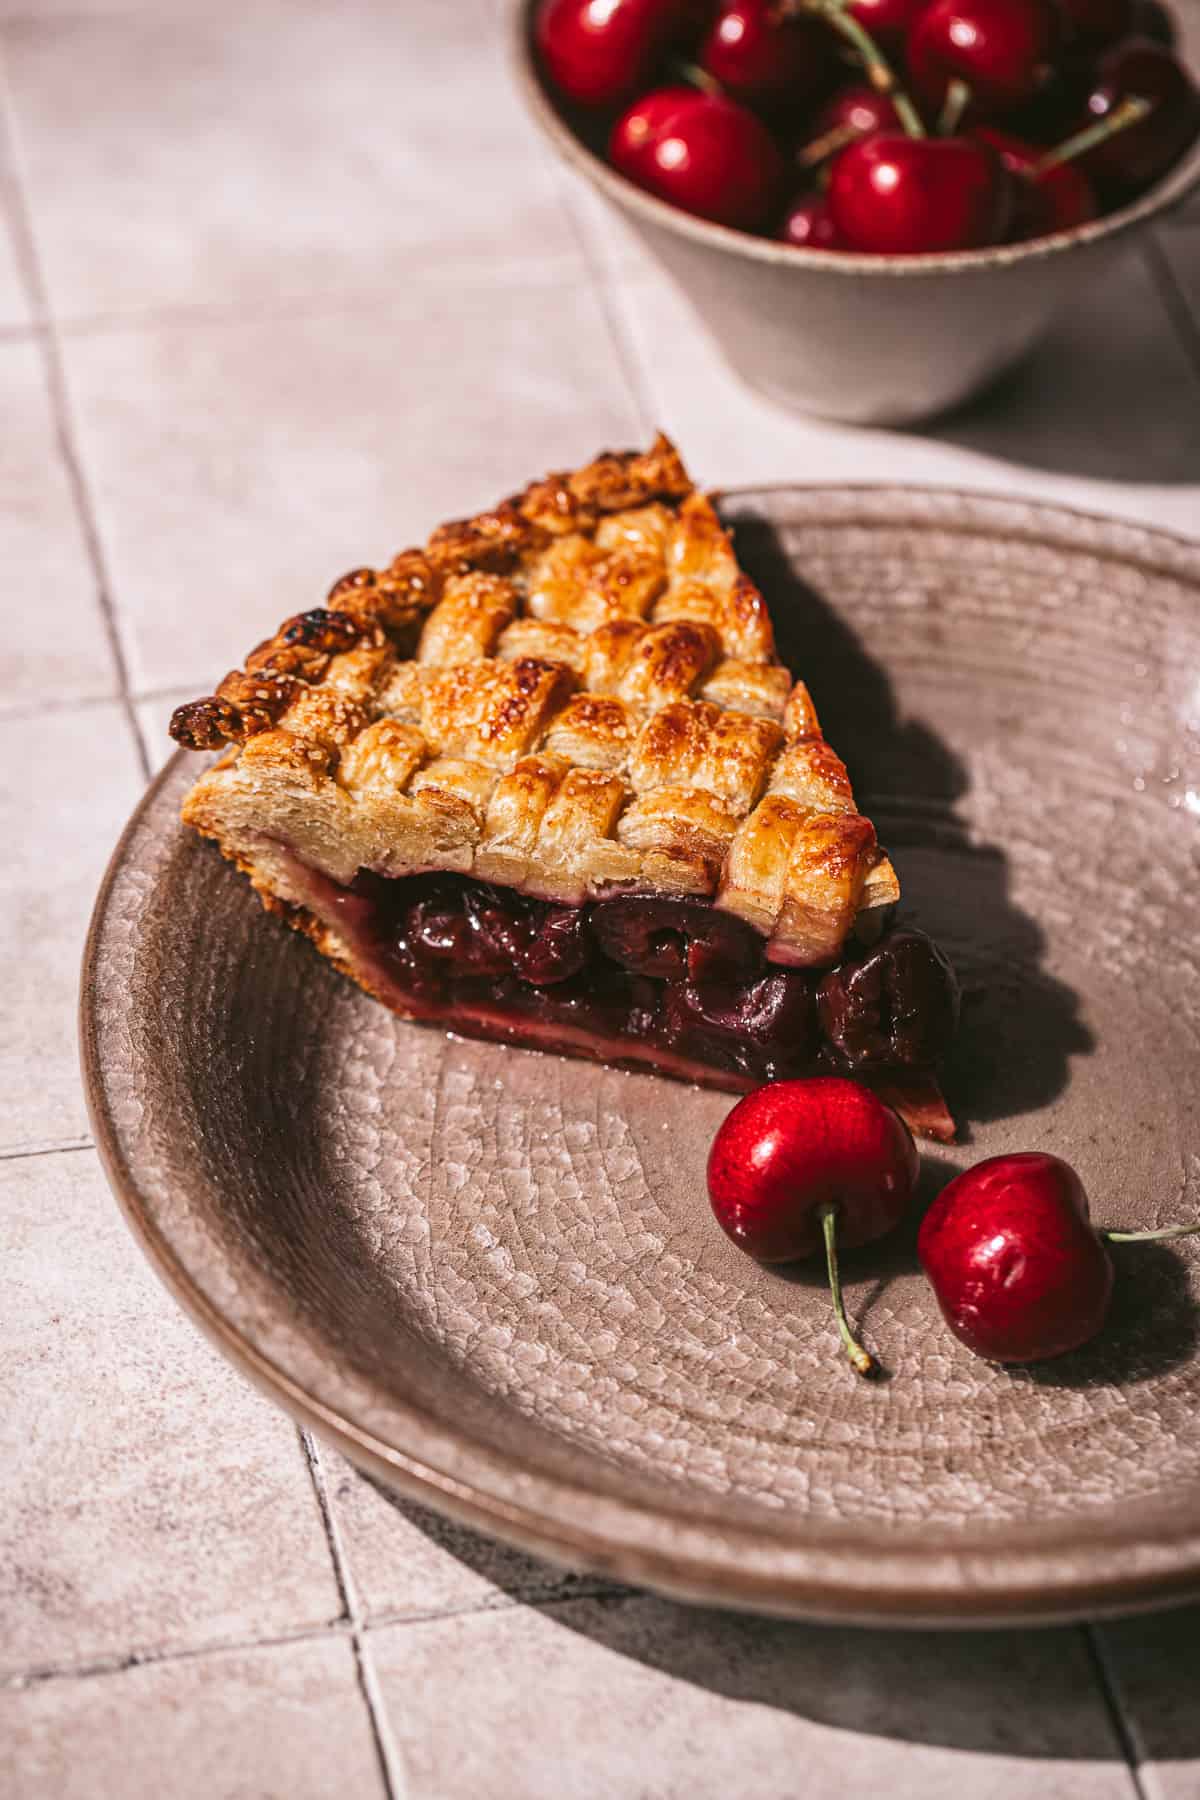
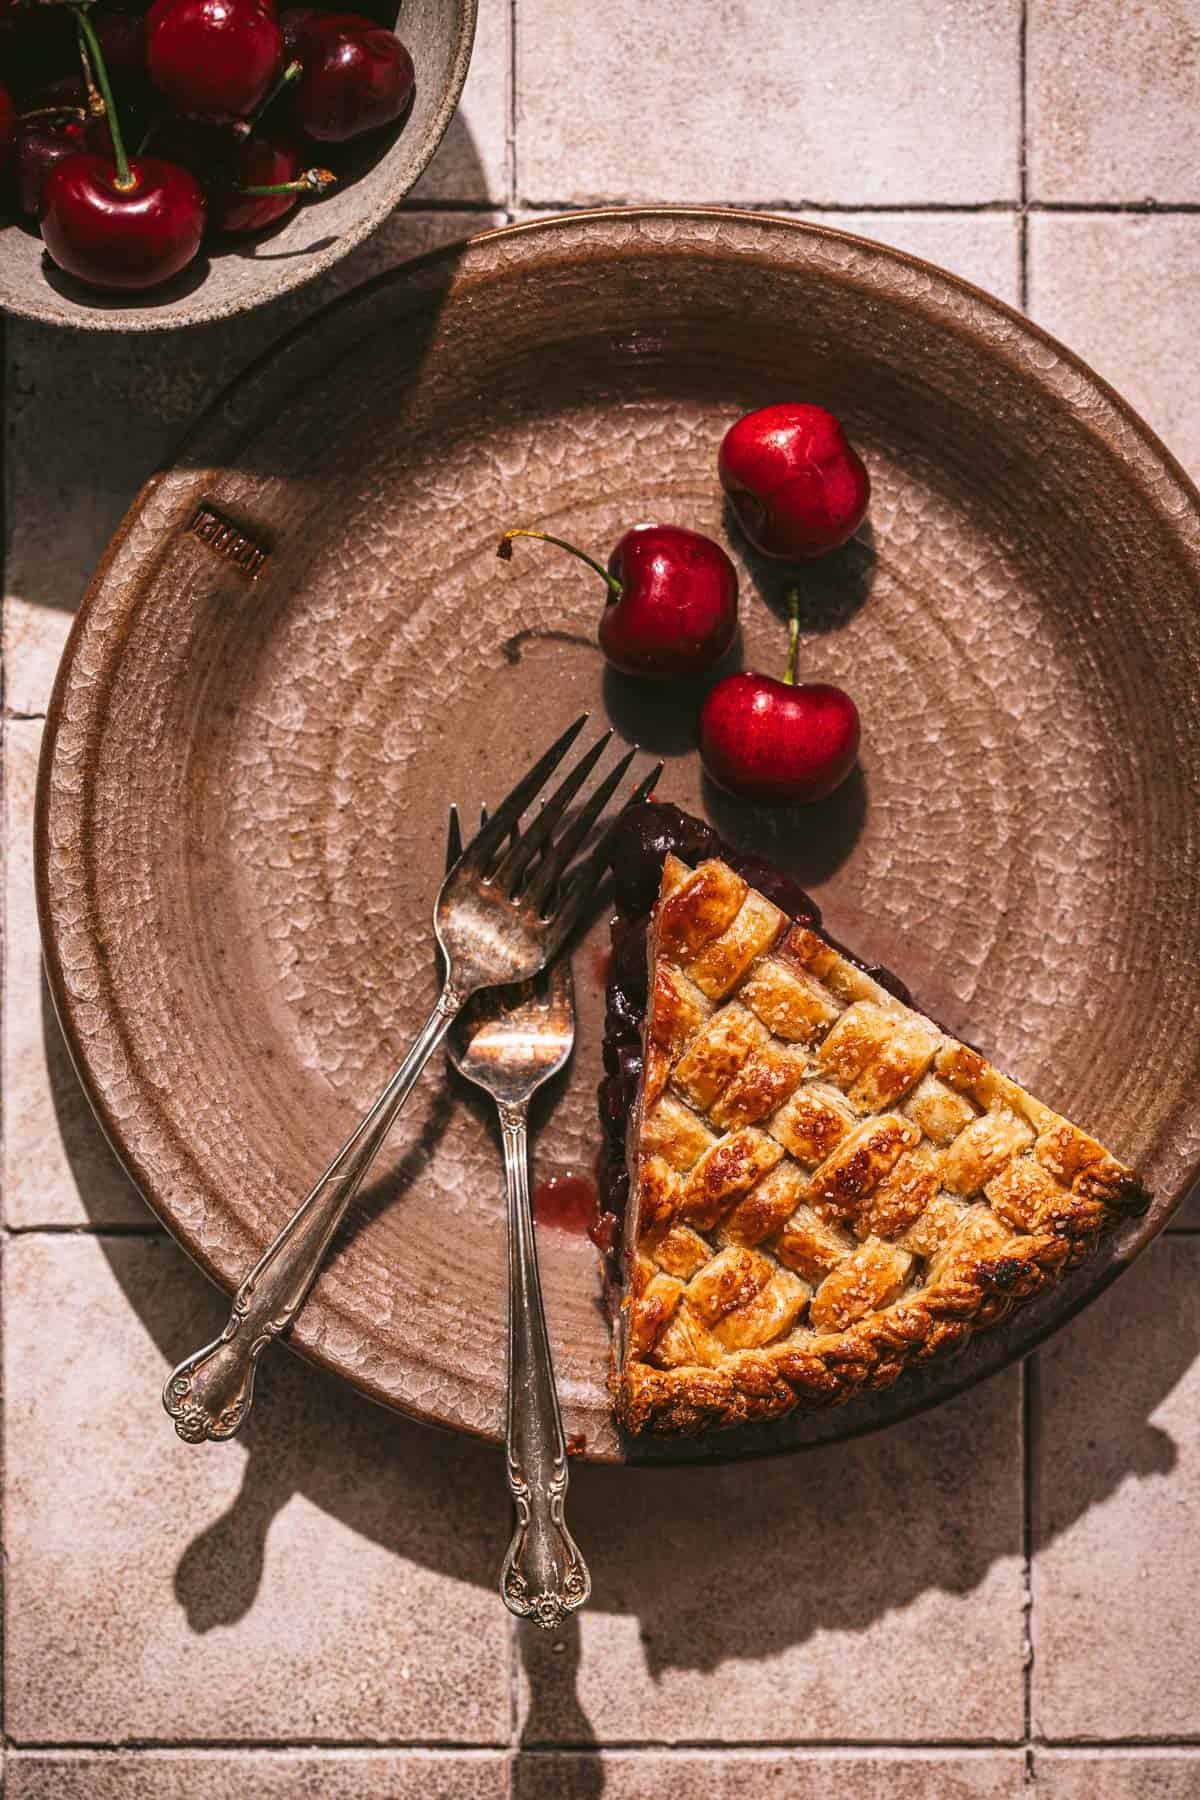
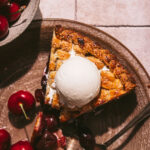
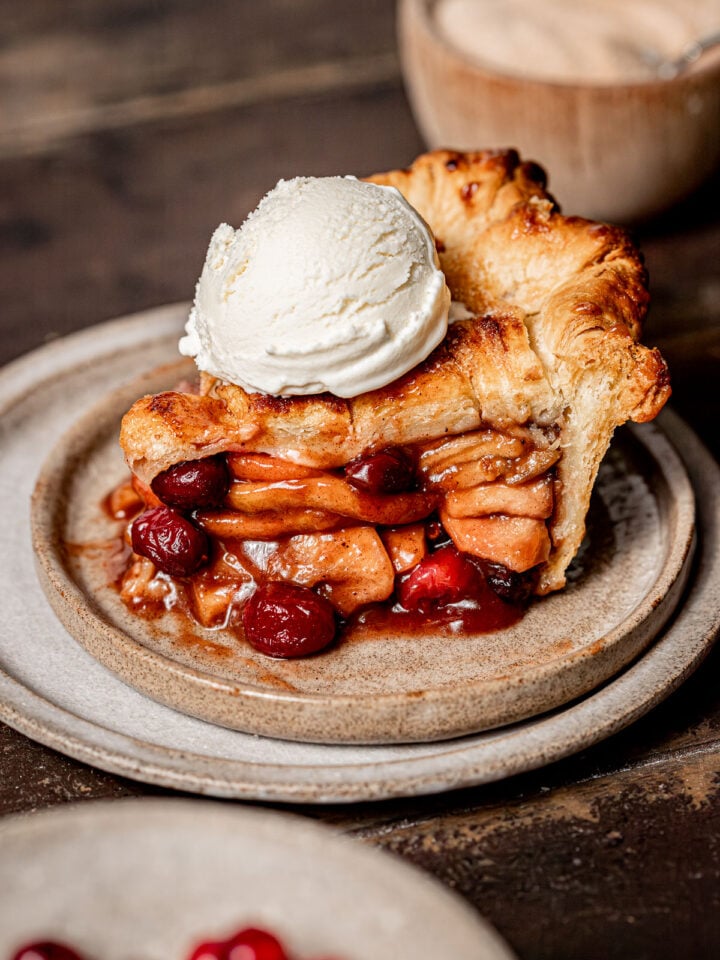
This homemade cardamom cherry pie is made simple with frozen cherries and extra delicious with an ultra flaky all butter pie crust. The warm & earthy notes of cardamom complement the sweet cherries perfectly! Serve each slice warm with a generous scoop of vanilla ice cream for the ultimate summer pie.
For more summer fruit recipes, try Roasted Strawberry Cinnamon Rolls, Peach Cobbler Pound Cake, Bakery Style Blackberry Oatmeal Muffins, and Strawberry Peach Cobbler.
Jump to Recipe
Why you'll love this cardamom cherry pie
- Buttery, Flaky Pie Crust: My go-to all butter pie dough that creates an ultra flaky, tender crust that's perfect with any pie filling.
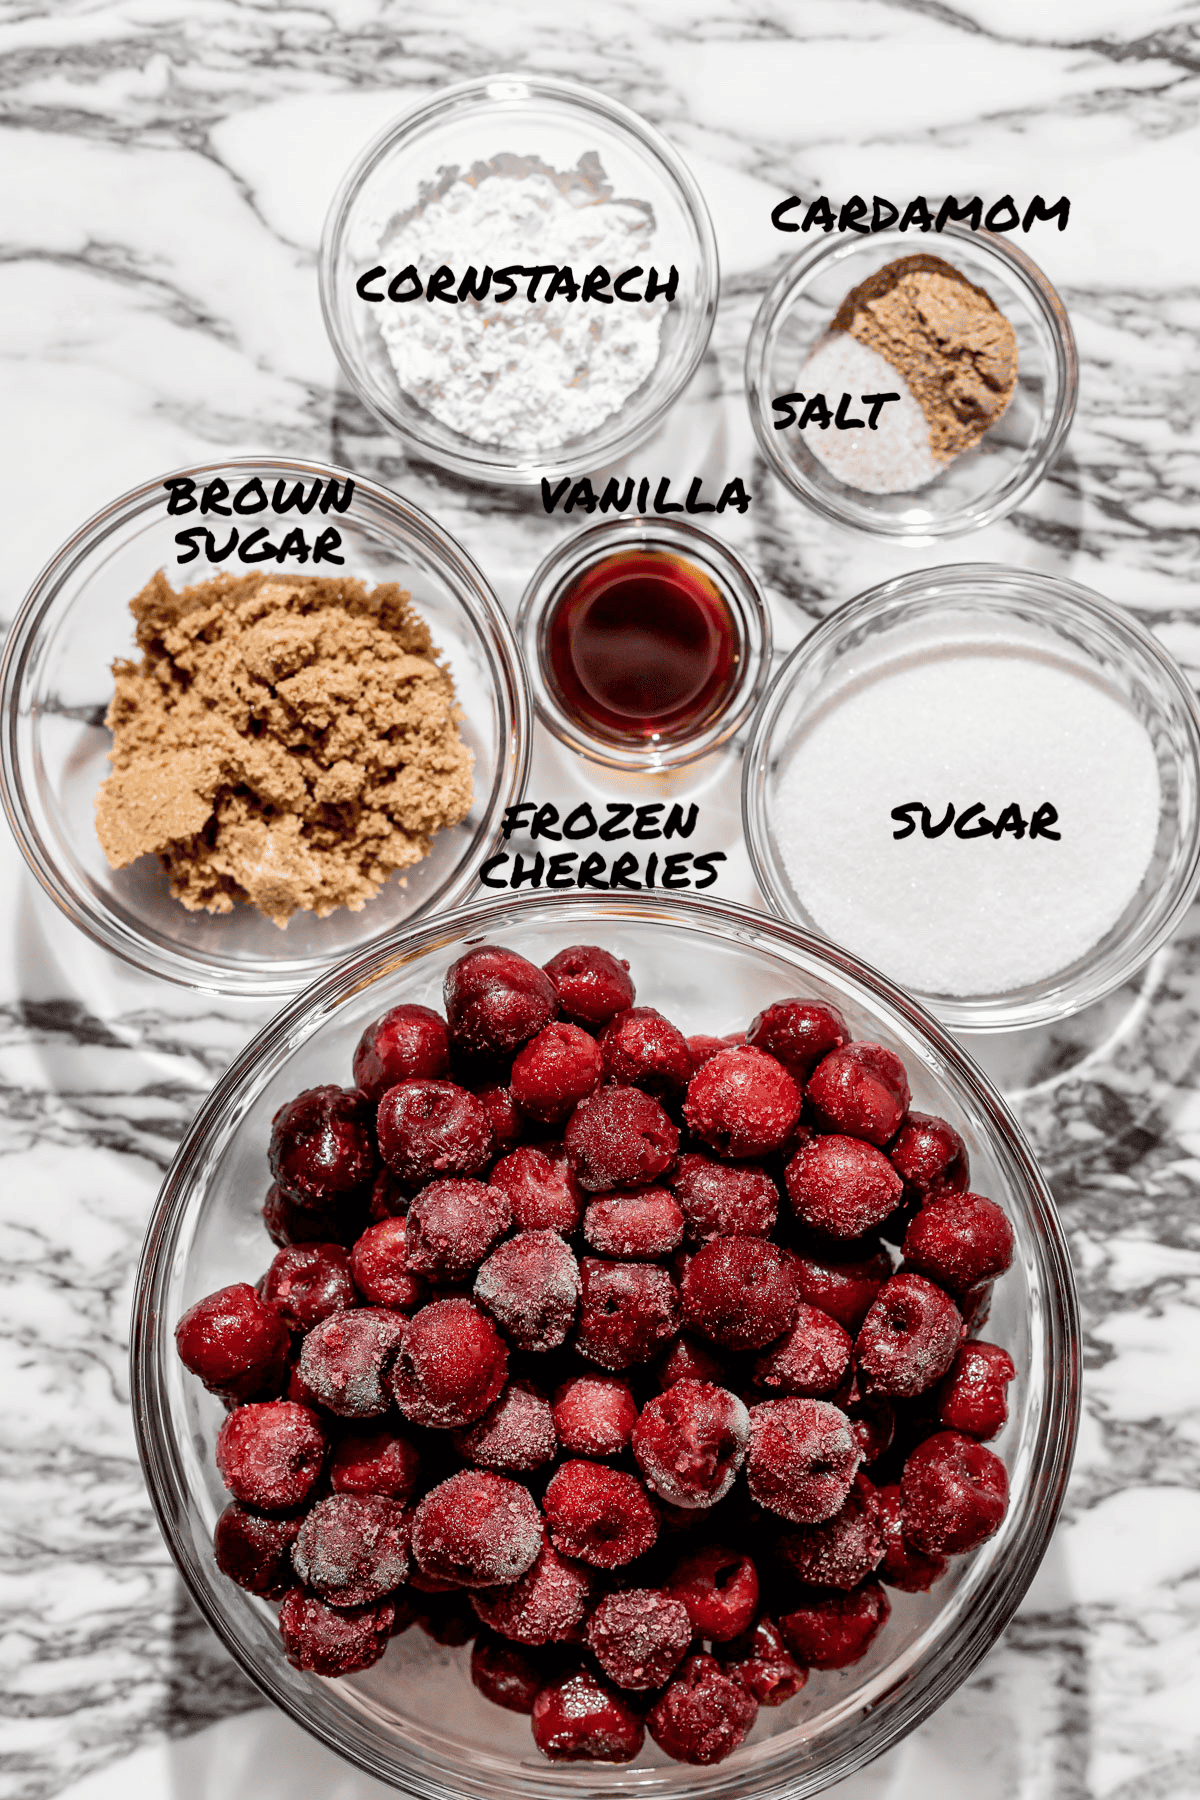
- Simple Frozen Cherry Filling: Sweet cherries are the star of the show! All they need is a little sugar, cardamom, salt, cornstarch, and vanilla to turn them into an extra special pie filling. Using frozen cherries is cheaper and can save you so much time since they're already pitted! Sour cherries (aka tart cherries) would also work well in this recipe!
- Cardamom Spiced Dough & Filling: Cardamom is one of my favorite spices to add to baking recipes! It creates such a unique flavor profile throughout the whole pie.
- Great Make Ahead Dessert: I won't lie, homemade pie is does require a lot of time and patience. But the best part is that it's best served the day after it's baked, so it's a great make ahead dessert!
Ingredient Notes
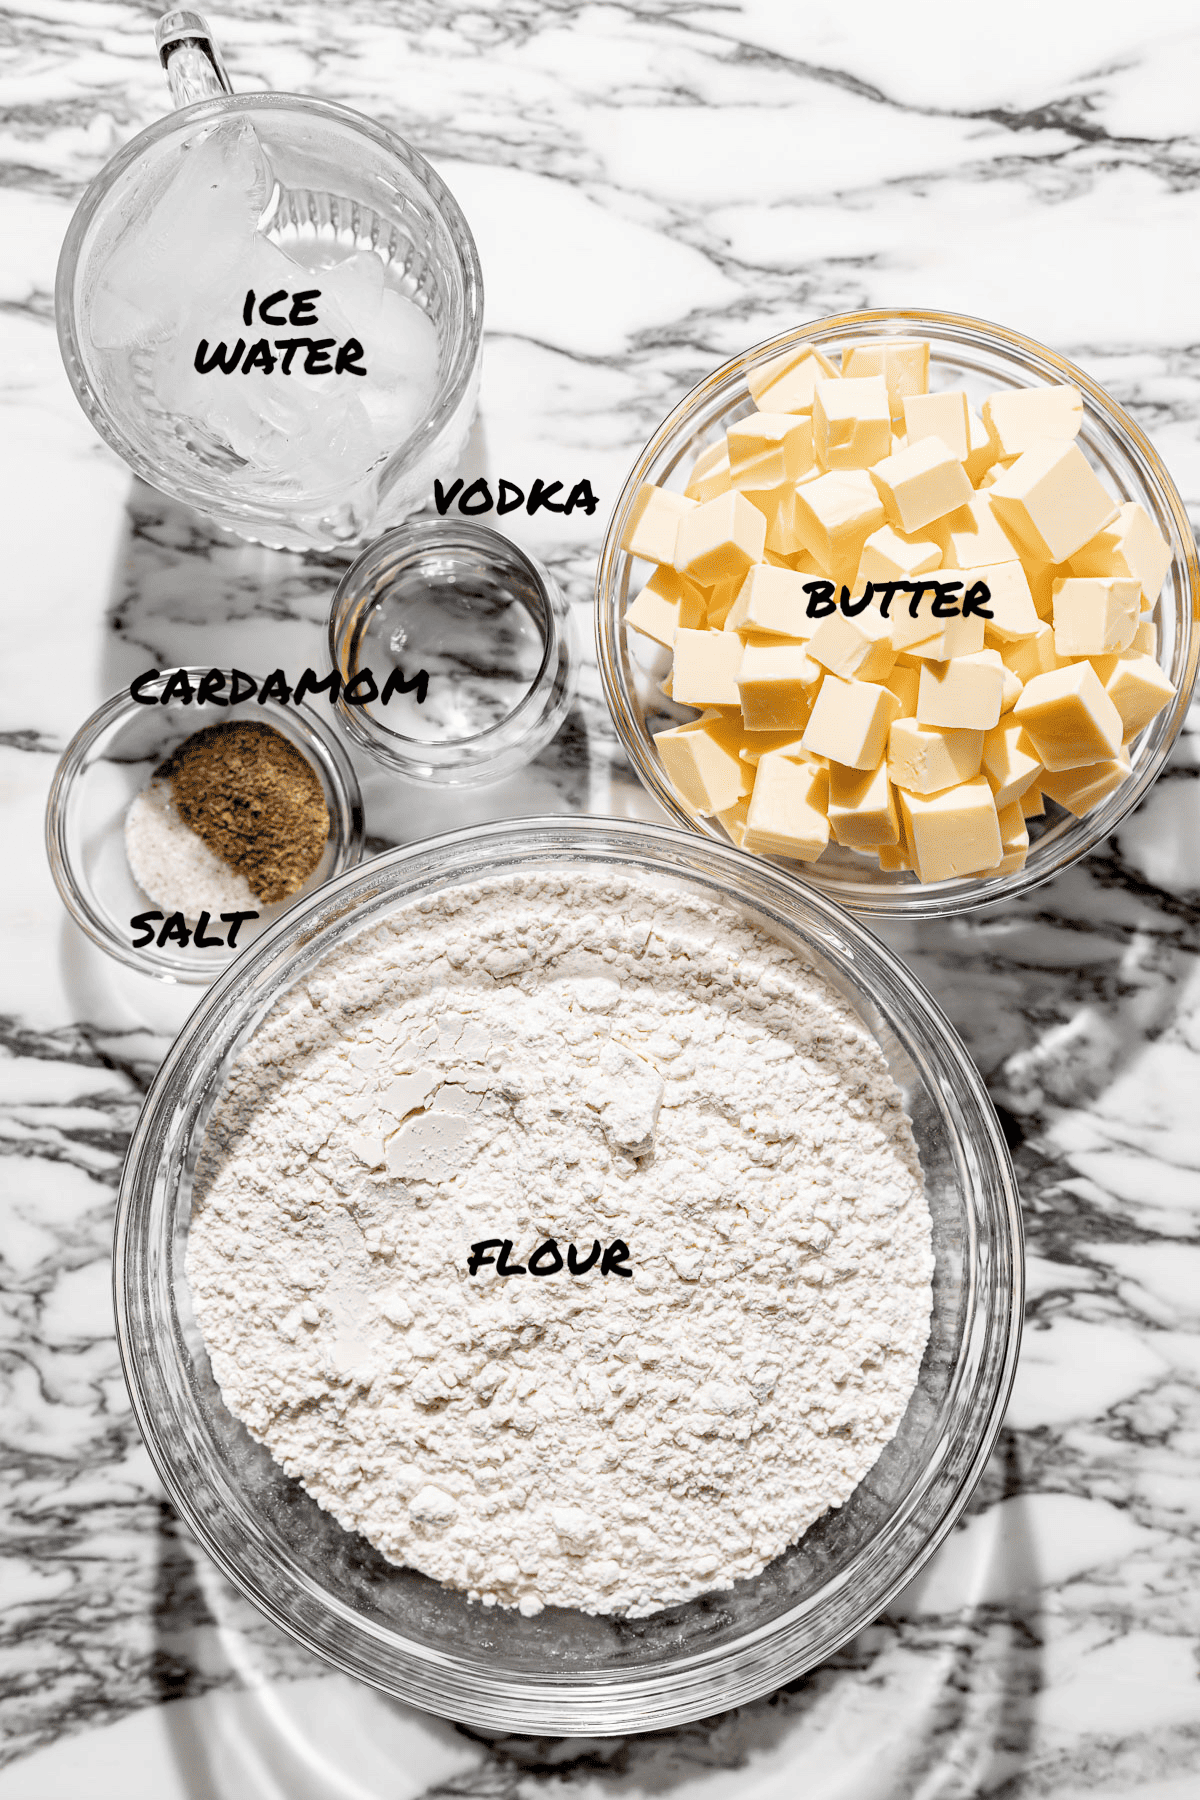
- Flour: Weigh your flour! Homemade pie crust is very simple, so long as everything is measured precisely!
- Butter: Since there are so few ingredients in pie dough, it gets all of its flavor from the butter, so I recommend using a high quality European-style unsalted butter. This type of butter has a higher fat content, and fat equals flavor!
- Ice Water: Pie must be cold at all times, so it's important that the water is iced!
- Cherries: Fresh cherries can be expensive and a pain to pit, so I recommend using frozen cherries! You can also use canned cherries, if you'd prefer. If you do use fresh cherries, be sure to get a cherry pitter!
- Cardamom: This warm & earthy spice adds an unreal depth of flavor to this pie.
- Cornstarch: A few tablespoons of cornstarch helps to thicken up the cherry pie filling.
- Vanilla Extract: Cherries and vanilla are a match made in heaven, so don't skimp on the good quality extract! One teaspoon almond extract would also be a great addition!
See recipe card for full information on ingredients and individual quantities.
Step by Step Instructions
Here are step by step photos and instructions on how to make this homemade cherry pie recipe! For the full ingredient list and method, see the recipe card at the end of this post.
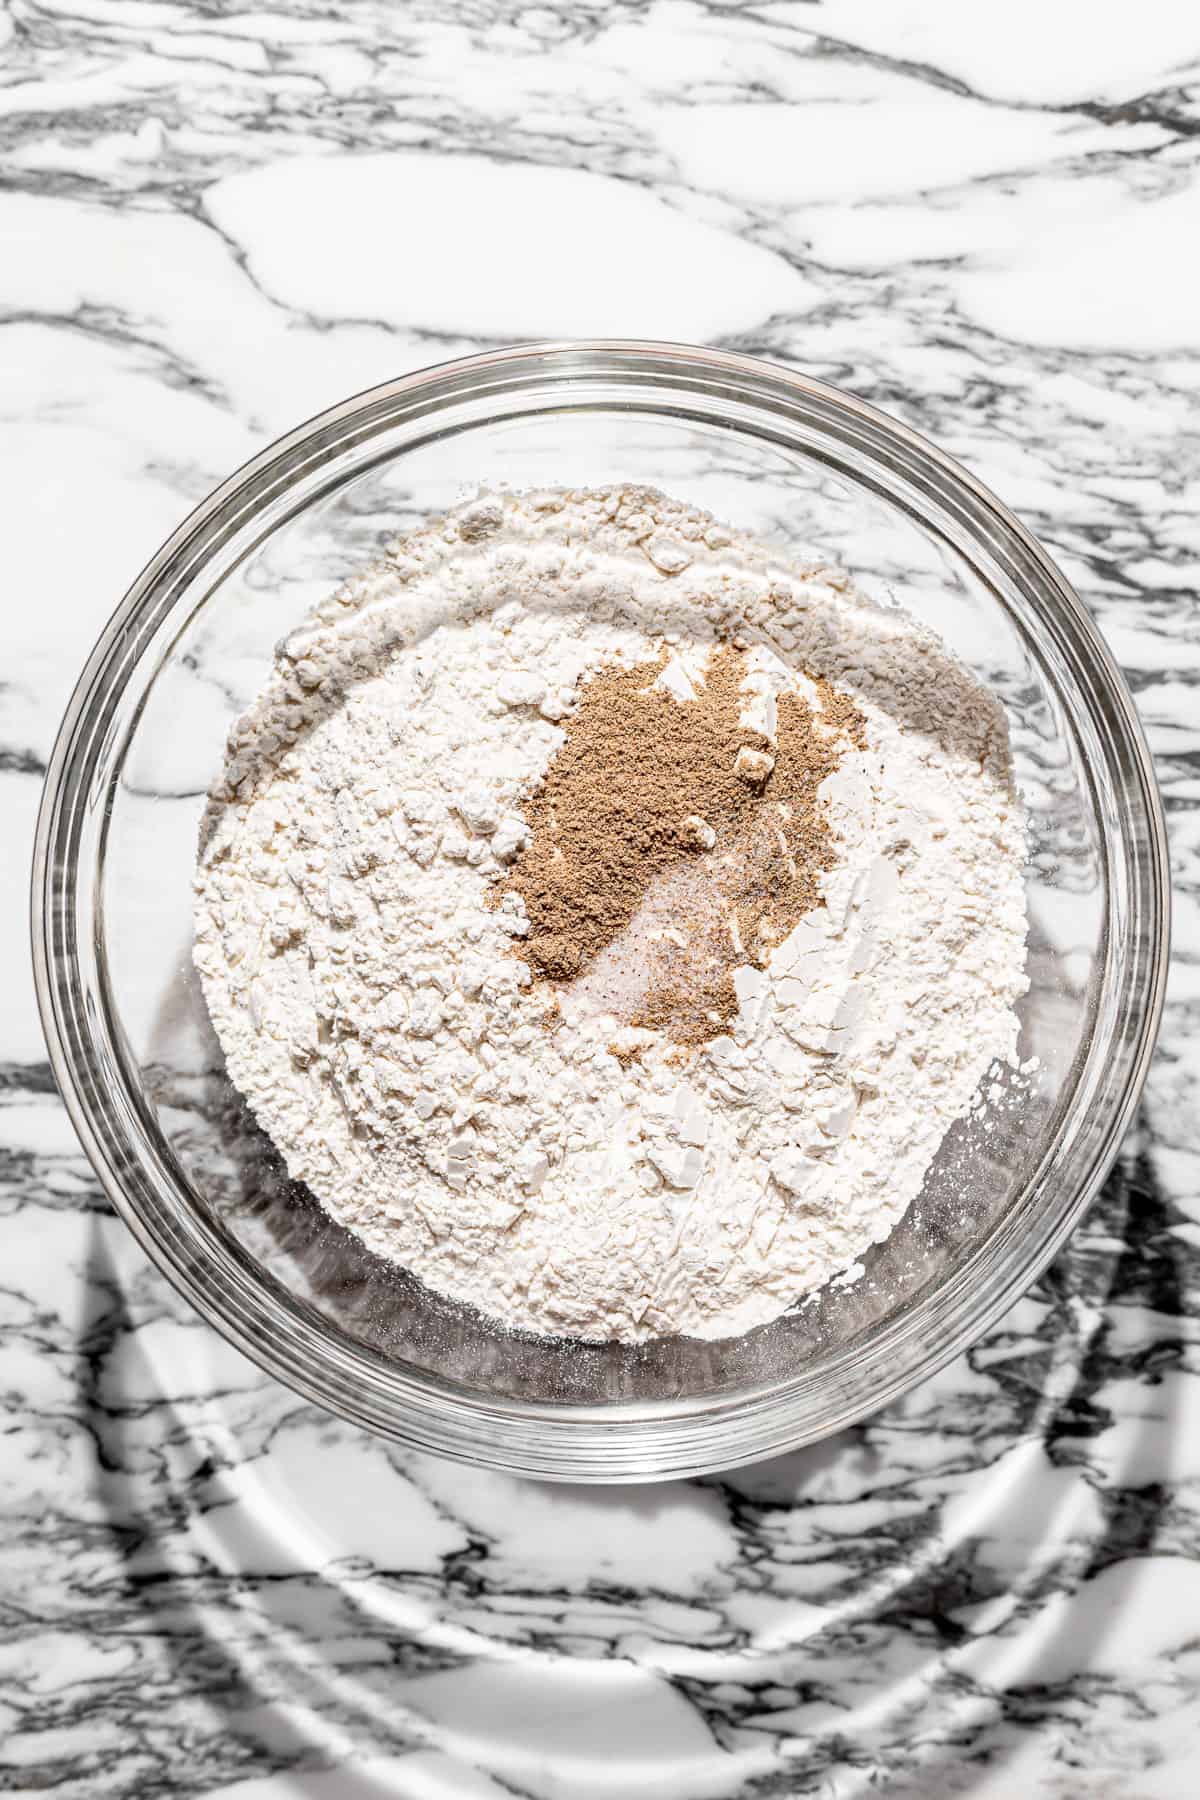
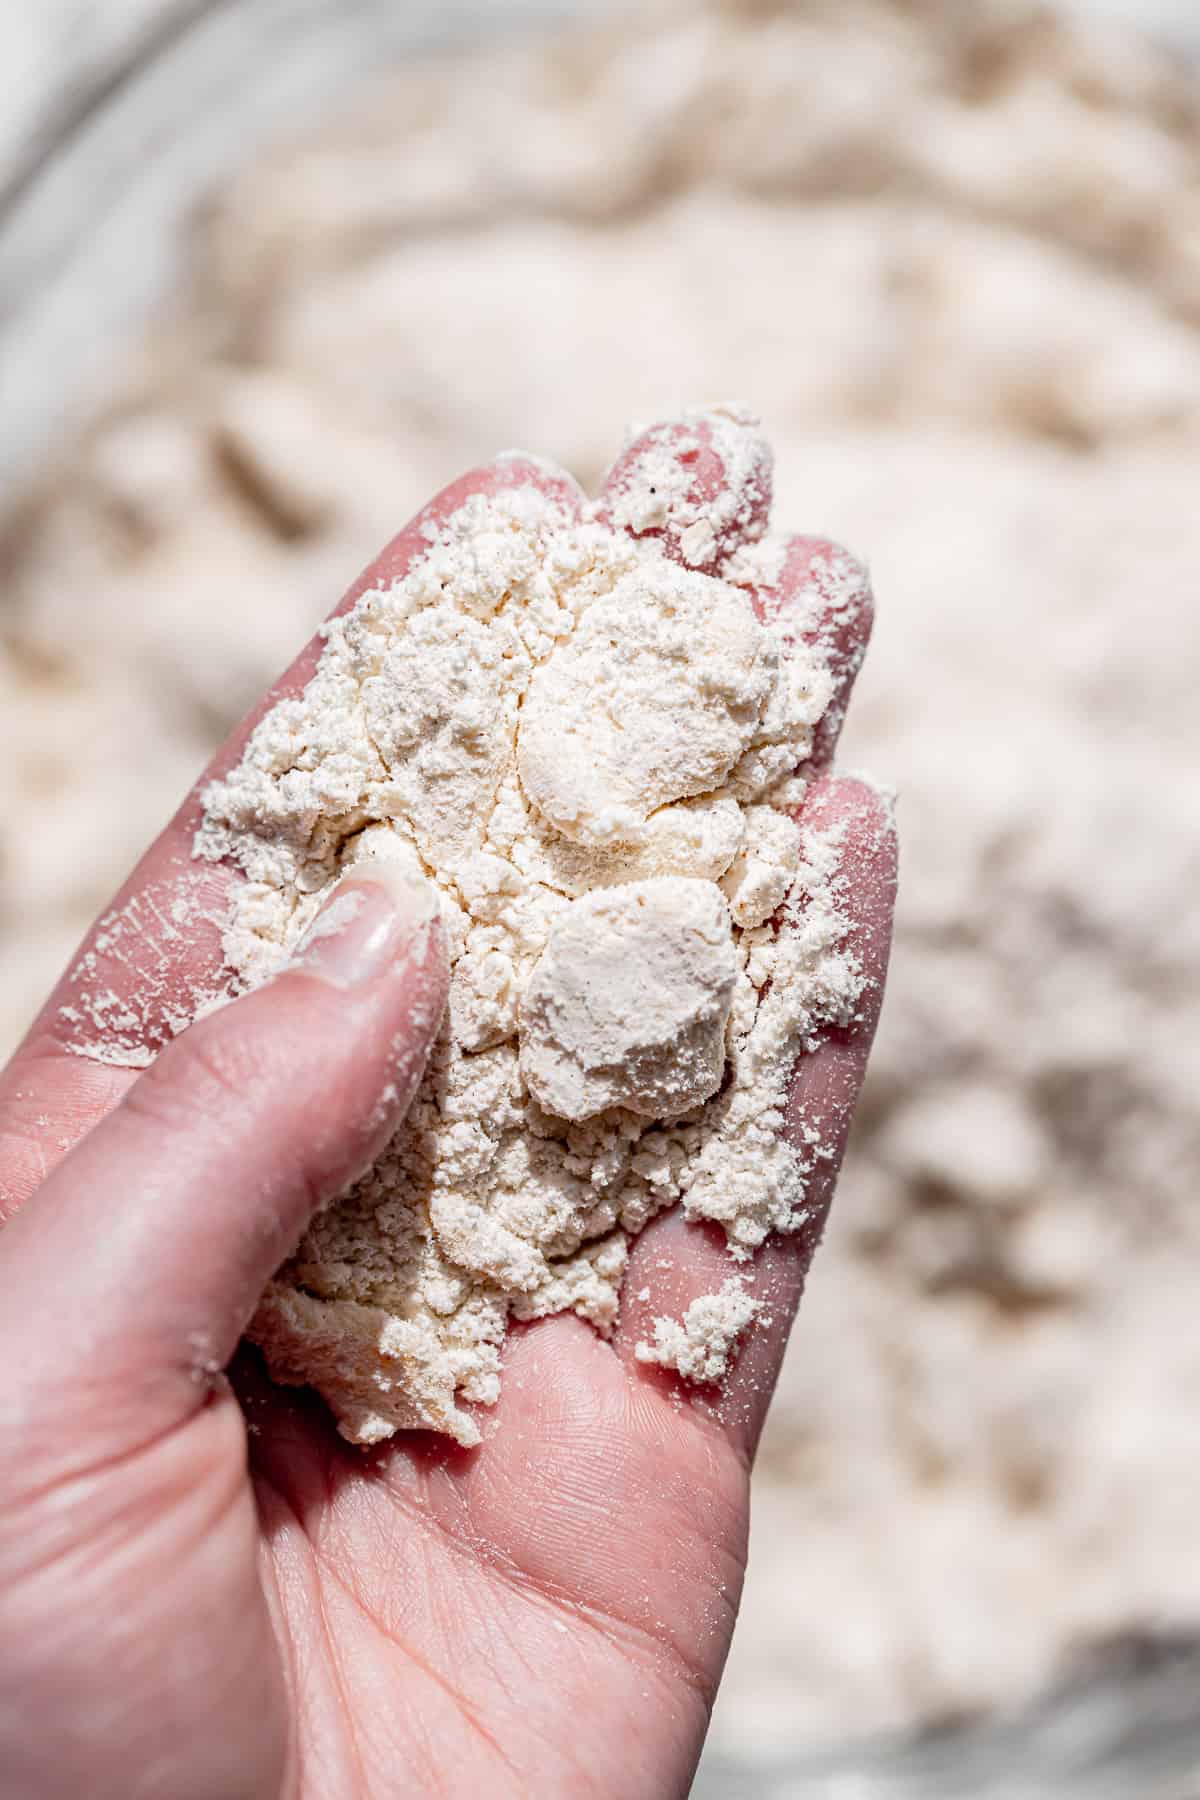
STEP 1: Combine the dry ingredients. In a medium bowl combine the flour and salt.
STEP 2: Cut the butter into the dry ingredients. Cut the cold butter into cubes and toss in the flour. Using your fingers, cut the butter into the dry ingredients until quarter sized pieces are left.
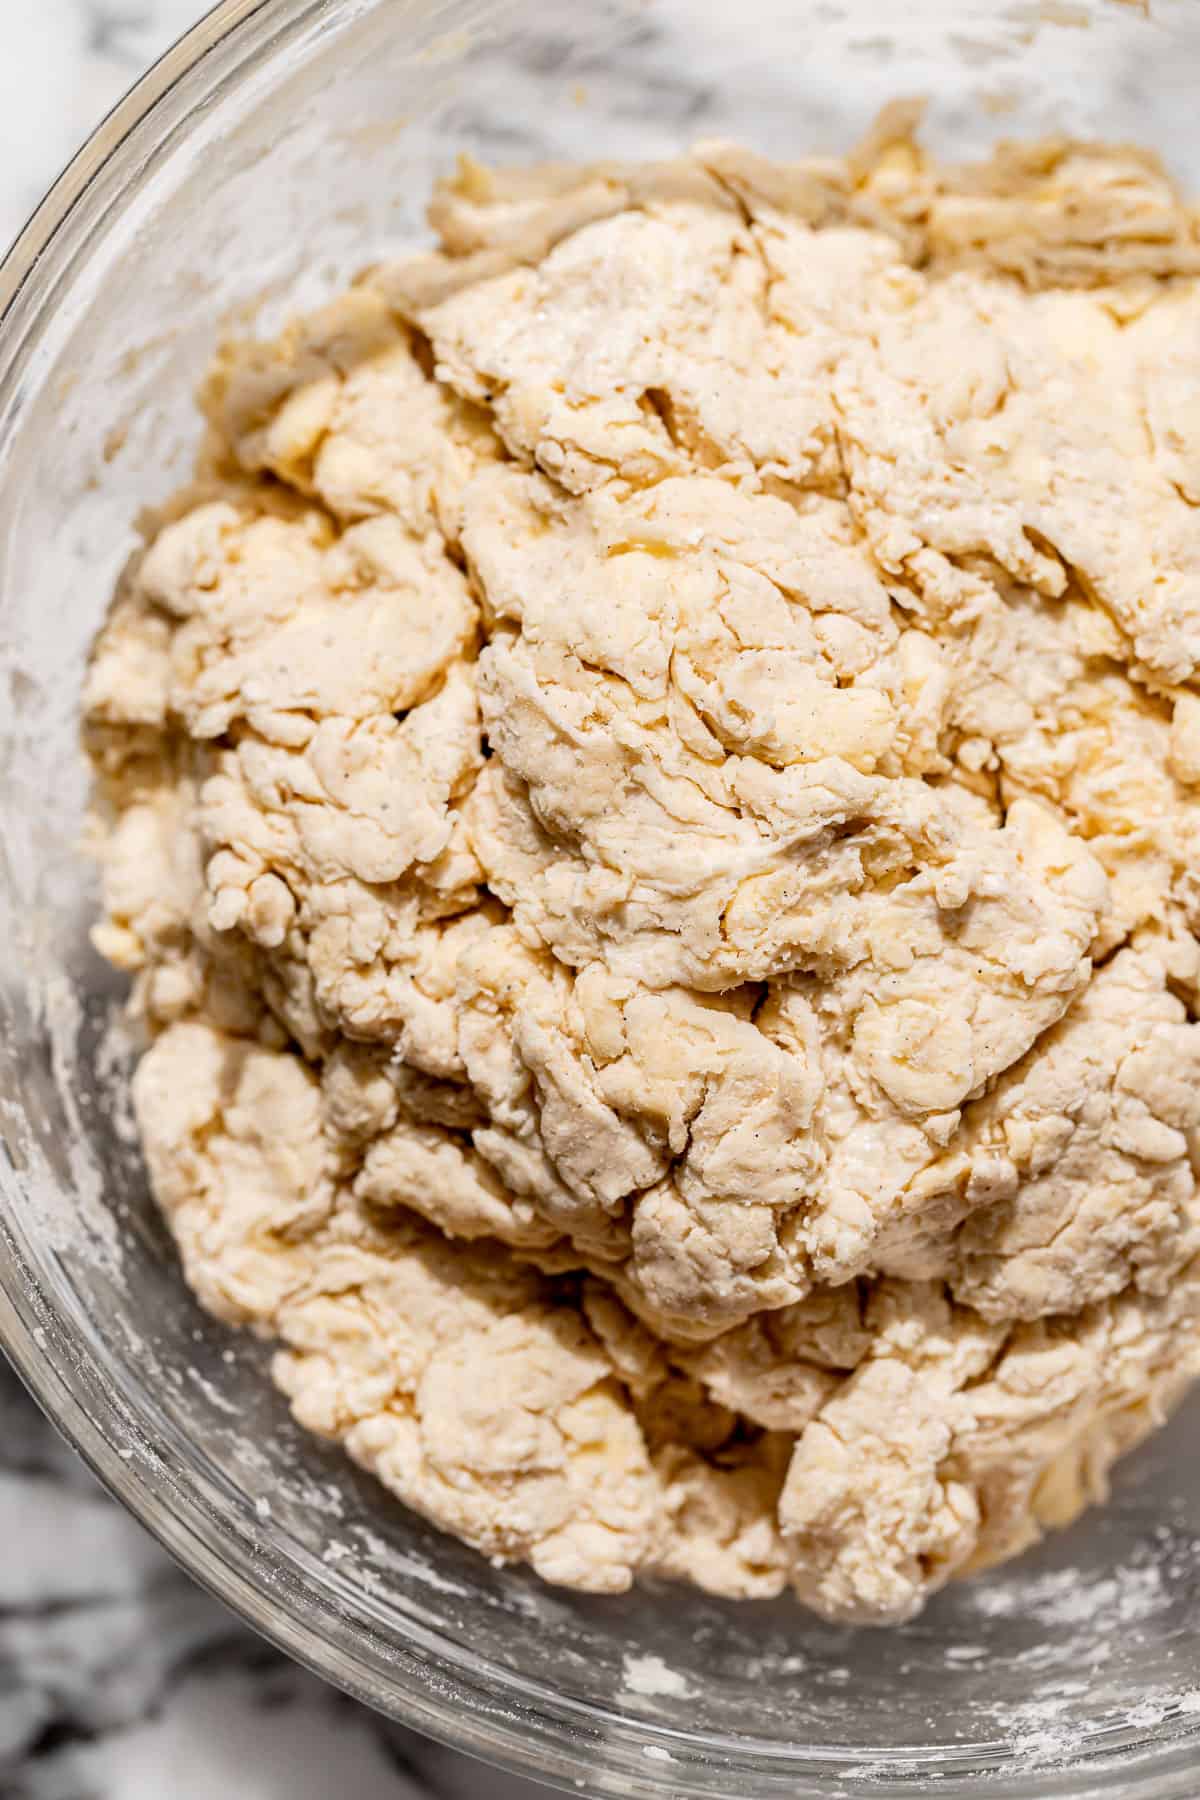
STEP 3: Hydrate the dough. Add the vodka (or a few tablespoons of water), then toss with a spoon to combine. Continue adding very small amounts of ice water until the dough can hold together, but is not overly wet. Wrap the dough tightly in plastic wrap, then chill in the refrigerator for one hour.
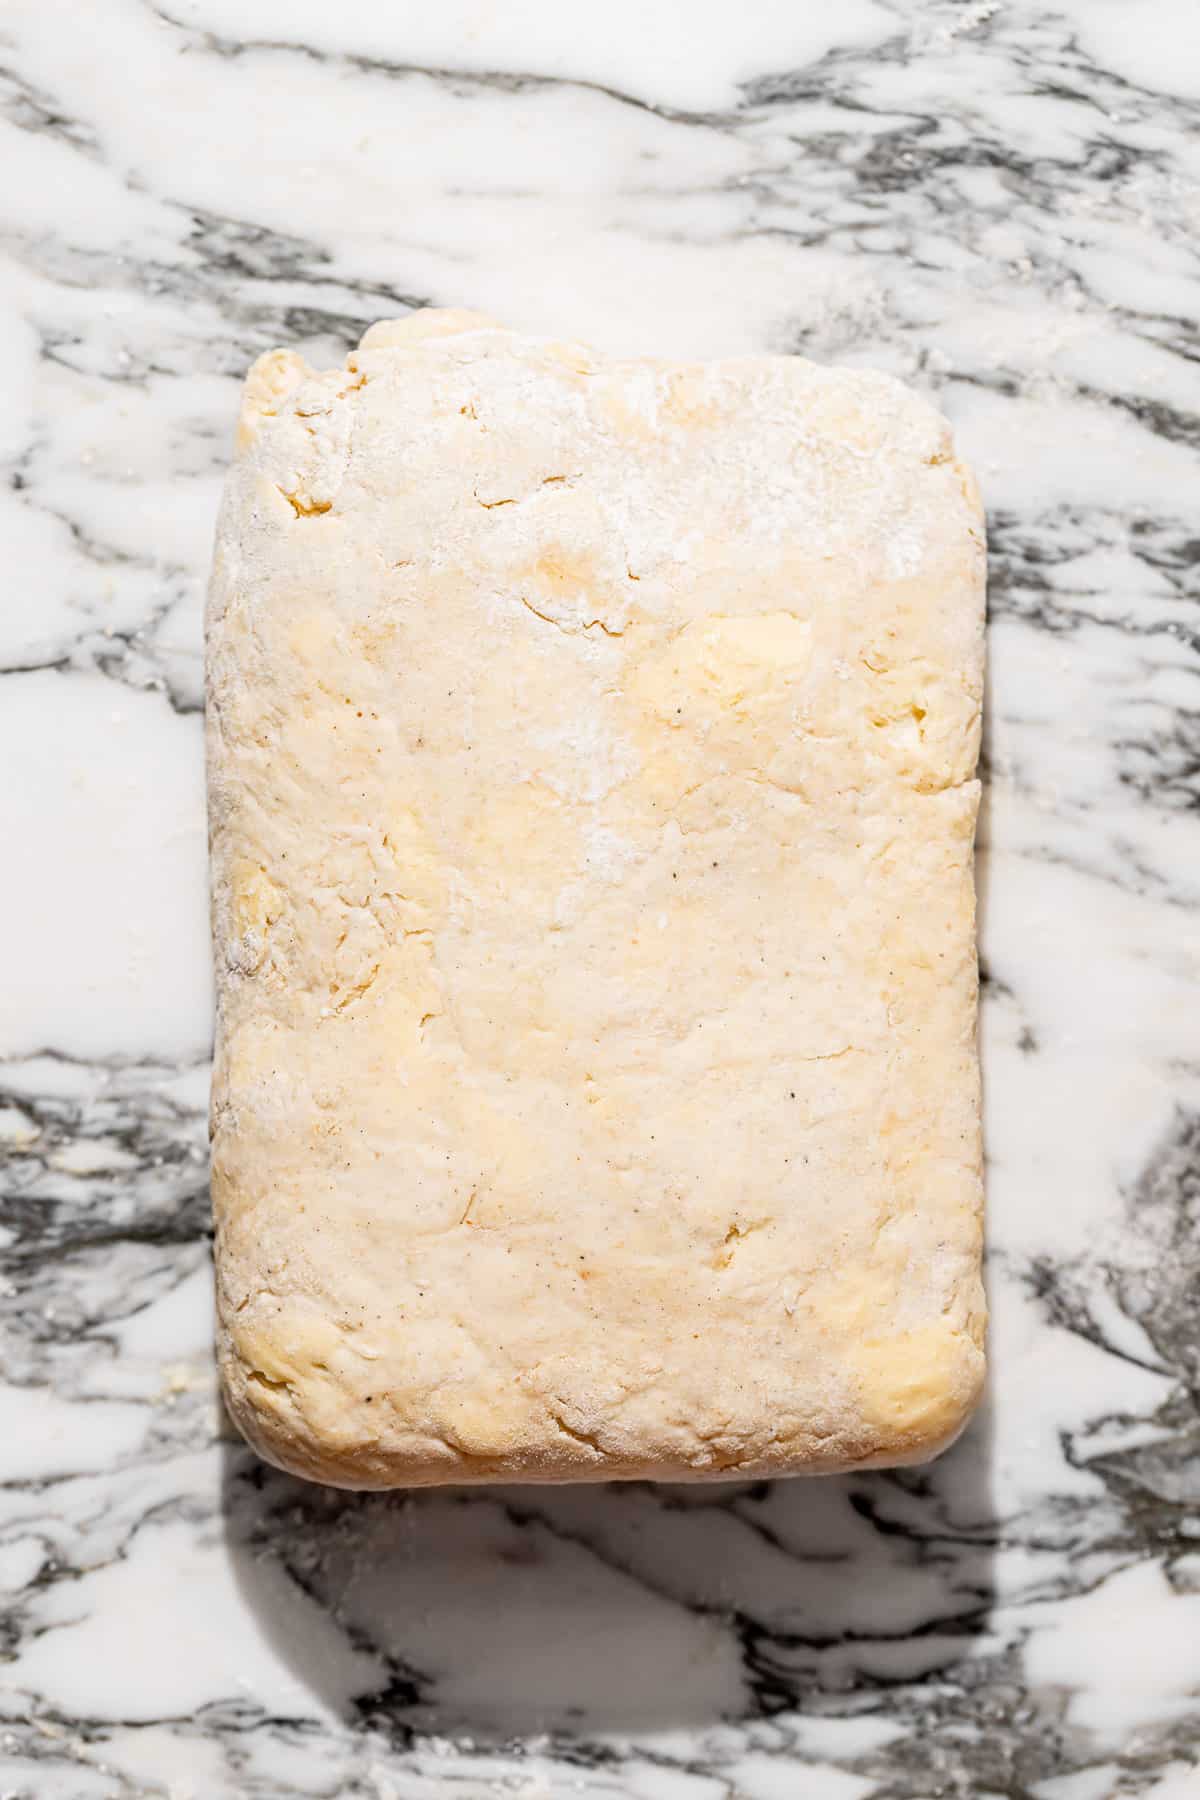
STEP 4: Laminate the dough. On a lightly floured surface, roll the dough out into a rough rectangle, fold in half, then again into quarters. Wrap the dough in plastic wrap and chill for another 30 minutes. Roll the dough out again into a rough rectangle and repeat the folding process.
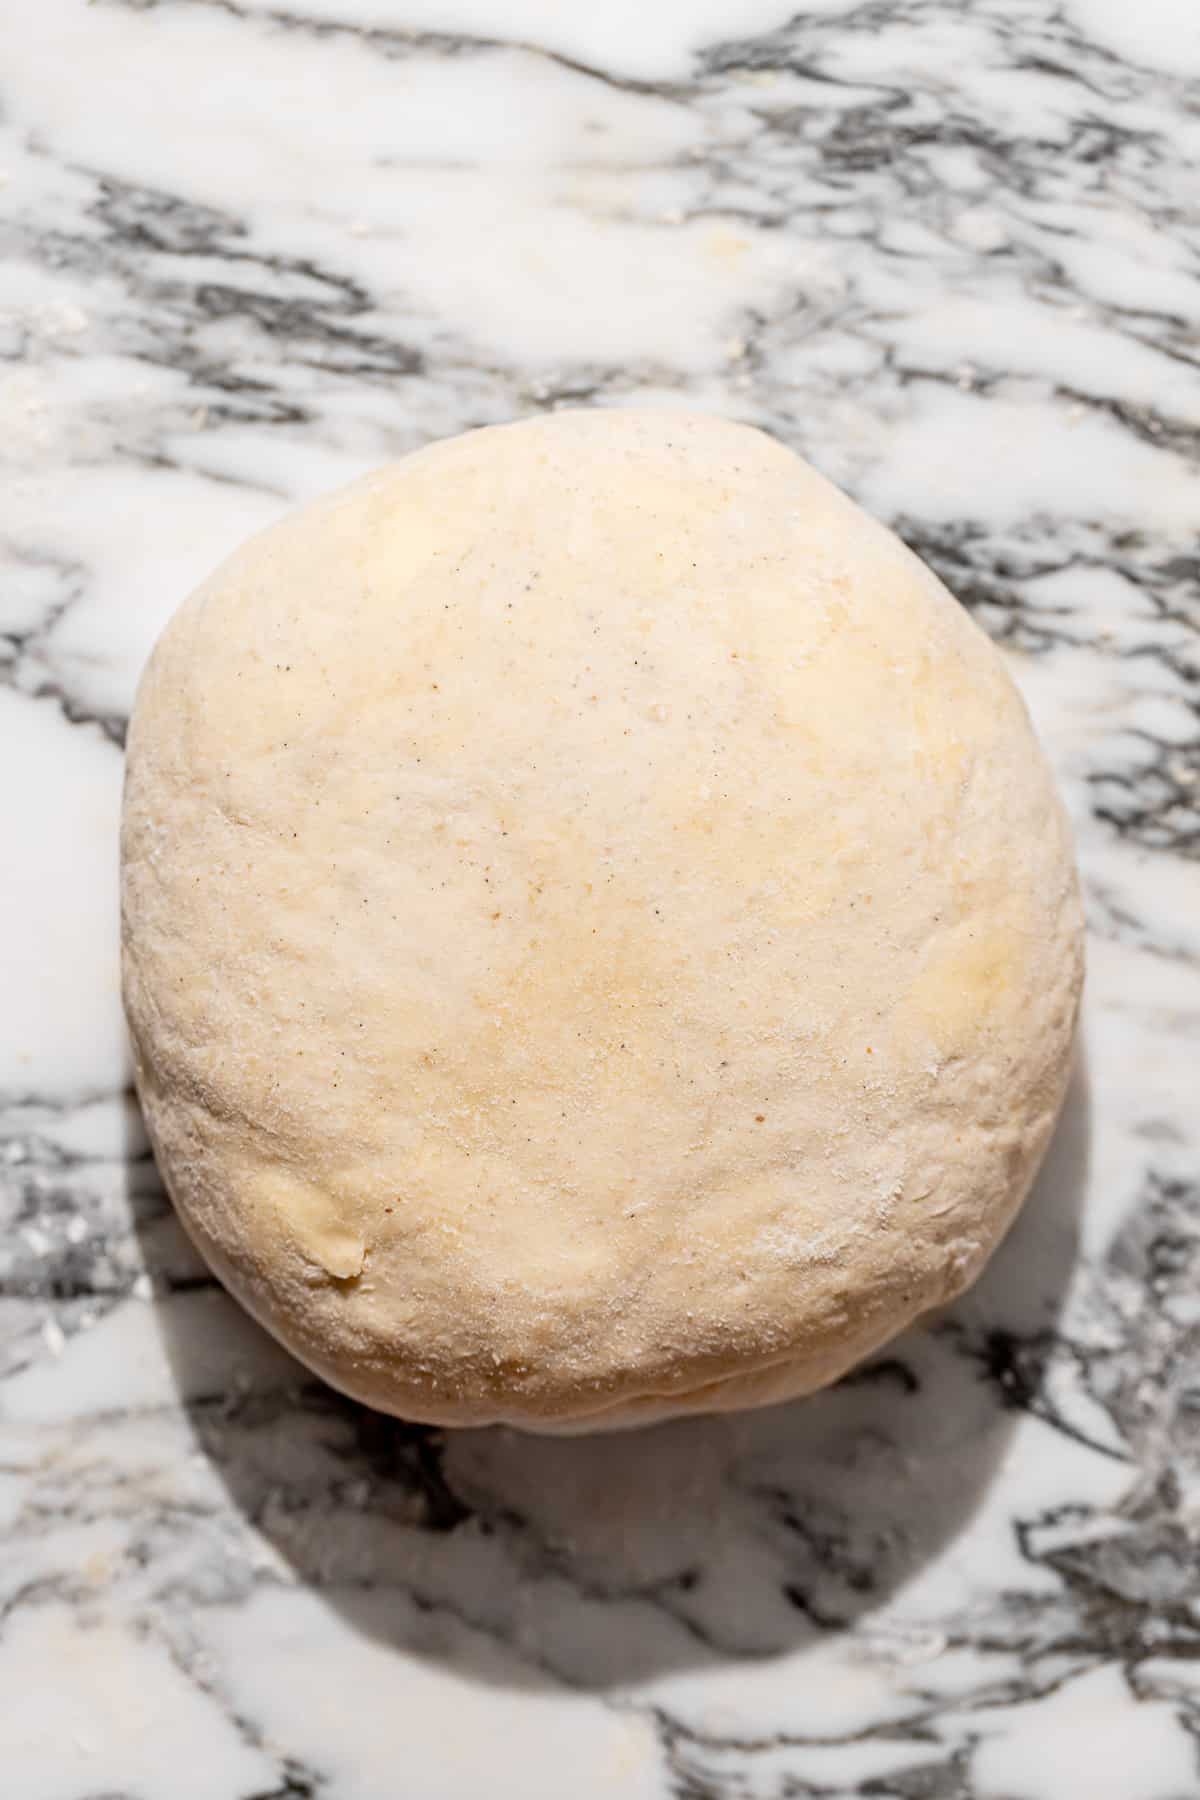

STEP 5: Chill the pie dough overnight. Shape the dough into a disk, wrap tightly in plastic wrap, and chill overnight.
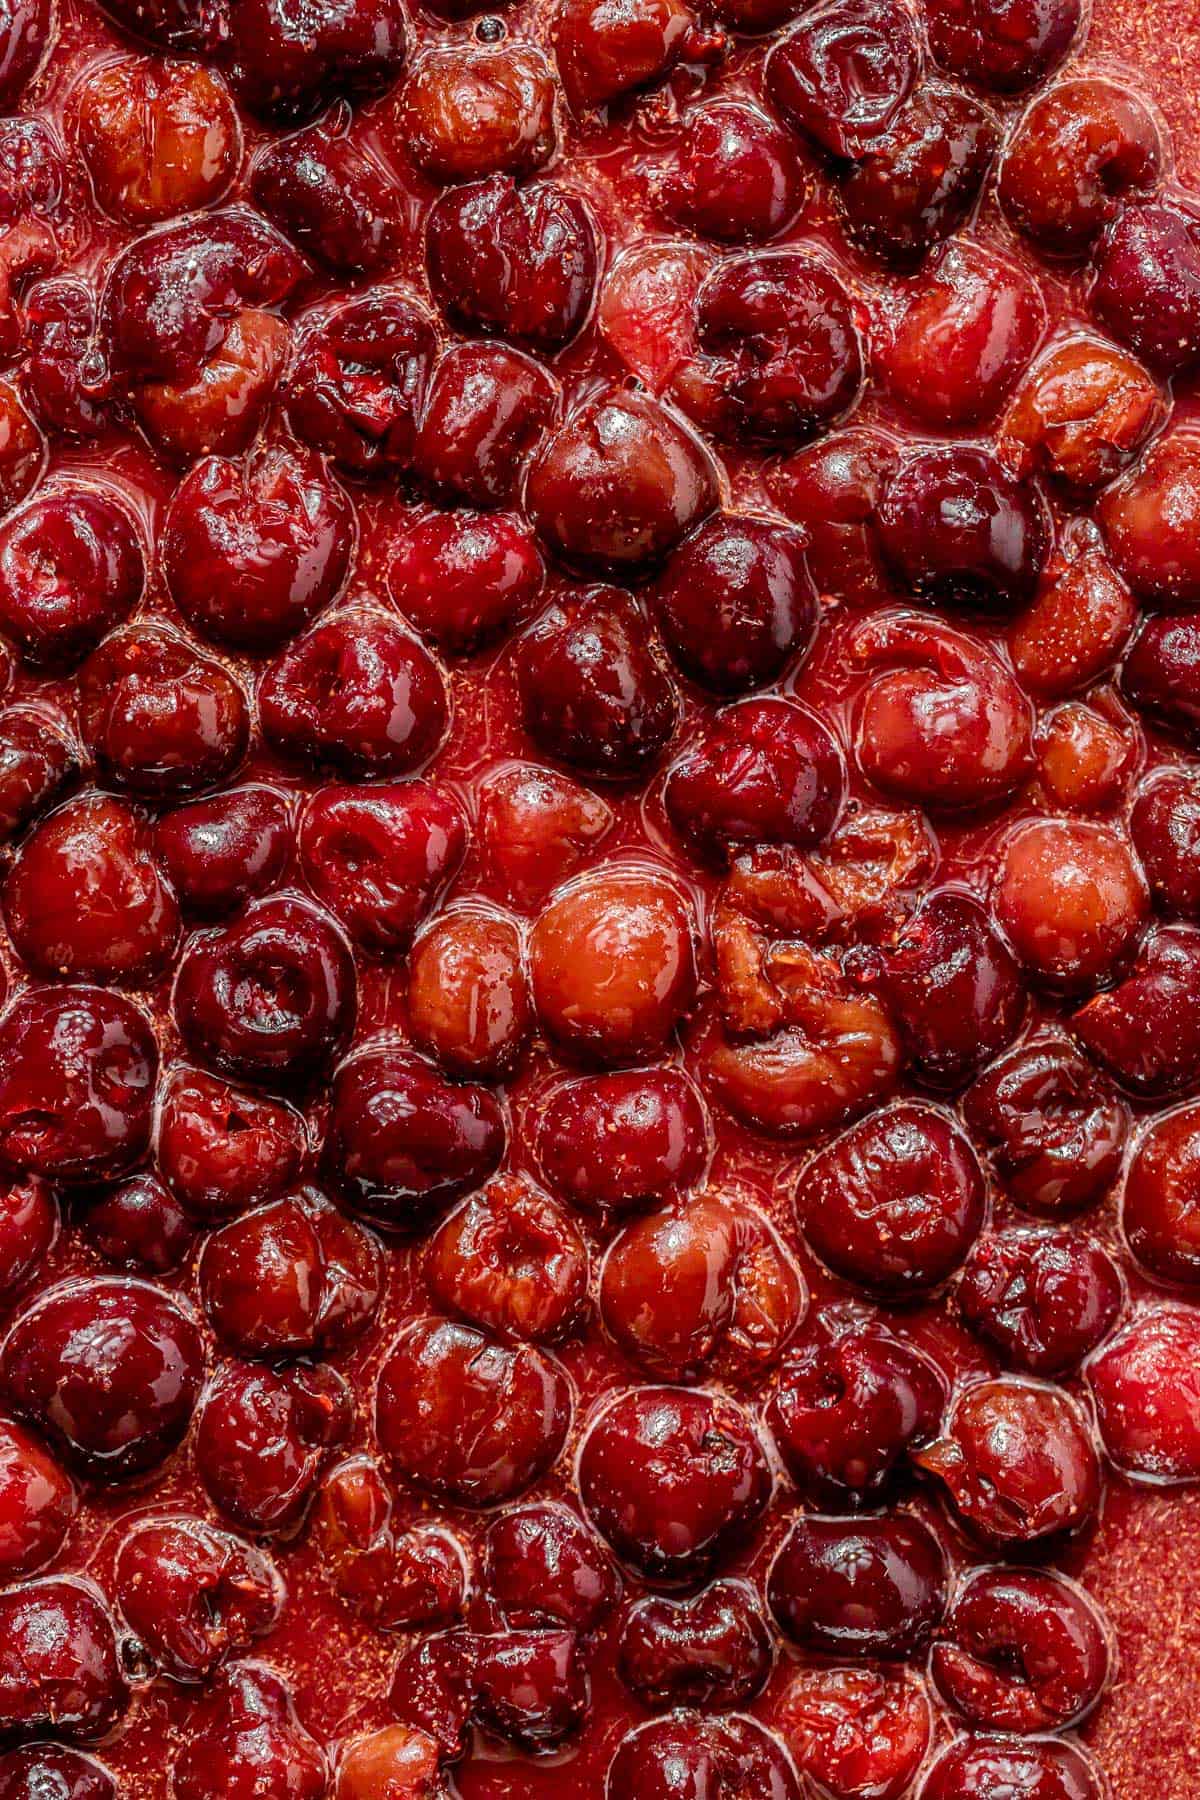
STEP 6: Make the homemade cherry pie filling. In a medium saucepan, combine the frozen cherries, sugars, cardamom, and salt. Place over medium heat, stirring occasionally for about 10 minutes or until the cherries start to soften and release their juices. Add the cornstarch and cook for another 10 minutes until the cherries have softened and the juices have thickened. Remove the pot from heat and stir in the vanilla.
STEP 7: Chill the cherry pie filling. Spread the cherry filling out onto a small baking sheet and place in the fridge for a few minutes to cool. Alternatively, pour the cherry filling into an airtight container and chill in the fridge overnight.
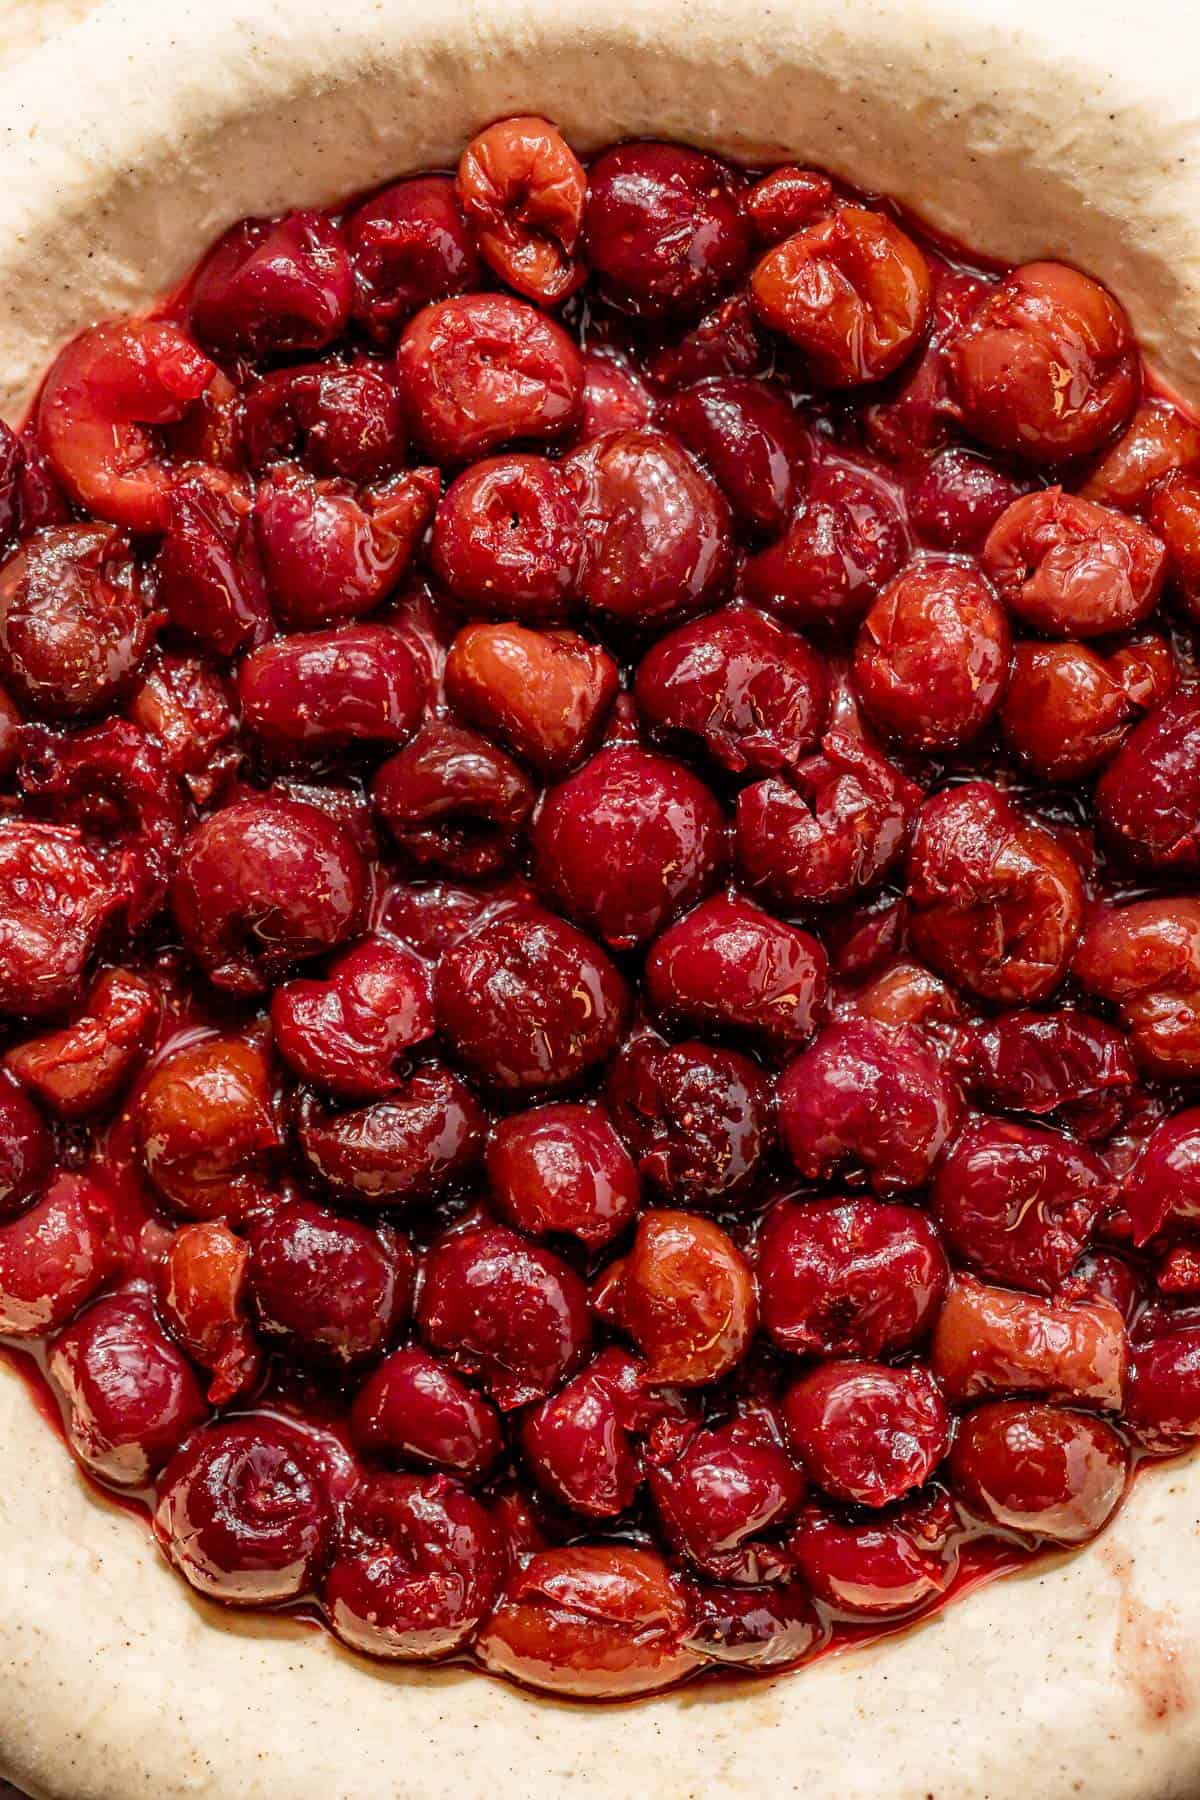
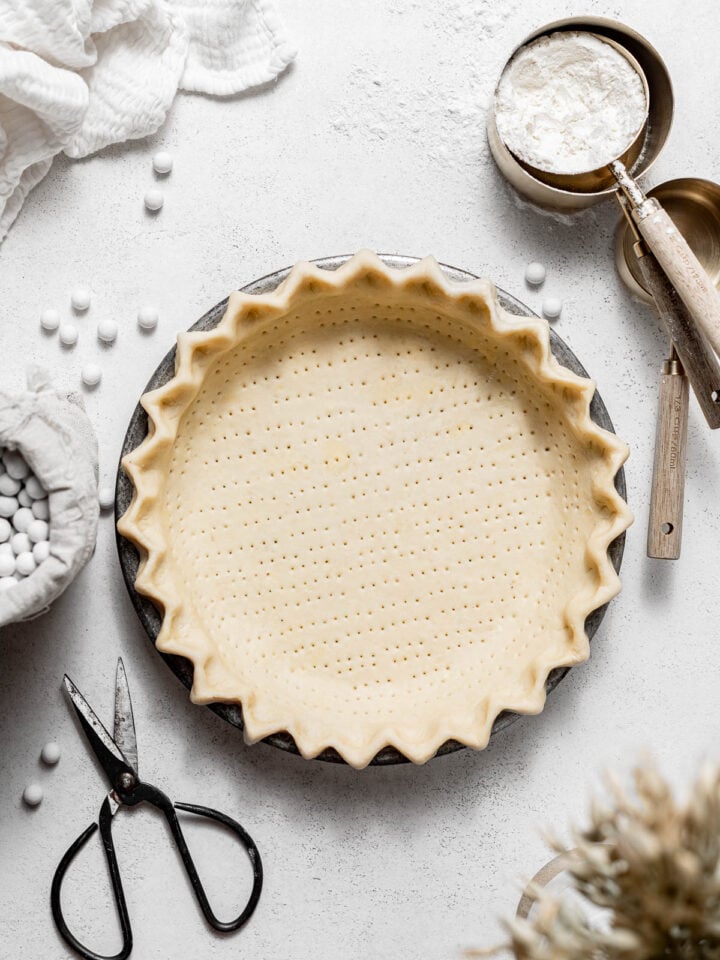
STEP 8: Assemble the pie. Weigh out 430g (about ⅓) of the pie dough, placing the bigger half back in the fridge. On a lightly floured surface, roll out the smaller piece into a circle about ⅛" in thickness and large enough to fit a 9-inch pie pan with some overhang. Carefully transfer the dough to the pie plate and coax it up against the sides. Place in the fridge while the lattice pieces are made.
Roll out the remaining dough to about ⅛" in thickness and at least 12" in length on one side. Cut out 12"x ½" strips and place on a small baking sheet. Chill the lattice strips in the fridge while the pie is assembled.
Take the pie dish out of the fridge and pour in the cherry pie filling, leaving behind most of the juices.
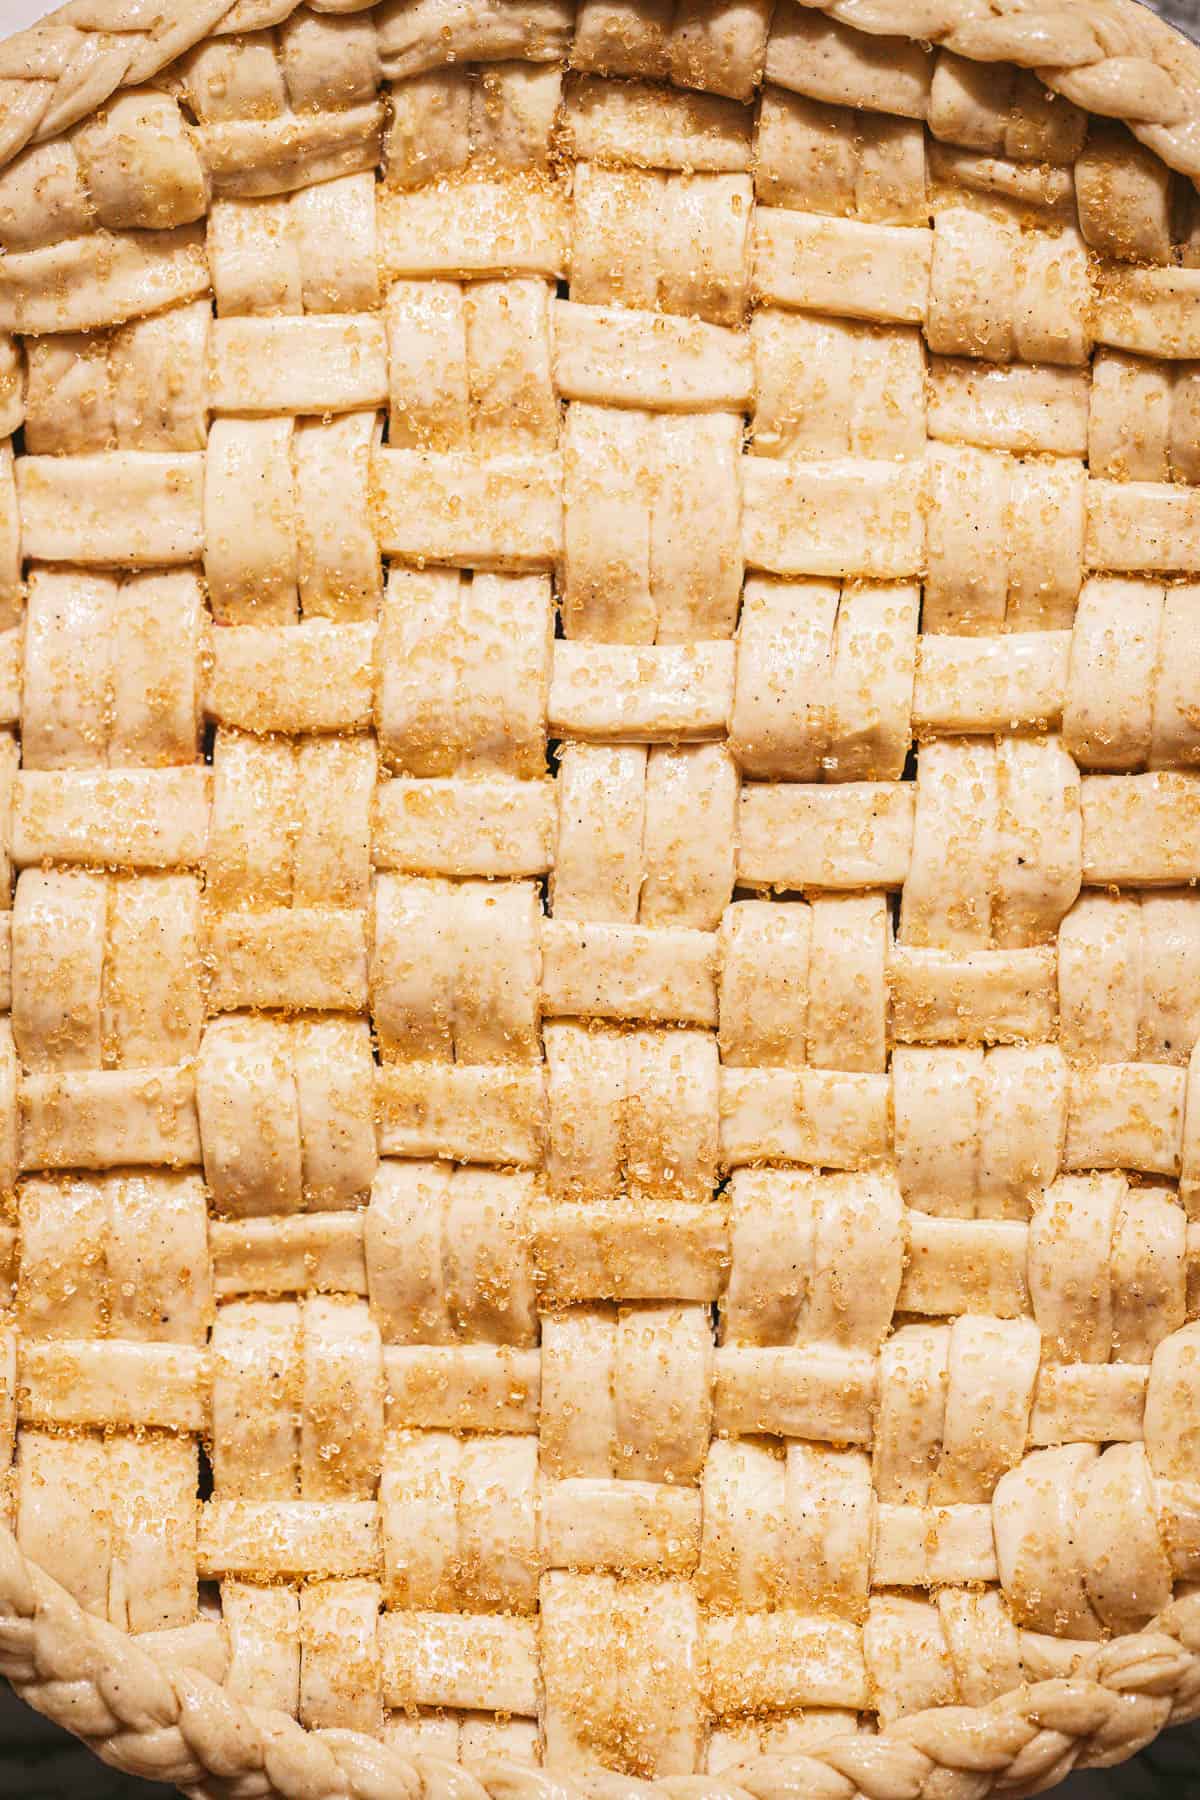
STEP 9: Create the lattice top crust. To make the lattice, arrange the vertical strips on the pie. With the vertical strips grouped into two, pull back every other "group" to the middle of the pie. Lay one strip down horizontally, then bring the grouped vertical strips back down. Repeat this until the entire lattice is complete.
Trim the excess pie dough to the very edge of the pie dish and squish together the edges so the bottom and the top dough adhere to each other. With the excess pie dough, you can make braids and line them along the edge of the pie, if desired.
Chill the assembled pie in the fridge for at least 15 minutes. Brush an egg wash all over the pie, and sprinkle turbinado or coarse sugar on top.
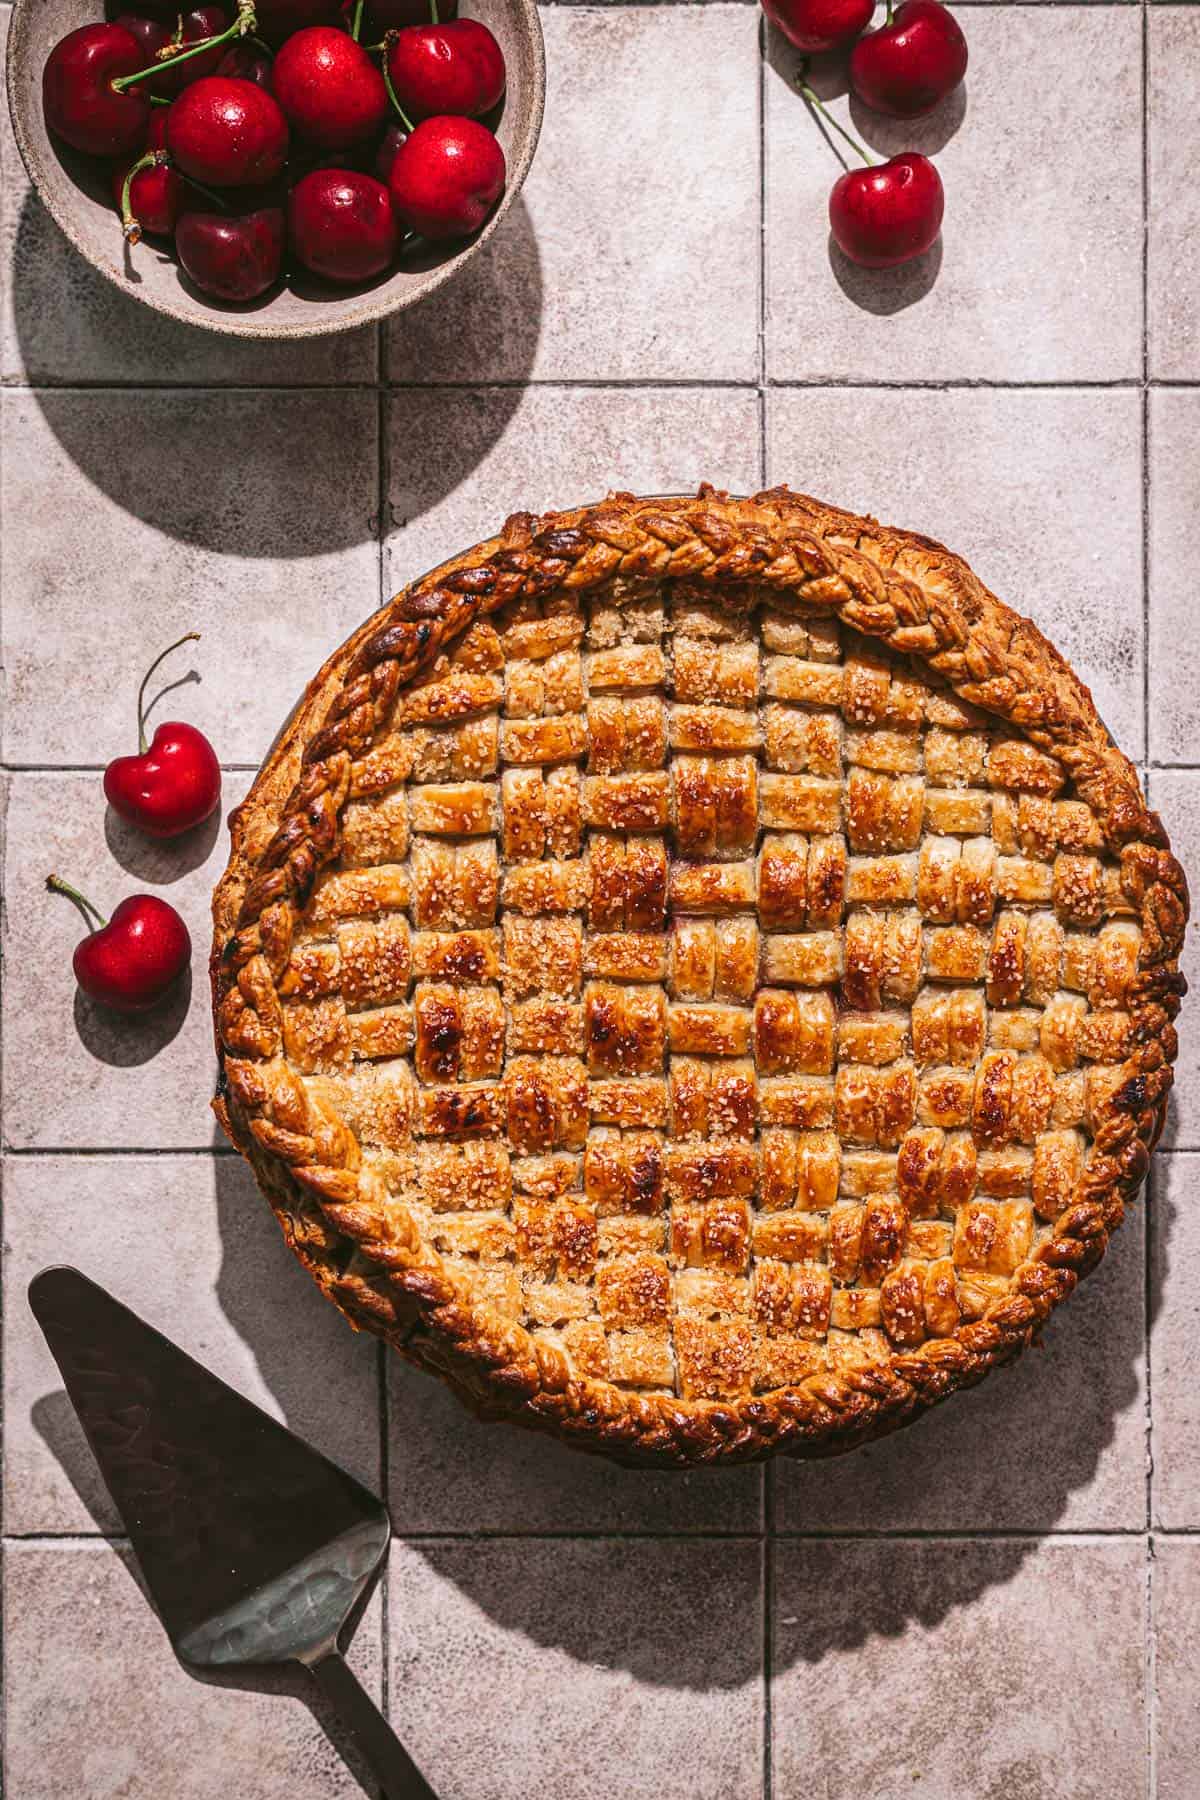
STEP 10: Bake the pie. Place the pie on top of the hot baking sheet and bake for about 45 minutes, or until the crust is deeply golden. Tent with aluminum foil towards the end if needed. Allow the pie to cool for at least two hours or overnight. Serve with vanilla ice cream!
Expert Baking Tips
- Add vodka to the pie dough. If you have vodka on hand, you can add a few tablespoons to the pie dough before the water. You'll end up adding less water, so still pay close attention to the hydration level. Vodka does not develop the gluten as much, which makes it perfect for hydrating pie dough and creating a super tender pie crust!
- Keep the pie dough cold. The most important thing with making pie crust is to always keep the dough cold at all steps. So use ice cold water and cold butter, and any time you touch the dough you should put it back in the fridge for at least 20 minutes.
- Bake the pie on a hot baking sheet on the lowest rack in the oven. No one likes a soggy bottom crust! To achieve a beautifully golden, crisp bottom pie crust preheat the oven with a baking sheet on the bottom rack. When it's time to bake the pie, place the pie dish directly on top of the hot baking sheet!
- Allow the pie to cool overnight. To ensure the pie filling sets up to a thick enough consistency for getting clean slices, I recommend allowing the pie to cool overnight at room temperature. If a clean slice with an intact filling is not important to you, then by all means, enjoy a slice fresh from the oven!
Recipe FAQs
Cut cold cubed butter into the flour until quarter sized pieces are left. Roll the chilled pie dough out into a rough rectangle, then fold it into quarters. Chill for a few minutes, then repeat. This series of rolling and folding creates layers and layers of butter and dough. When the pie dough is baked, the butter creates steam and pushes the layers of dough upwards, creating an ultra flaky, buttery crust!
Of course! But if you have the time, I encourage you try homemade. It's so much better than store-bought, and it is surprisingly easy to make!
The cherries are cooked in a large saucepan before being baked into a pie in order to ensure that they cook evenly, thicken up to right consistency, and pack in tight so you can get as many cherries as possible in every bite!
You can make the pie dough up to 3 days ahead of time stored in the fridge or up to 3 months ahead of time if stored in the freezer. If it's stored in the freezer, be sure to thaw it out in the fridge overnight before using.
The cherry filling can be made one day before baking the pie stored in the fridge.
The day the pie is assembled, it must be baked! I highly recommend baking it the day before serving to give it time to cool and set. This gives the filling enough time to set so you can get clean cut pie slices!
Store leftover pie slices covered at room temperature or in the fridge for 2-3 days.
Baking in Grams
All of the recipes on this blog are carefully developed with gram measurements so you can easily recreate them in your own kitchen with success. Volume measurements are extremely inaccurate and leave room for significant errors. Not all measuring cups are made equally, so your one cup of flour will be different from my one cup of flour. By providing precise measurements in grams (aside from minor ingredients, which are given in tsp/tbsp), you can make these recipes accurately and with less cleanup! All you need is this kitchen scale.
If this still isn't enough to convince you, I have provided volume measurements in the recipe card. If you are interested in understanding the conversions, this is the best conversion chart.
But trust me, once you try baking in grams you'll never turn back!
Happy baking! x
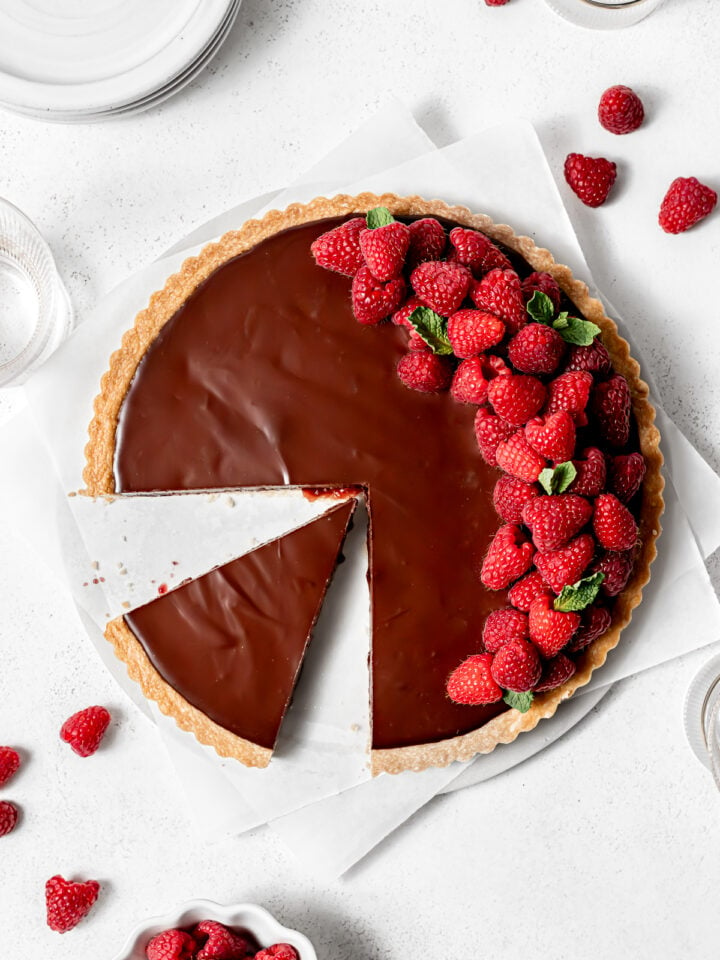
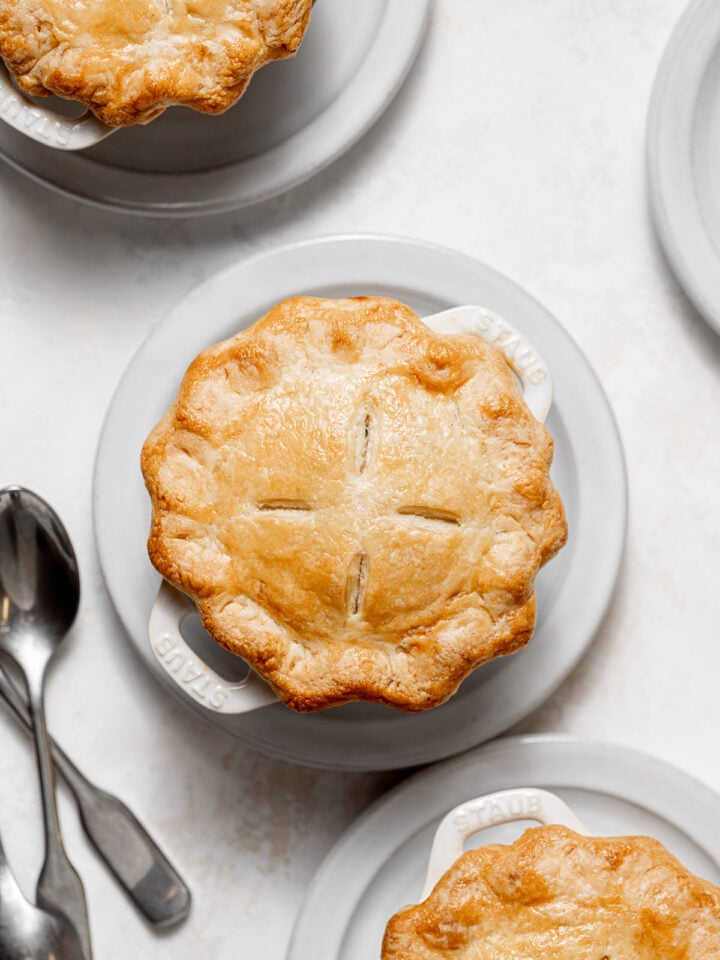
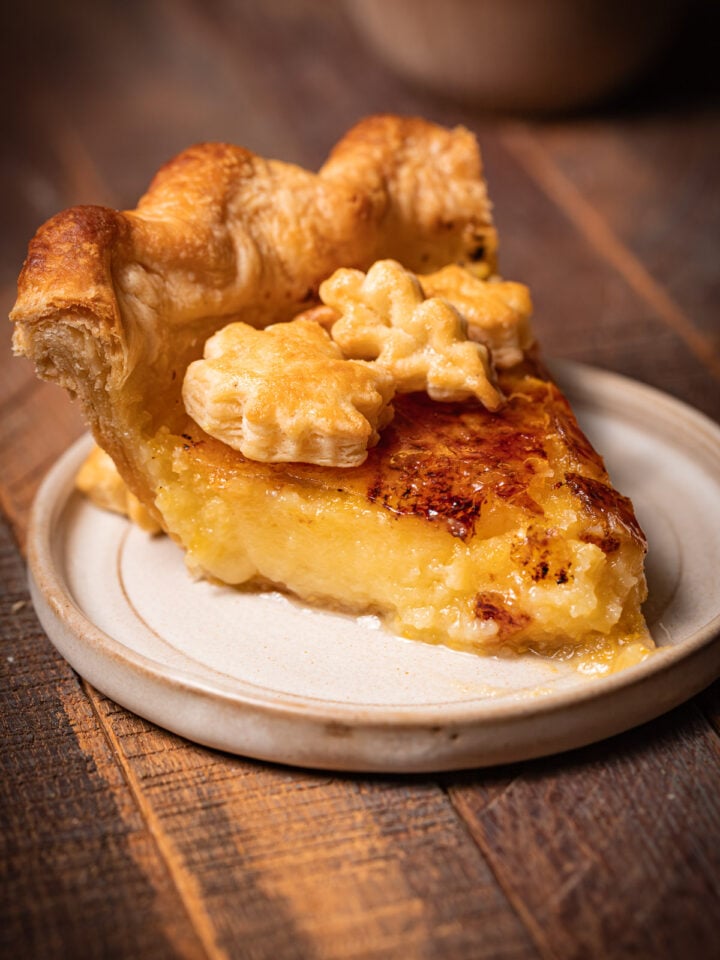
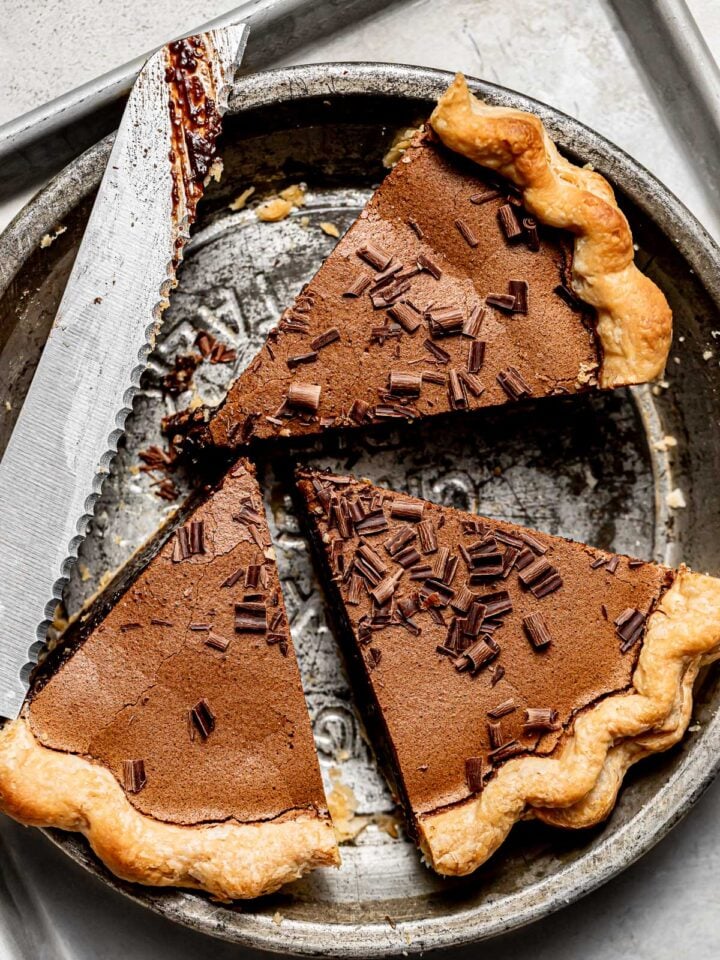
Other pies & tarts to try
If you tried this recipe, I'd love to know how it turned out for you! Leave a star rating & review below and post a picture (or video!) on Instagram and tag me so I can see your bakes! Not ready to make this recipe yet? Click the heart button on the right of your screen to save it for later 🙂
📖 Recipe
Cardamom Cherry Pie
Equipment
Ingredients
For the all-butter pie crust:
- 500 g (4 cups + 3 tbsp) all-purpose flour
- 1 teaspoon kosher salt
- 2 teaspoon cardamom
- 350 g (25 tbsp) butter, cold
- 50 g (¼ cup) vodka, optional
- 1 cup ice water
- Egg wash, 1 egg + 30g (2 tbsp) heavy cream
- Turbinado sugar, for sprinkling
For the cardamom cherry pie filling:
- 845 g (30 oz) frozen cherries
- 53 g (¼ cup) brown sugar
- 100 g (½ cup) granulated sugar
- 2 teaspoon cardamom
- 1 teaspoon kosher salt
- 24 g (3 tablespoon) cornstarch
- 1 tablespoon vanilla extract
Instructions
For the all-butter pie crust:
- In a medium bowl combine the flour and salt.
- Cut the cold butter into cubes and toss in the flour. Using your fingers, cut the butter into the dry ingredients until quarter sized pieces are left.
- Add the vodka (or a few tablespoons of water), then toss with a spoon to combine. Continue adding very small amounts of ice water until the dough can hold together, but is not overly wet. Wrap the dough tightly in plastic wrap, then chill for one hour.
- On a lightly floured surface, roll the dough out into a rough rectangle, fold in half, then again into quarters. Wrap the dough in plastic wrap and chill for another 30 minutes.
- Roll the dough out again into a rough rectangle and repeat the folding process. Shape the dough into a disk, wrap tightly in plastic wrap, and chill overnight.
For the cardamom cherry pie filling:
- In a medium pot, combine the frozen cherries, sugars, cardamom, and salt. Place over medium heat, stirring occasionally for about 10 minutes or until the cherries start to soften and release their juices.
- Add the cornstarch and cook for another 10 minutes until the cherries have softened and the juices have thickened. Remove the pot from heat and stir in the vanilla.
- Spread the cherry filling out onto a small baking sheet and place in the fridge for a few minutes to cool. Alternatively, pour the cherry filling into an airtight container and chill in the fridge overnight.
For assembly:
- Place a large baking sheet on the bottom rack of the oven, and preheat it to 425 degrees F.
- Weigh out 430g (about ⅓) of the pie dough, placing the bigger half back in the fridge.
- On a lightly floured surface, roll out the smaller piece into a circle about ⅛" in thickness and large enough to fit a 9" pie pan with some overhang.
- Carefully transfer the dough to the pie dish and coax it up against the sides. Place in the fridge while the lattice pieces are made.
- Roll out the remaining dough to about ⅛" in thickness and at least 12" in length on one side.
- Cut out 12"x ½" strips and place on a small baking sheet. Chill the lattice strips in the fridge while the pie is assembled.
- Take the pie dish out of the fridge and pour in the cherry pie filling, leaving behind most of the juices.
- To make the lattice, arrange the vertical strips on the pie. With the vertical strips grouped into two, pull back every other "group" to the middle of the pie. Lay one strip down horizontally, then bring the grouped vertical strips back down. Repeat this until the entire lattice is complete.
- Trim the excess pie dough to the very edge of the pie dish and squish together the edges so the bottom and the top dough adhere to each other. With the excess pie dough, you can make braids and line them along the edge of the pie, if desired.
- Chill the assembled pie in the fridge for at least 15 minutes.
- Brush an egg wash all over the pie, and sprinkle turbinado sugar on top.
- Place the pie on top of the hot baking sheet and bake for about 45 minutes, or until the crust is deeply golden. Tent with foil towards the end if needed.
- Allow the pie to cool for at least two hours or overnight. Serve with vanilla ice cream!
Notes
- Add vodka to the pie dough. If you have vodka on hand, you can add a few tablespoons to the pie dough before the water. You'll end up adding less water, so still pay close attention to the hydration level. Vodka does not develop the gluten as much, which makes it perfect for hydrating pie dough and creating a super tender pie crust!
- Keep the pie dough cold. The most important thing with making pie crust is to always keep the dough cold at all steps. So use ice cold water and cold butter, and any time you touch the dough you should put it back in the fridge for at least 20 minutes.
- Bake the pie on a hot baking sheet on the lowest rack in the oven. No one likes a soggy pie bottom! To achieve a beautifully golden, crisp bottom pie crust preheat the oven with a baking sheet on the bottom rack. When it's time to bake the pie, place the pie dish directly on top of the hot baking sheet!
- Allow the pie to cool overnight. To ensure the pie filling sets up to a thick enough consistency for getting clean slices, I recommend allowing the pie to cool overnight at room temperature. If a clean slice with an intact filling is not important to you, then by all means, enjoy a slice fresh from the oven!
Sara says
I was looking for a more unique cherry pie so I made this today. Just gave it a taste, it's good but heavy on the cardamom for my household's taste. I would recommend cutting the cardamom in half for both the crust and filling! It was an easy and super flaky and delicious crust though!