
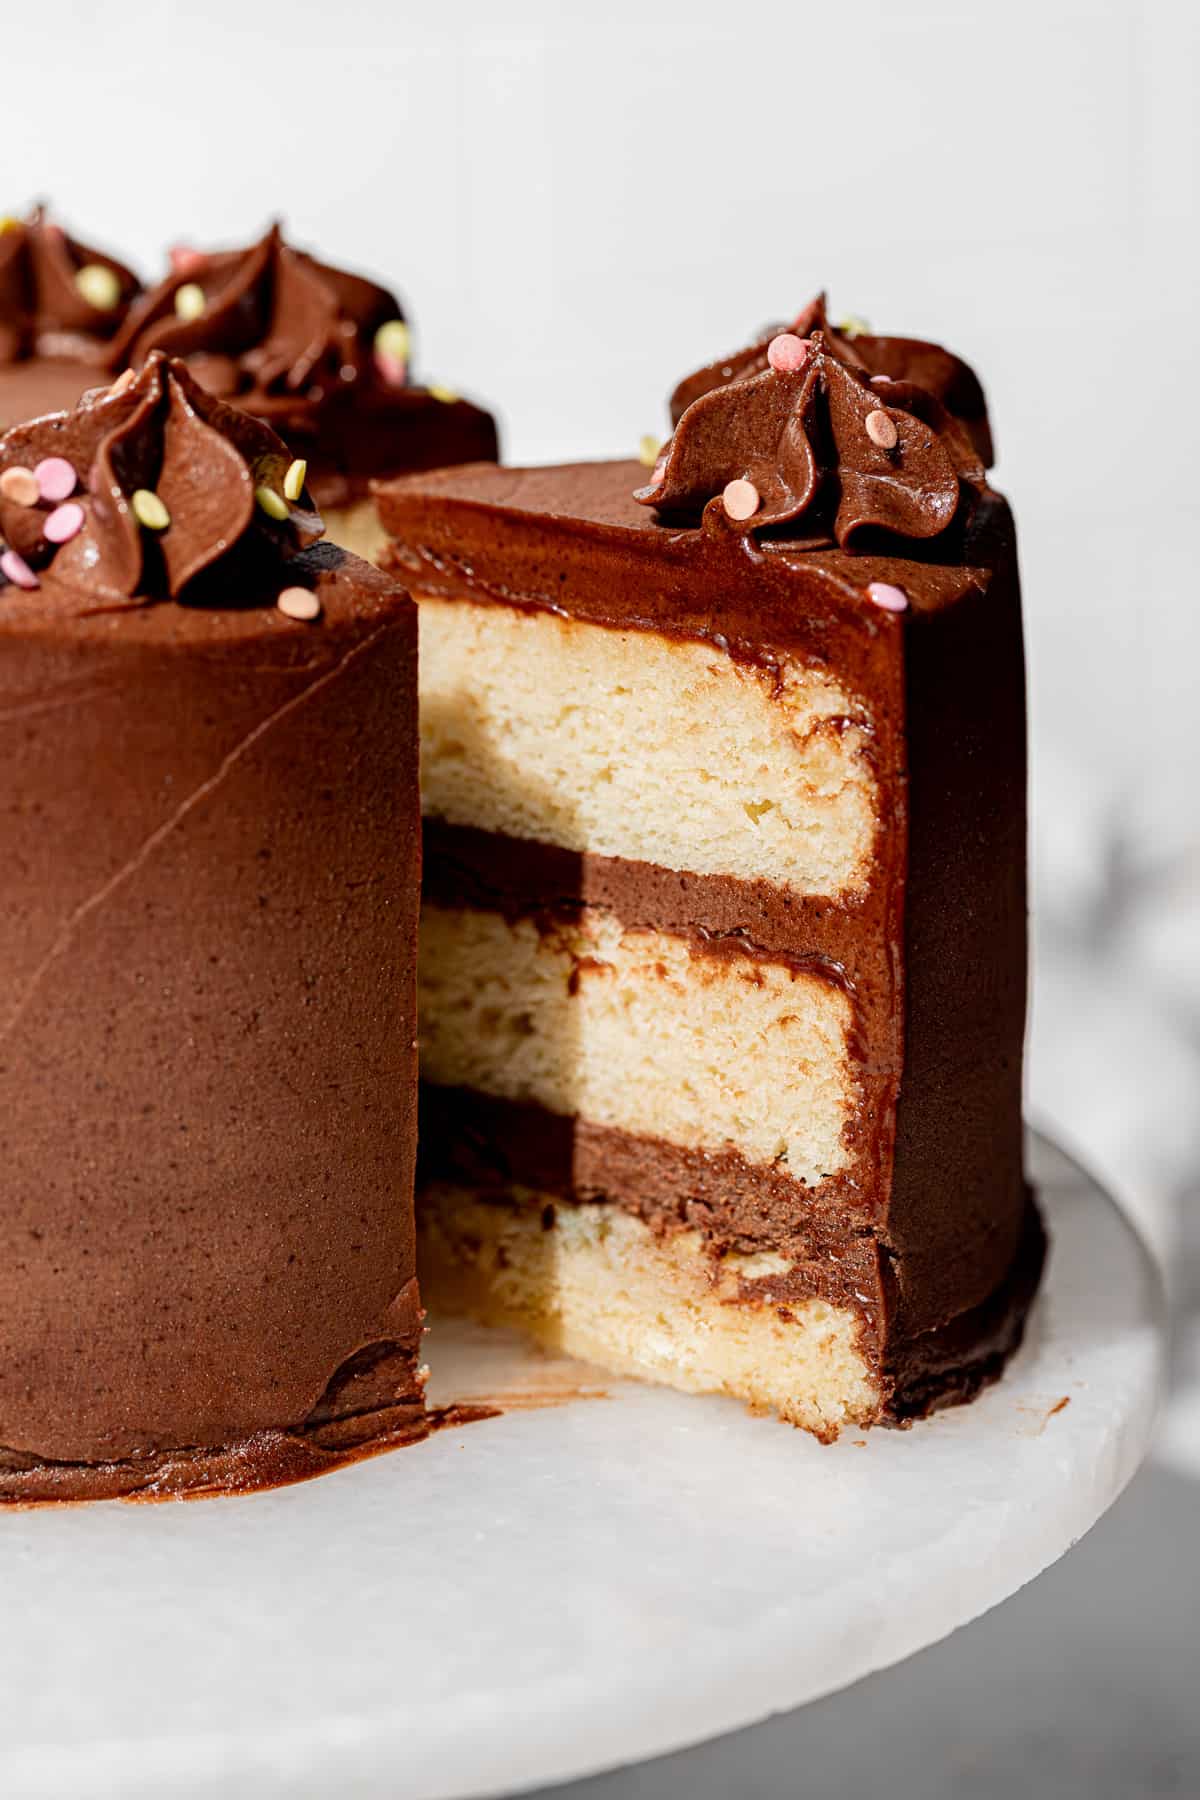
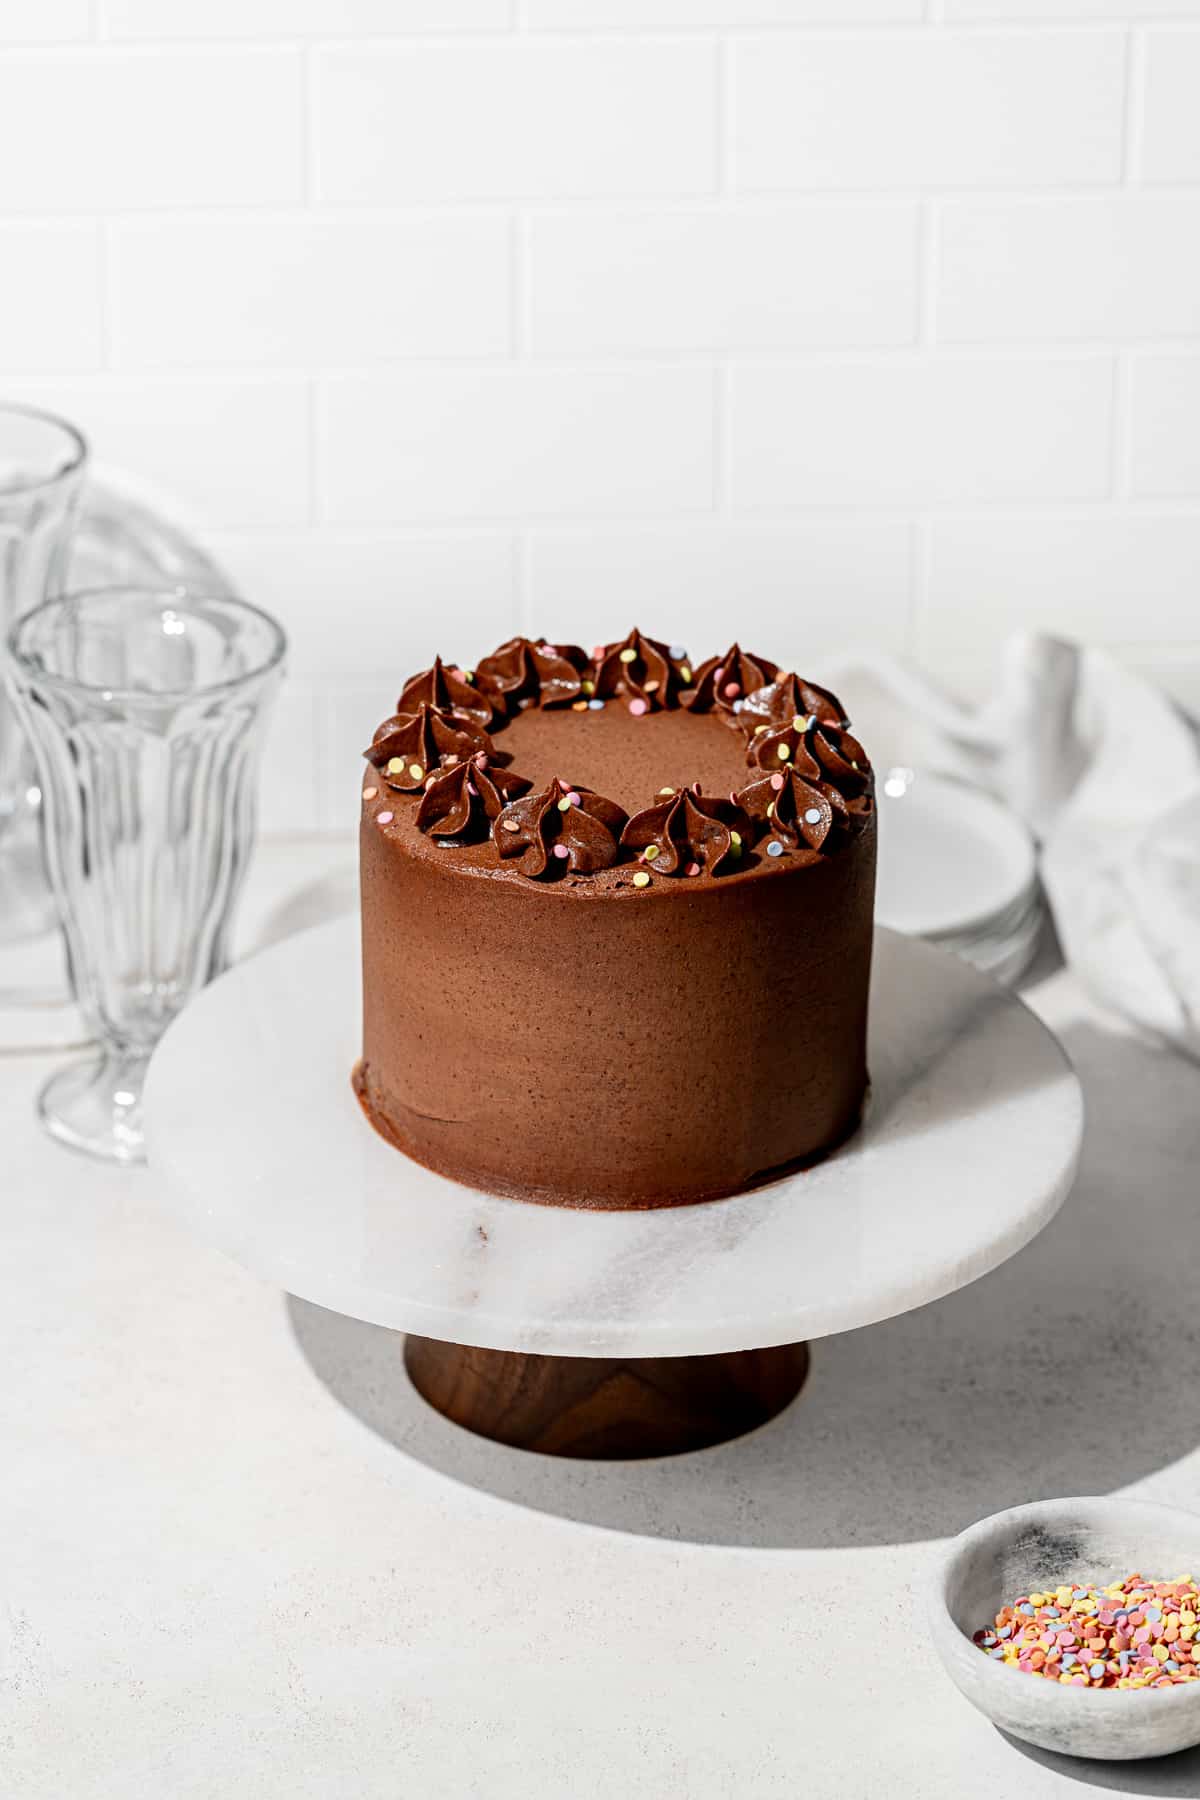
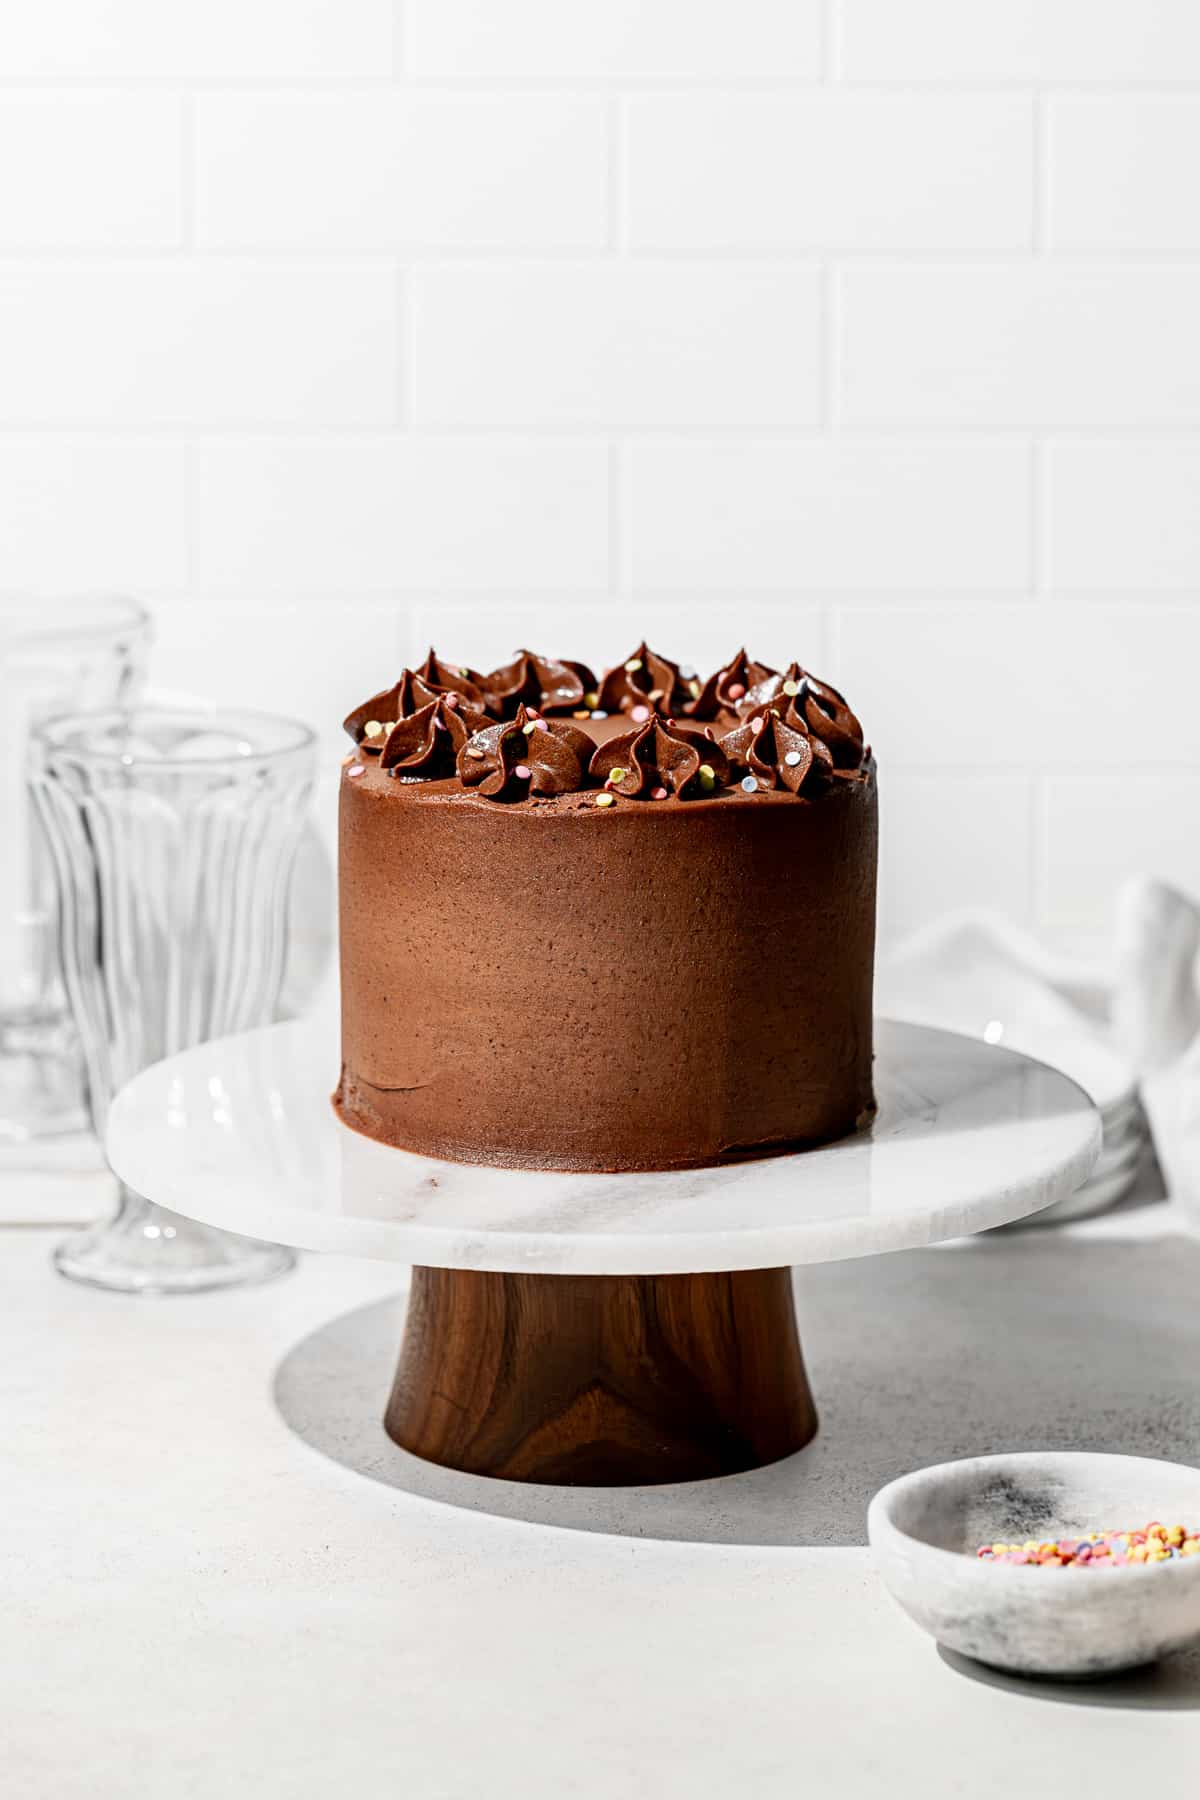
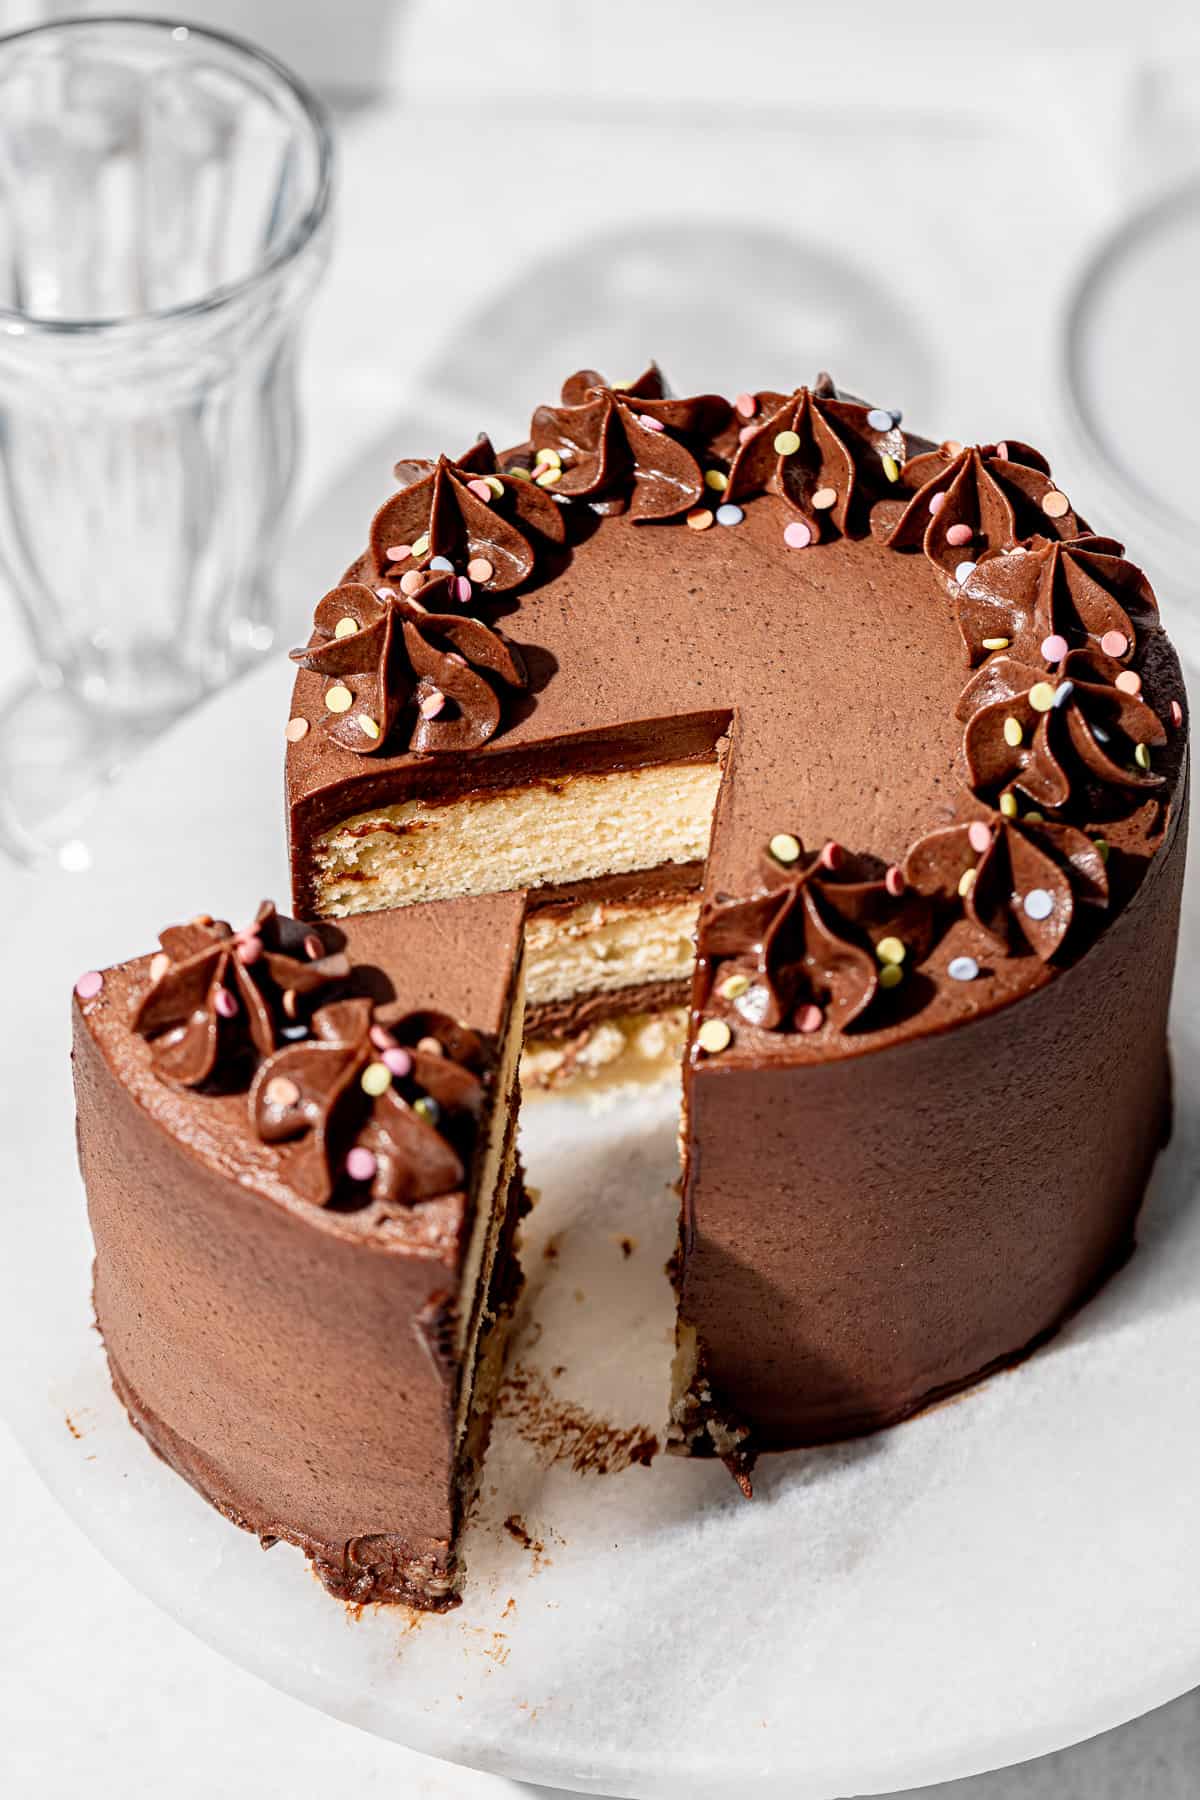
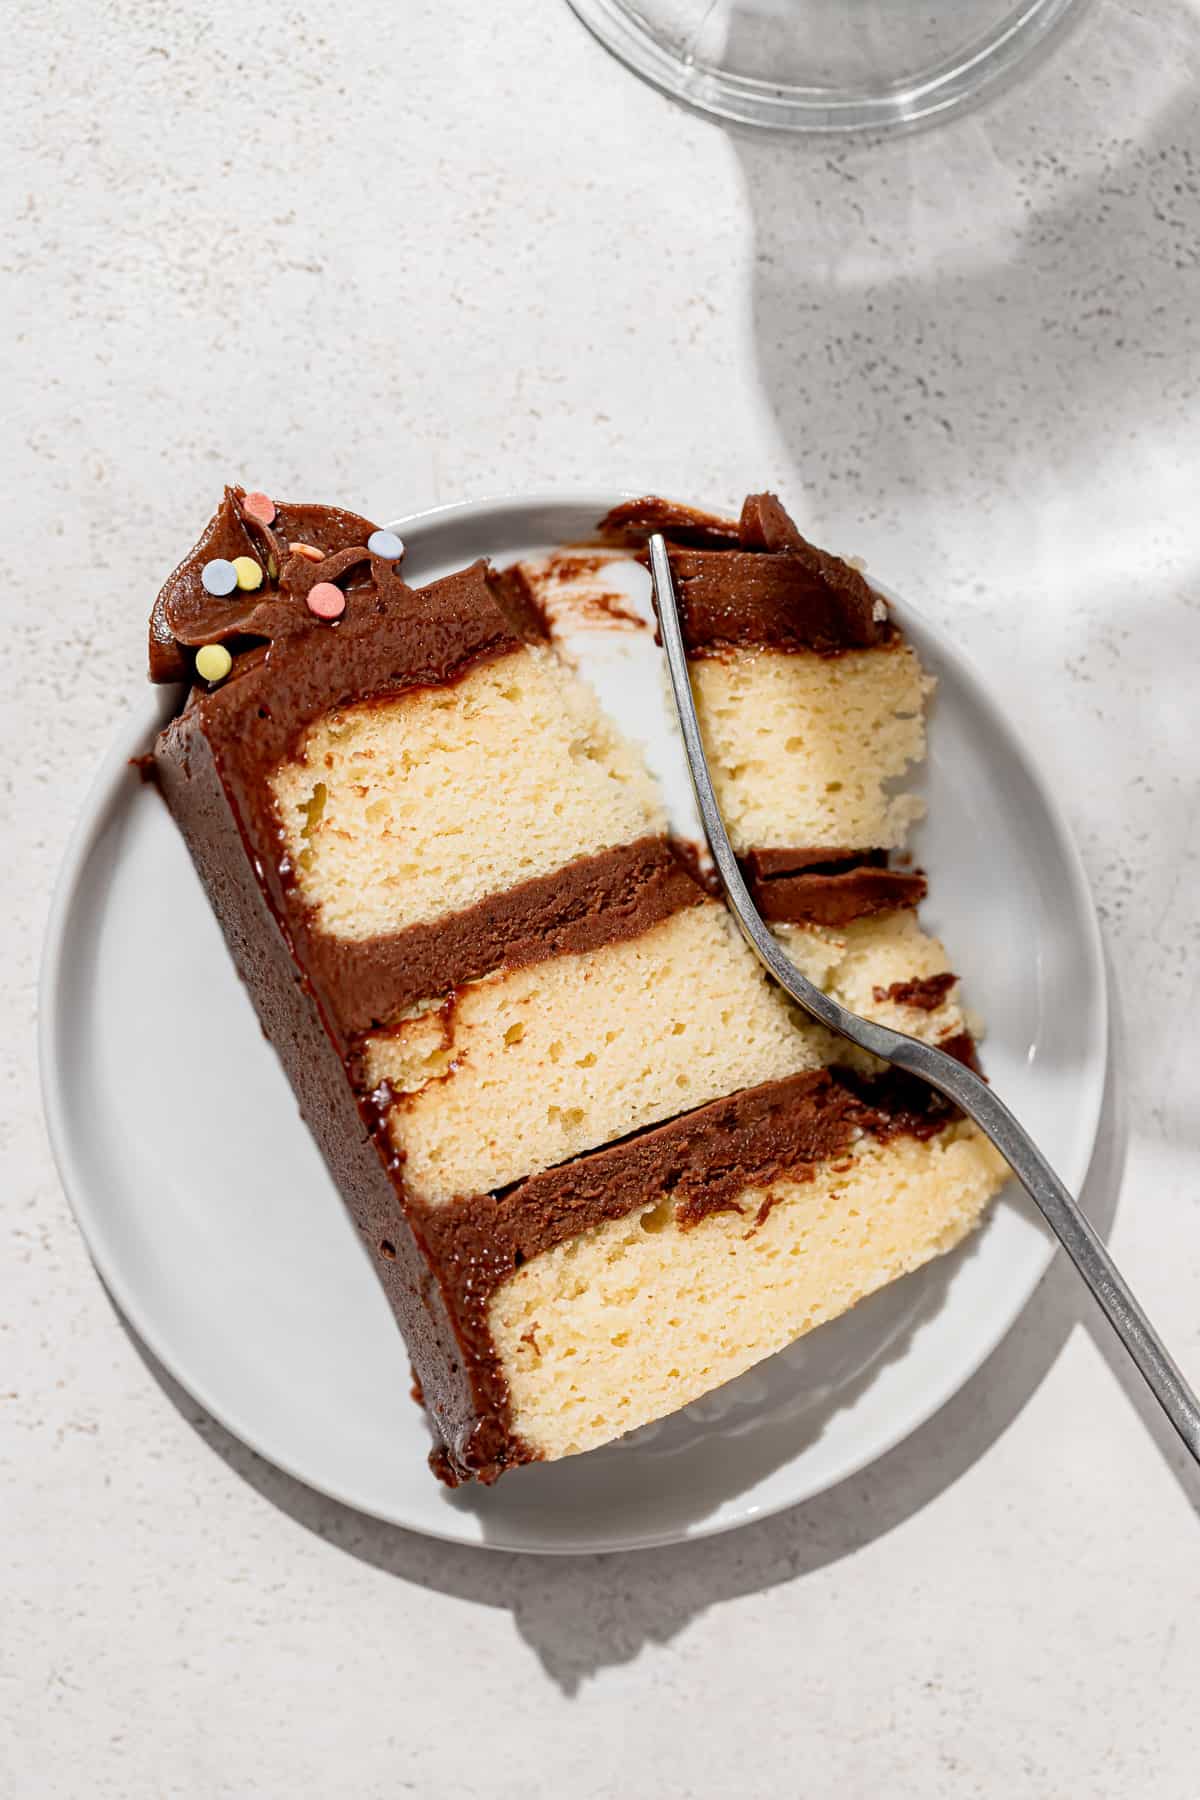
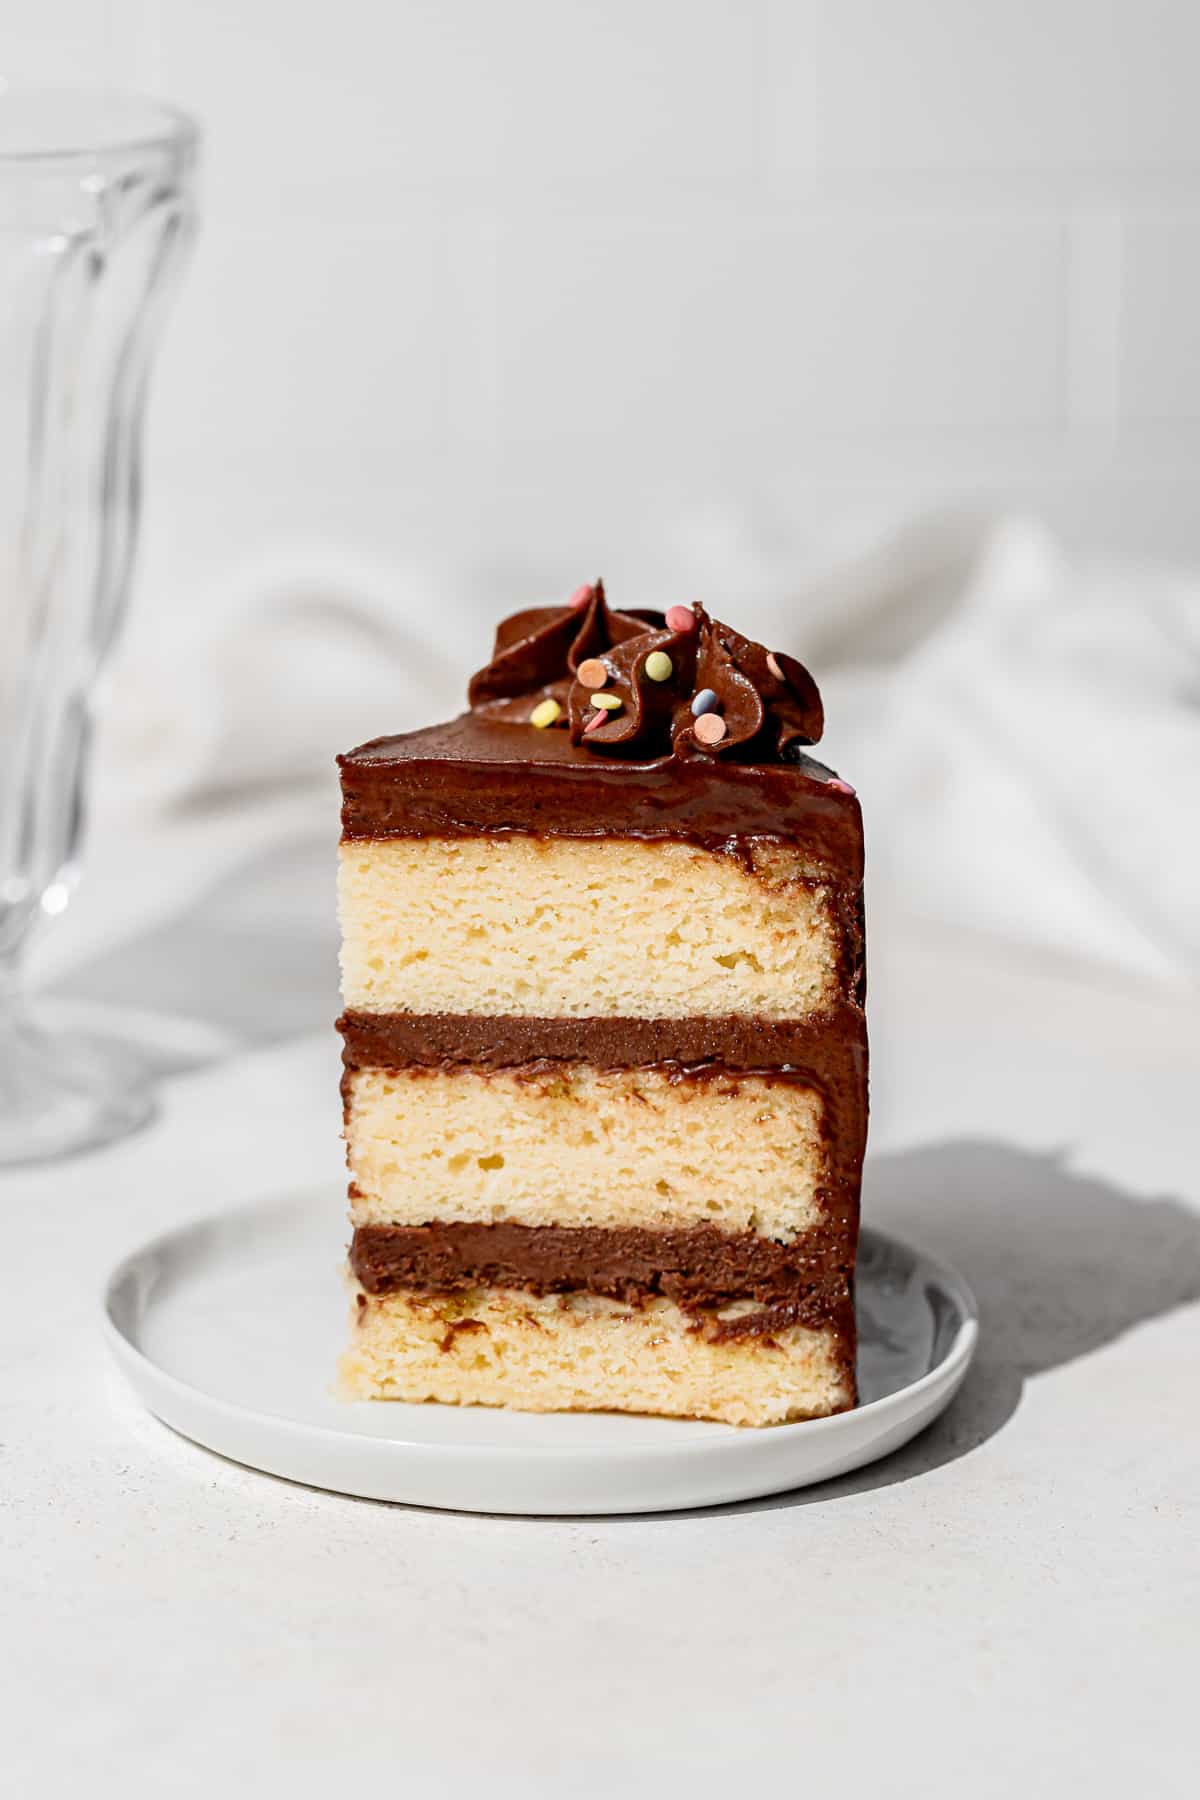
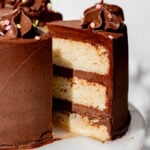
This yellow cake with chocolate frosting is what birthday dreams are made of! Each soft & moist cake layer is slathered with an irresistible brown butter milk chocolate frosting. Finish the cake off with some confetti sprinkles for a special celebratory occasion!
You can't wrong with a classic dessert, like this yellow birthday cake! However, the simplest recipes are often the trickiest to perfect, to really impress people with its flavor and texture. And if there's one thing I LOVE, it's building off of my past recipes to create even better versions of them!
A while back, I perfected the Vanilla Cake (imo😌), so I adapted it to create this simpler yellow cake that is equally just as soft & moist with a balanced sweetness. I also created the best chocolate frosting for this Dark Chocolate Malt Snack Cake, which really does taste like chocolate cake batter! But this brown butter milk chocolate frosting might be my favorite so far. It's decadent without being too sweet, and the brown butter really stands out!
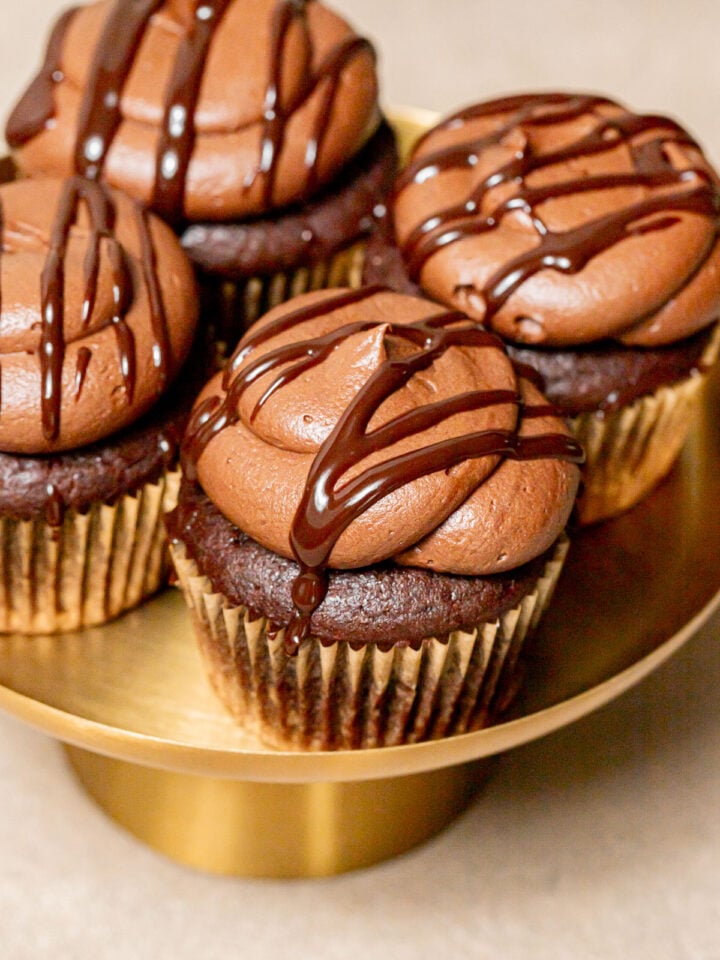
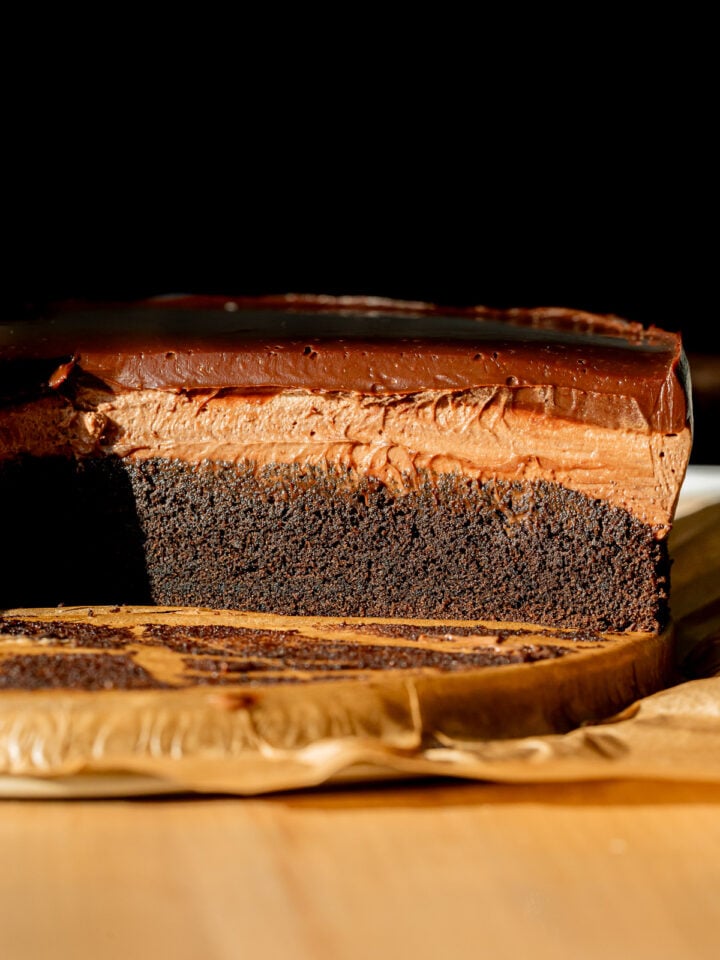
For more birthday recipes, try Birthday Cake Sugar Cookies, Ultimate Chocolate Fudge Cake, and Small Batch Vanilla Cupcakes with Dark Chocolate Frosting.
Jump to Recipe
Why you'll love this yellow cake with chocolate frosting
- Soft & Moist Cake Layers: This recipe uses the reverse creaming method, a butter-oil combination, and buttermilk to create the most tender crumb that stays moist for days!
- Outrageously Delicious Chocolate Frosting: I was literally speechless the first time I tasted this frosting. The notes of caramelized butter are prominent and marry beautifully with a high quality milk chocolate. It's not overly sweet (I can't stand cloyingly sweet frostings!), and is a dream to use for decorating cakes - especially when the cake layers are frozen!
- Easy to Decorate: I have to admit something to you - I'm terrible at decorating cakes. Something goes wrong almost every time, and I have a meltdown because I've spent so much time (and ingredients!) on this cake. But this cake?! This cake is a dream to decorate. If you freeze the cake layers overnight (or even just a couple hours), the frosting thickens up on contact with the cake. So the cake layers never slide around, and there's no need for a crumb coat! Within an hour the cake layers will defrost and be ready to cut!
Ingredient Notes
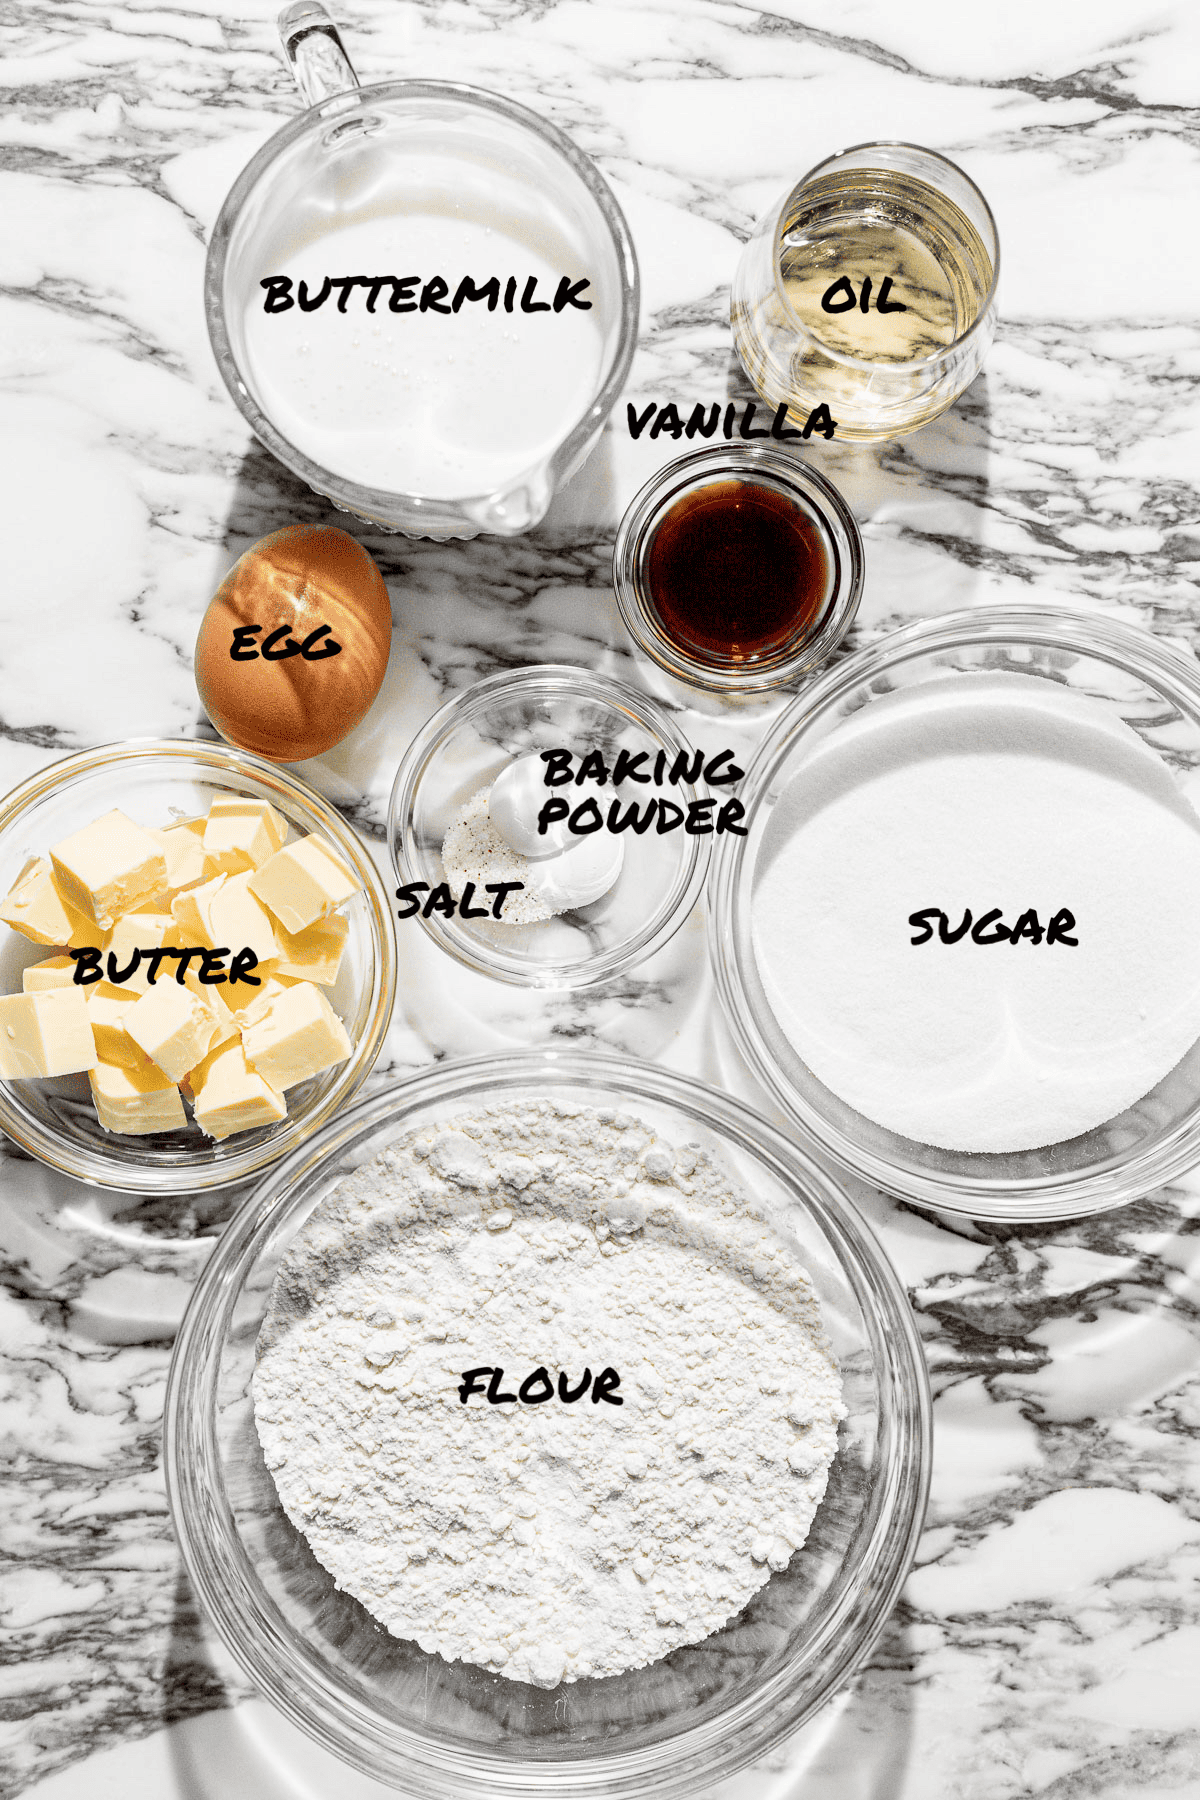
- Flour: Use a high quality, unbleached all-purpose flour.
- Fat: To make this cake super moist while maintaining that classic buttery flavor, this recipe uses a butter-oil combo. I prefer to use light tasting olive oil, but you can also use canola or vegetable oil. For both the cake and the frosting, use a high quality European-style butter, as it has a higher fat content than American-style butter, and fat equals flavor!
- Dairy: Buttermilk adds moisture and richness from its high fat content. Alternatively, you can use whole milk.
- Egg: The cake needs just one large egg. Bring it to room temperature quickly by placing it in a bowl of warm water for 10 minutes.
- Vanilla: It isn't a classic birthday cake without a strong vanilla flavor! Use a high quality vanilla extract for the best flavor. I used ifiProvisions Pure Vanilla Extract.
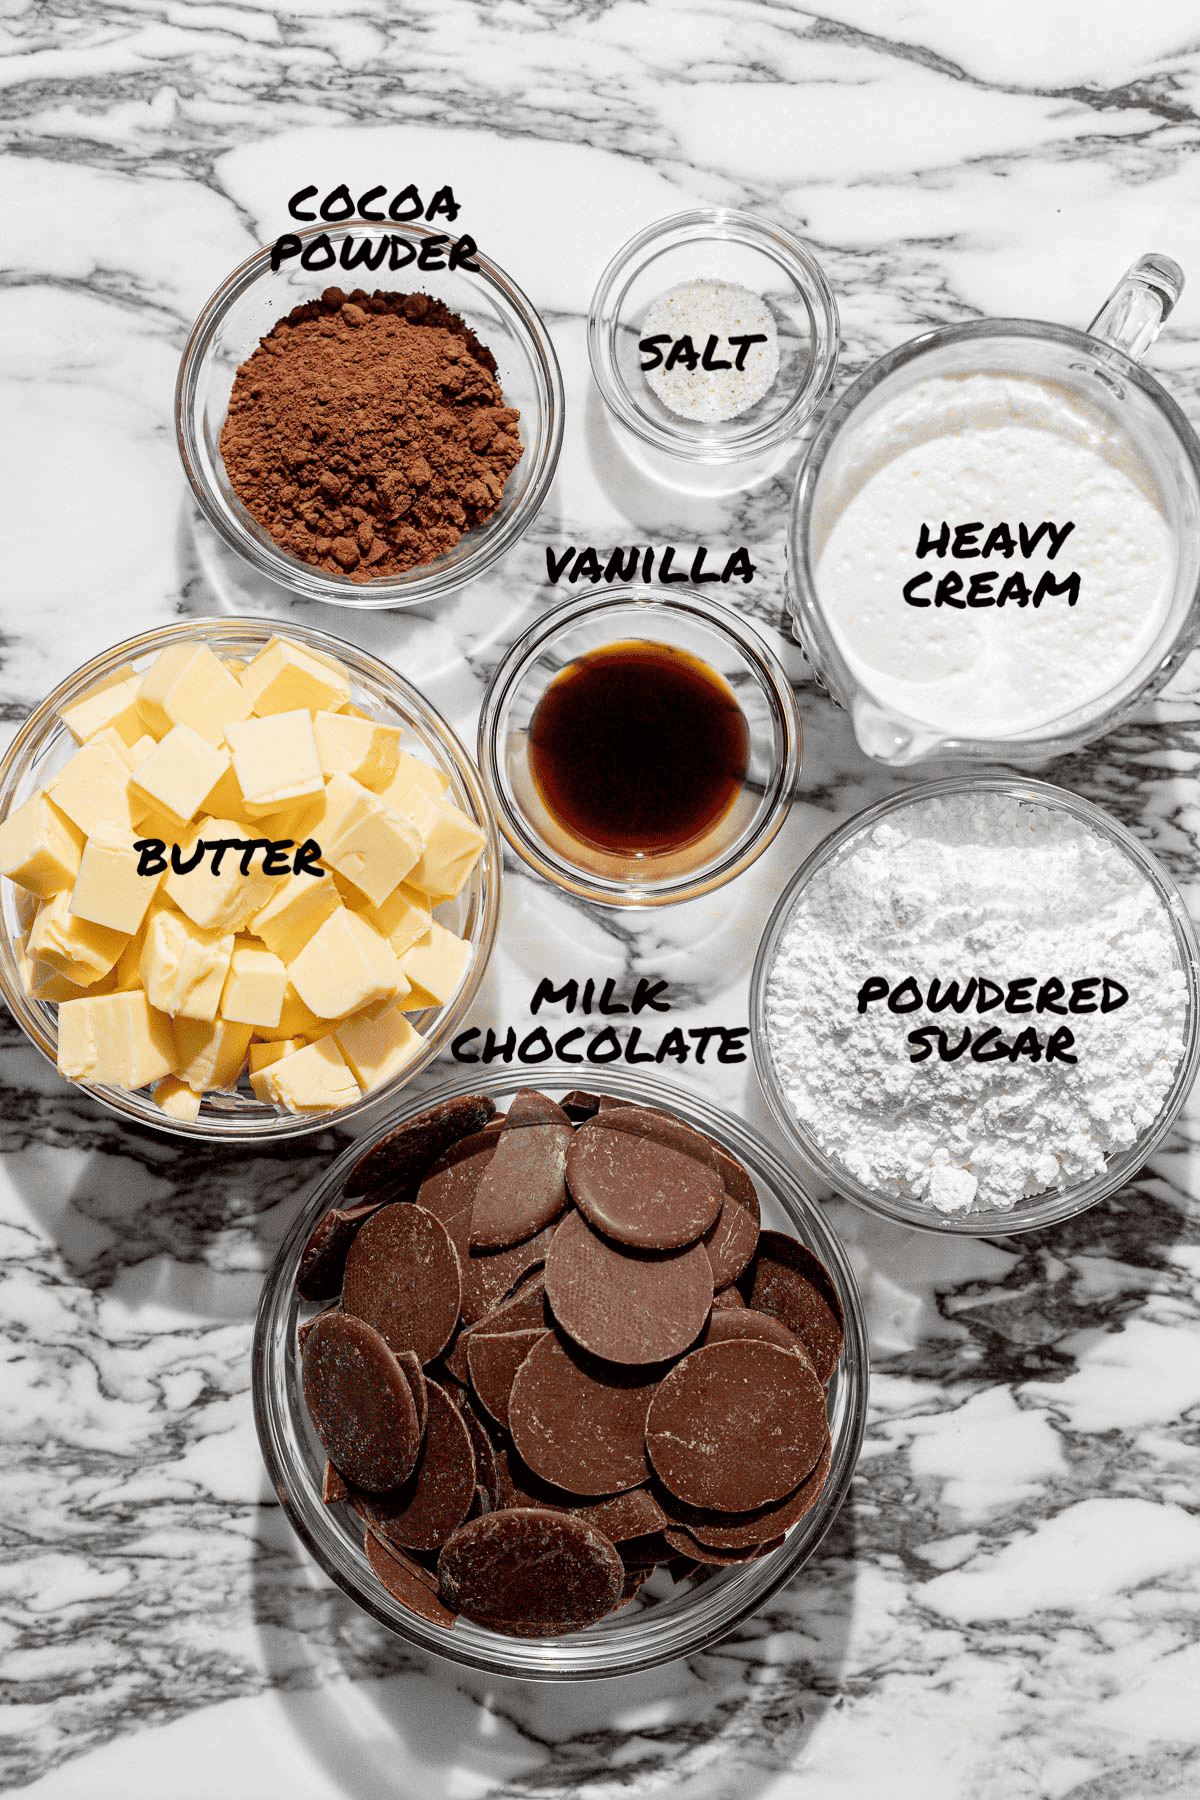
- Milk Chocolate: Use a high quality milk chocolate for best flavor and overall results. I used ifiProvisions Noche 40% Milk Chocolate (use the code SLOANESTABLE for 15% off site wide).
- Sprinkles: Decorate the cake with ifiProvisions Confetti Sprinkles!
See recipe card for full information on ingredients and individual quantities.
Step by Step Instructions
Here are step by step photos and instructions on how to make the best yellow cake recipe from scratch! For the full ingredient list and method, see the recipe card at the end of this post.
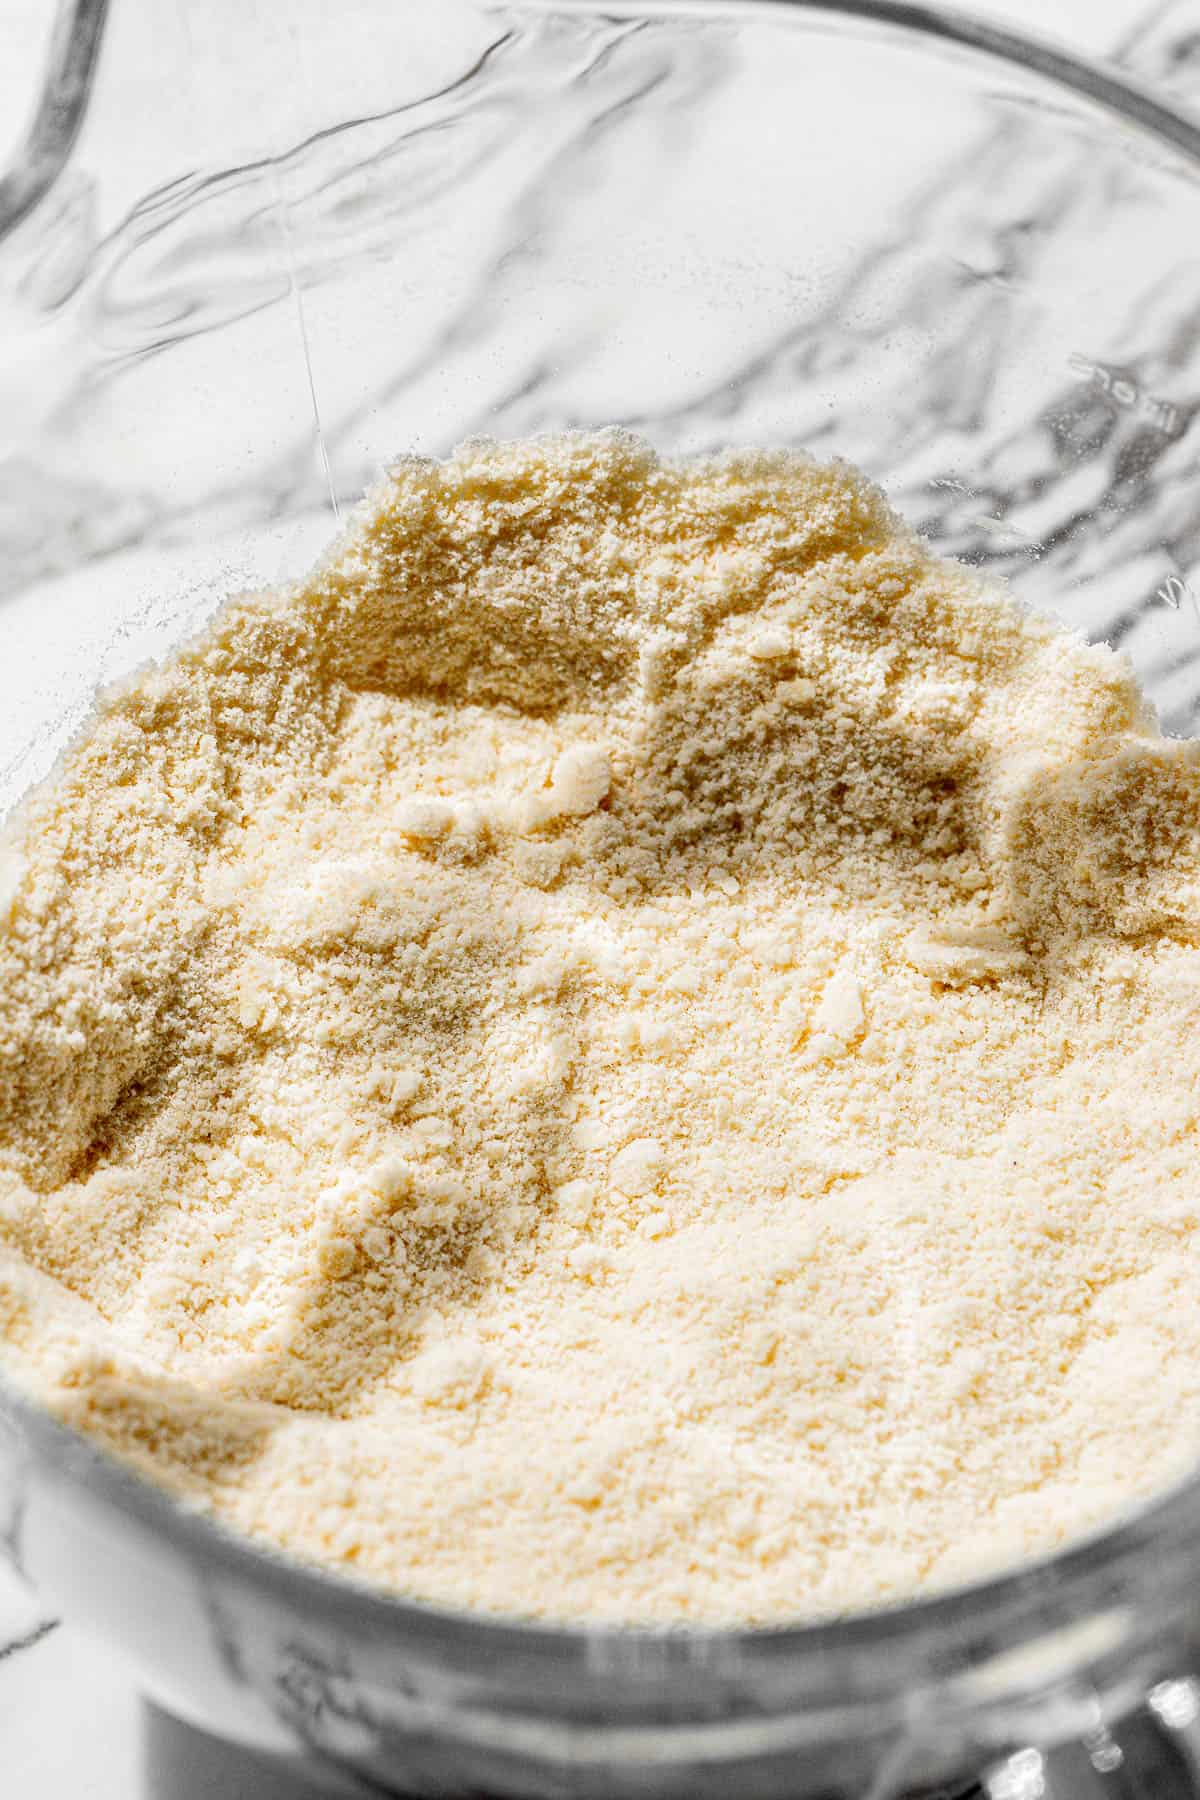
STEP 1: Beat the butter into the dry ingredients. In the bowl of a stand mixer fitted with the paddle attachment, combine the flour, sugar, baking powder, and salt. Cut up the butter into small cubes and add to the flour mixture. Mix on low speed until it resembles wet sand.
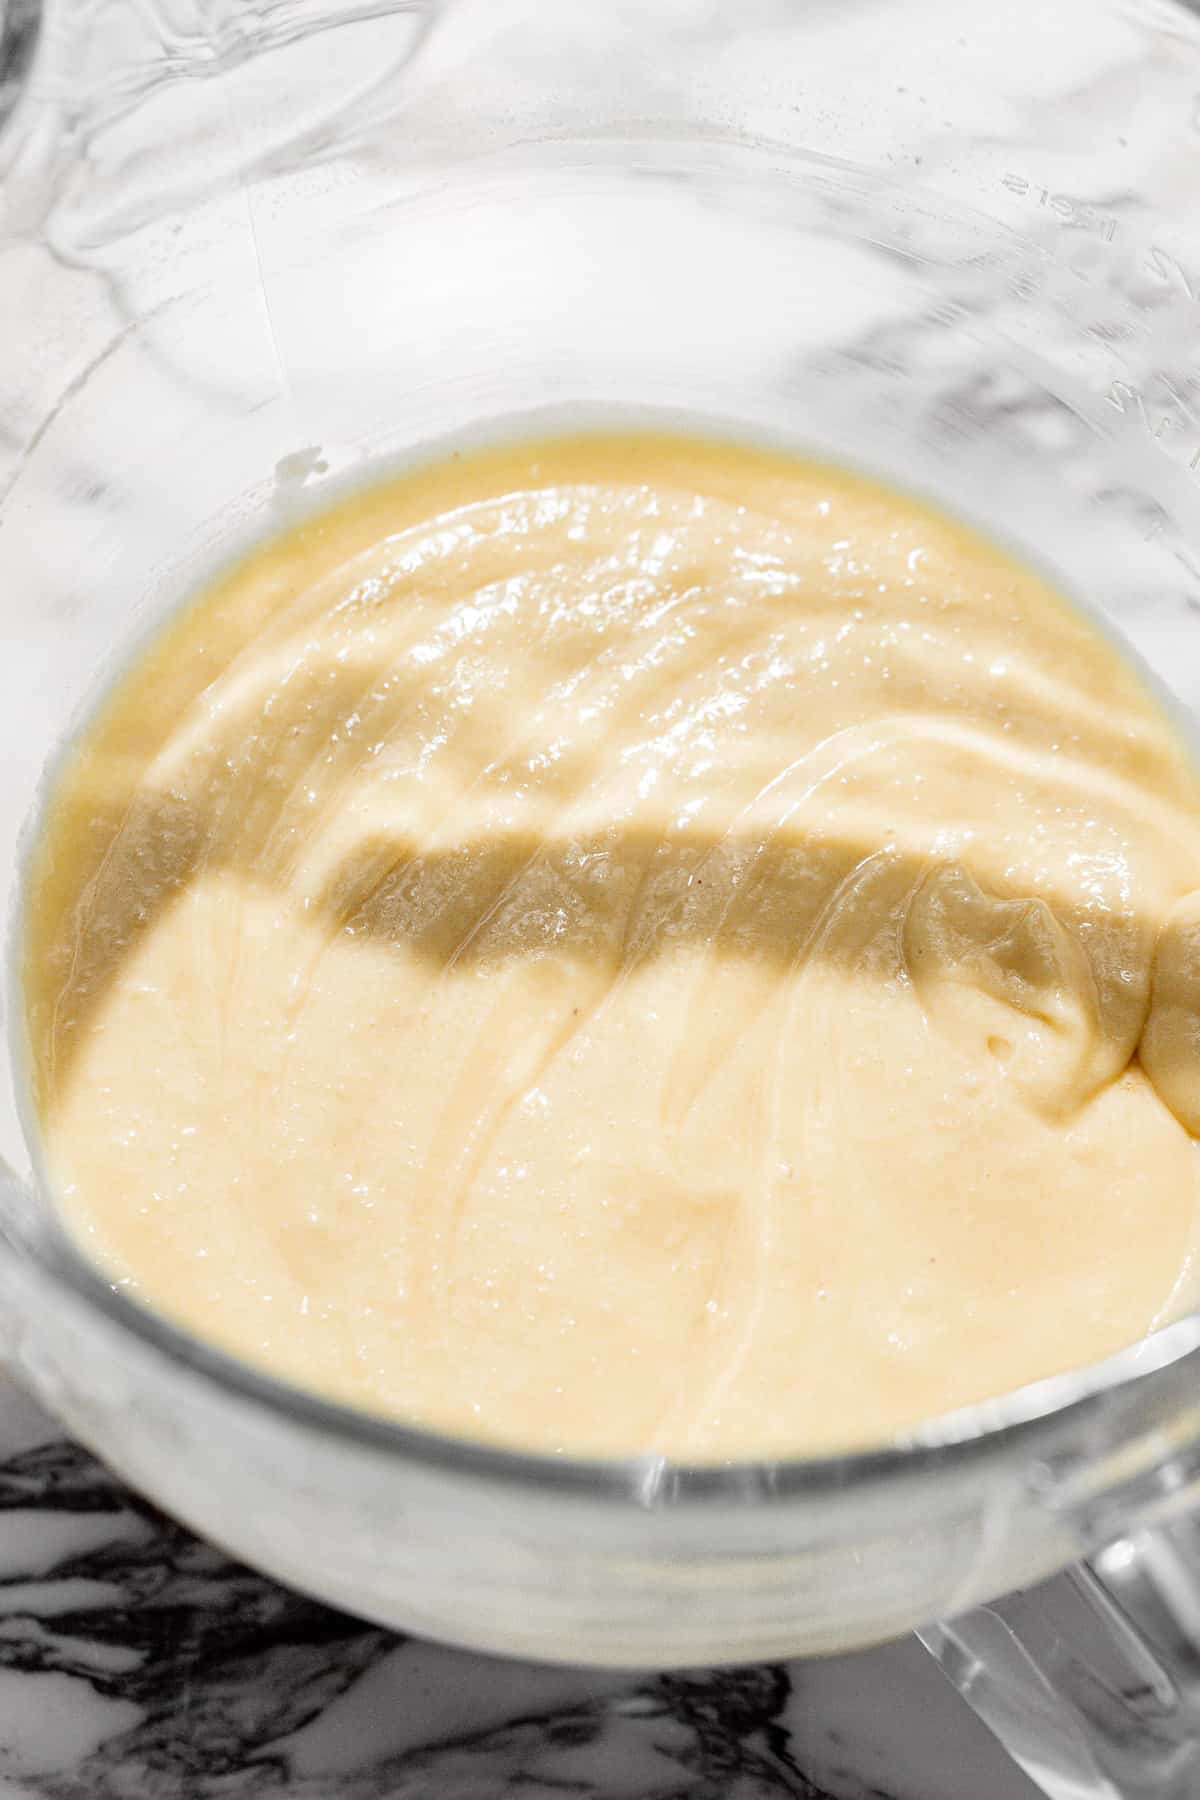
STEP 2: Mix in the wet ingredients. Add the oil, buttermilk, egg, and vanilla, and mix until just combined.
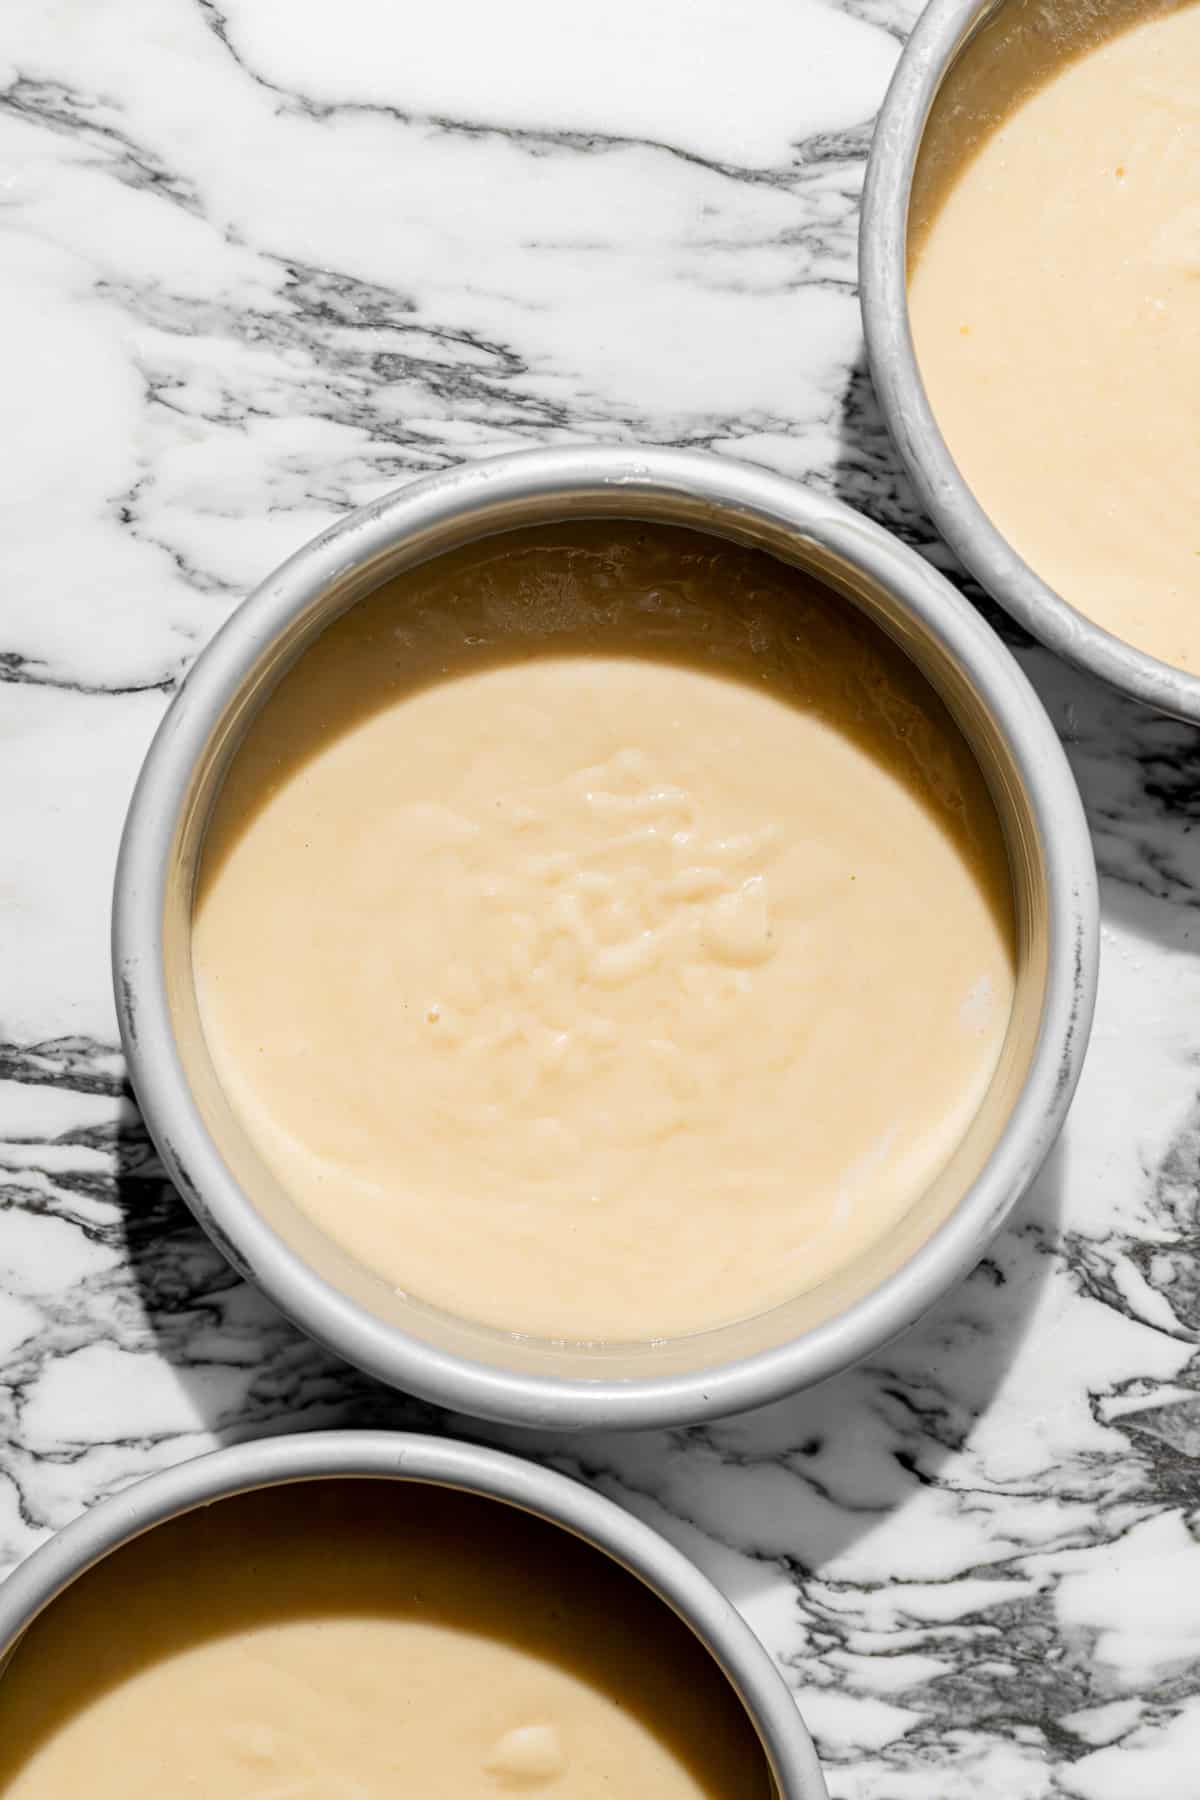
STEP 3: Bake. Scrape down the bowl, then divide the cake batter between the prepared round cake pans. Bake for 22-25 minutes or until a toothpick inserted comes out clean.
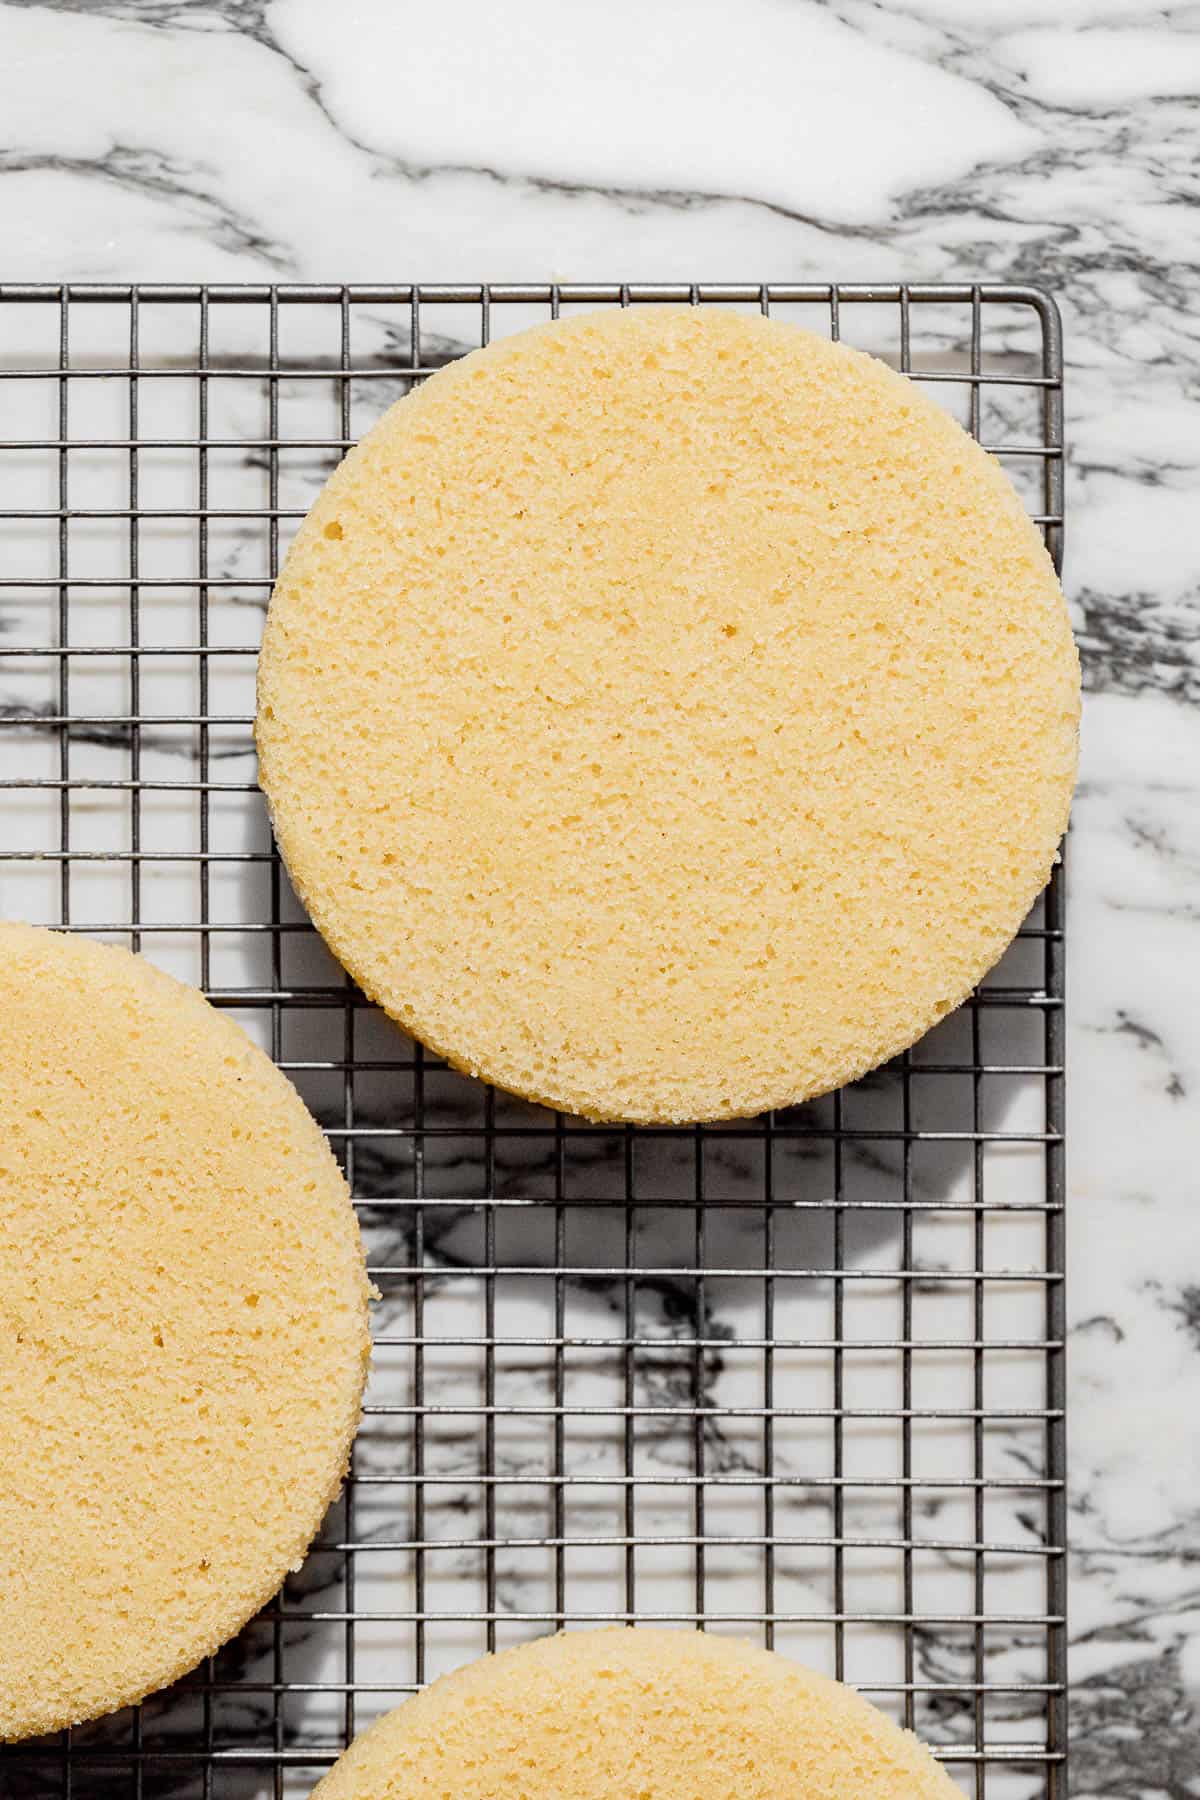
STEP 4: Cool, then freeze. Immediately turn the cakes out onto a wire rack to cool completely. Once cool, wrap the cakes in plastic wrap and freeze until ready to decorate. (Frozen cake layers will be much easier to frost!)
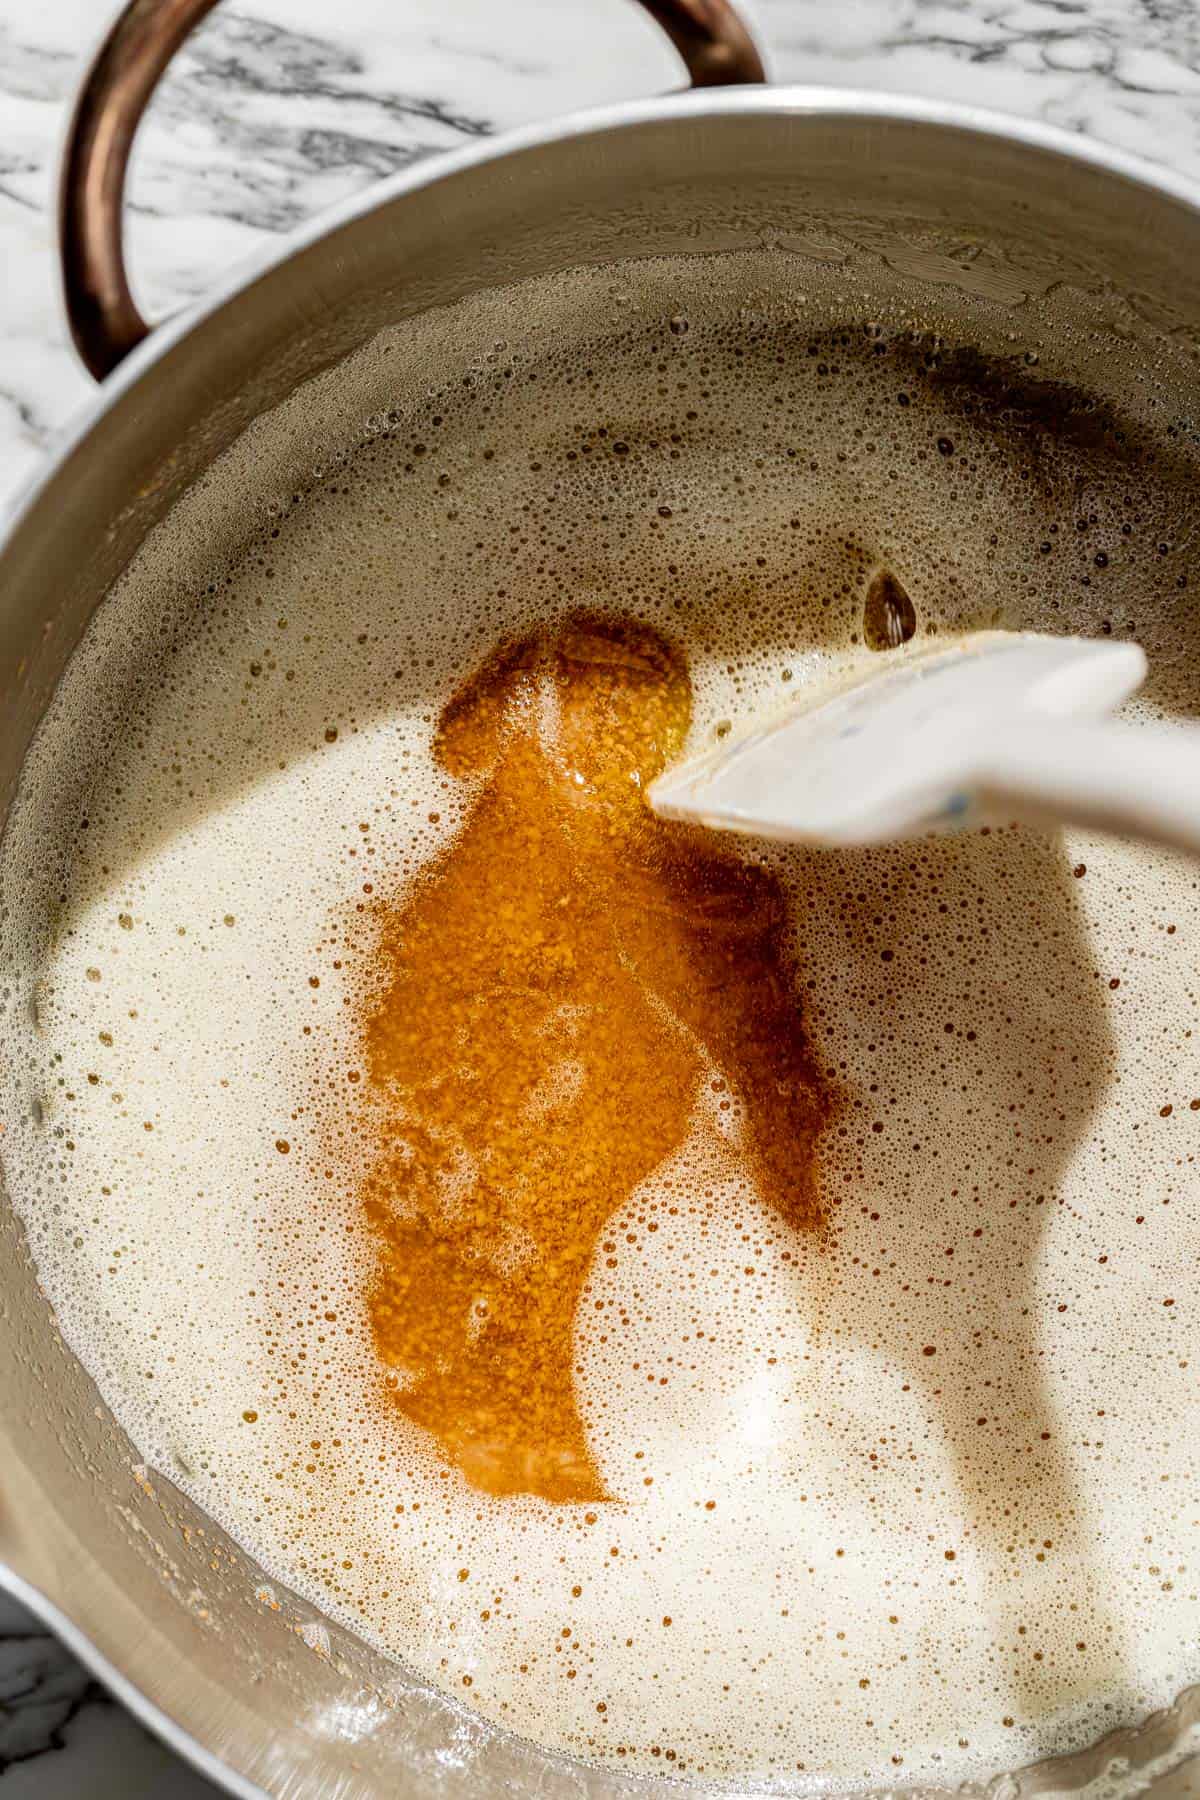
STEP 5: Brown the butter. In a large saucepan, place the butter over medium heat. As the butter melts, stir it with a rubber spatula to encourage even cooking. Once the butter has fully melted, it will alternate between rapid large bubbles and gentle small foamy bubbles. The butter will be ready once it turns a dark golden color and the fat solids have darkened and settled at the bottom of the pan.
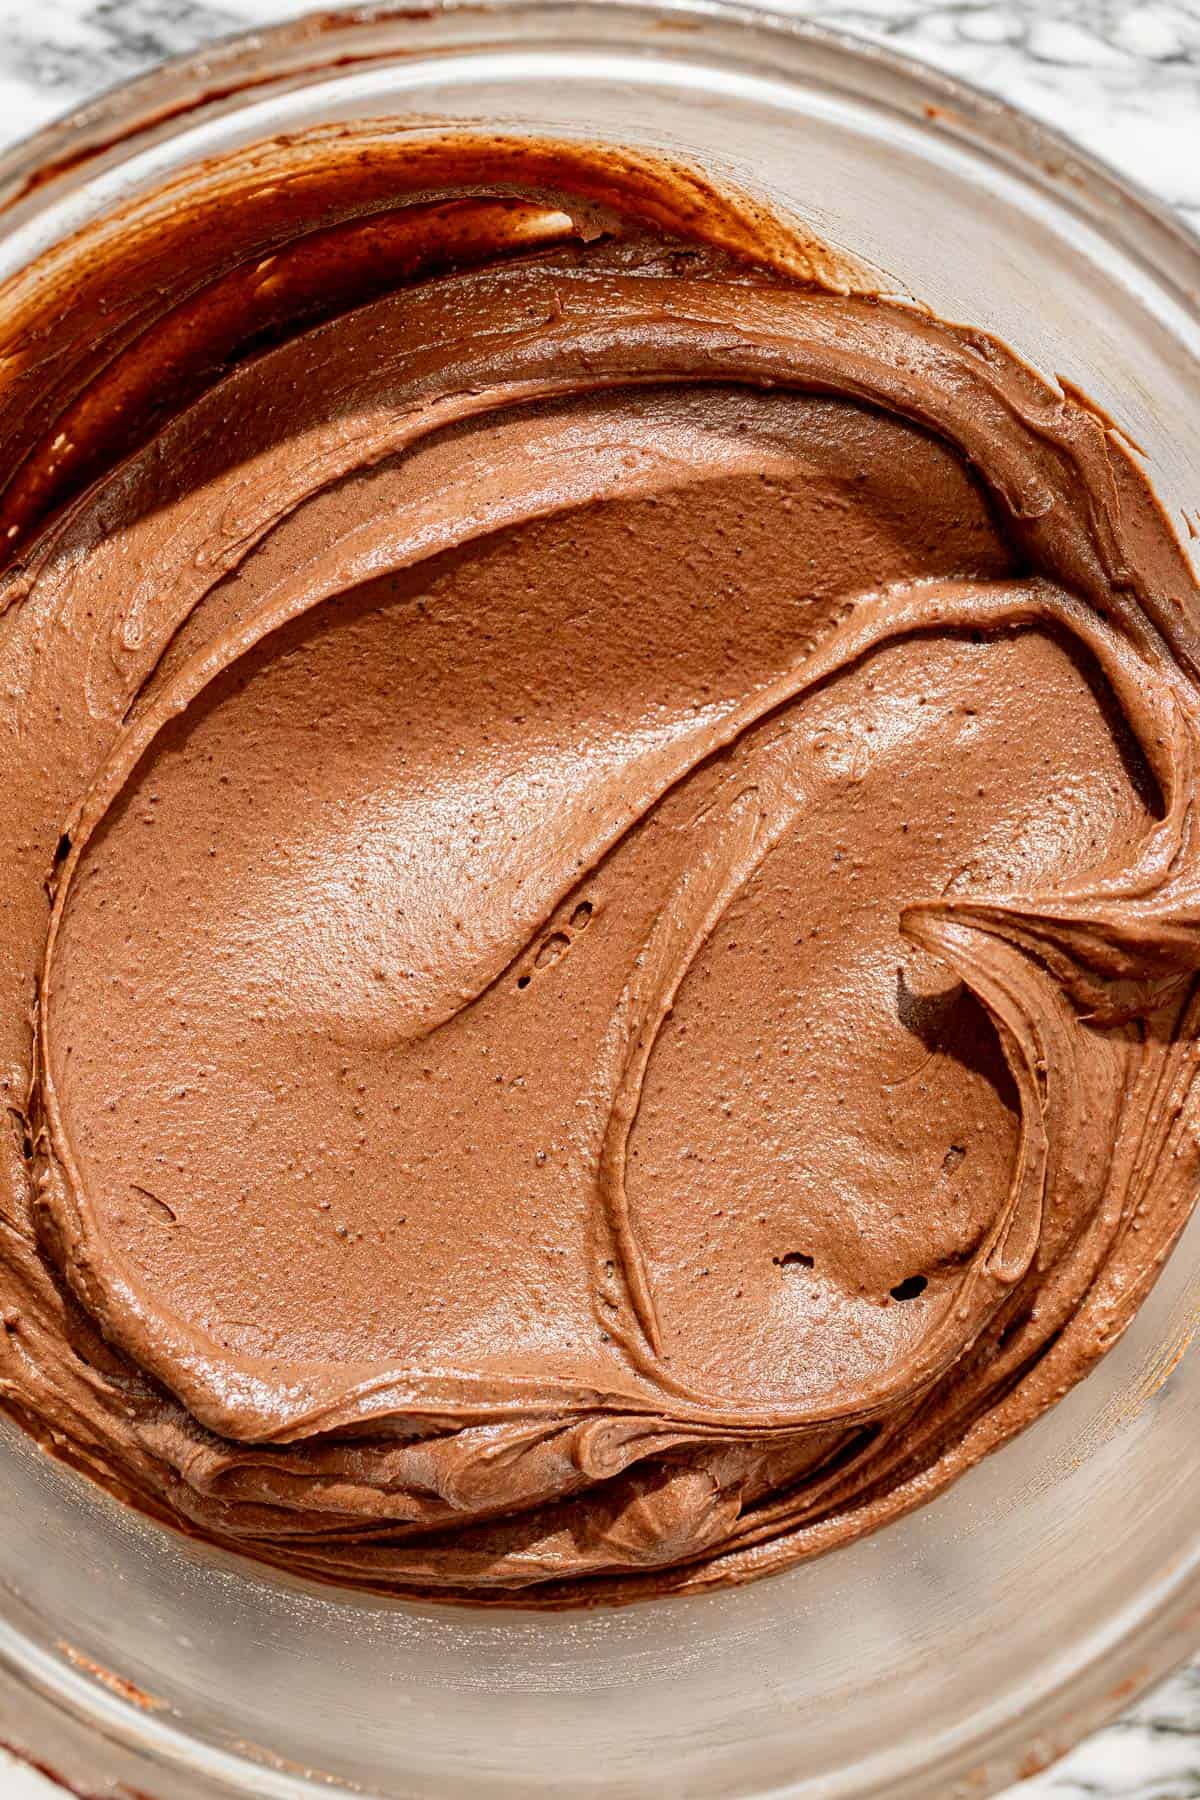
STEP 6: Add remaining ingredients and chill. Add the milk chocolate, heavy cream, powdered sugar, cocoa powder, salt, and vanilla. Stir constantly until everything is melted and fully combined. Pour the mixture through a fine mesh sieve into a large bowl. Press plastic wrap up against the surface and place in the fridge for at least one hour or overnight. (If chilled overnight, microwave in 10 second increments until soft, then use an electric hand mixer to beat on low speed until smooth.)
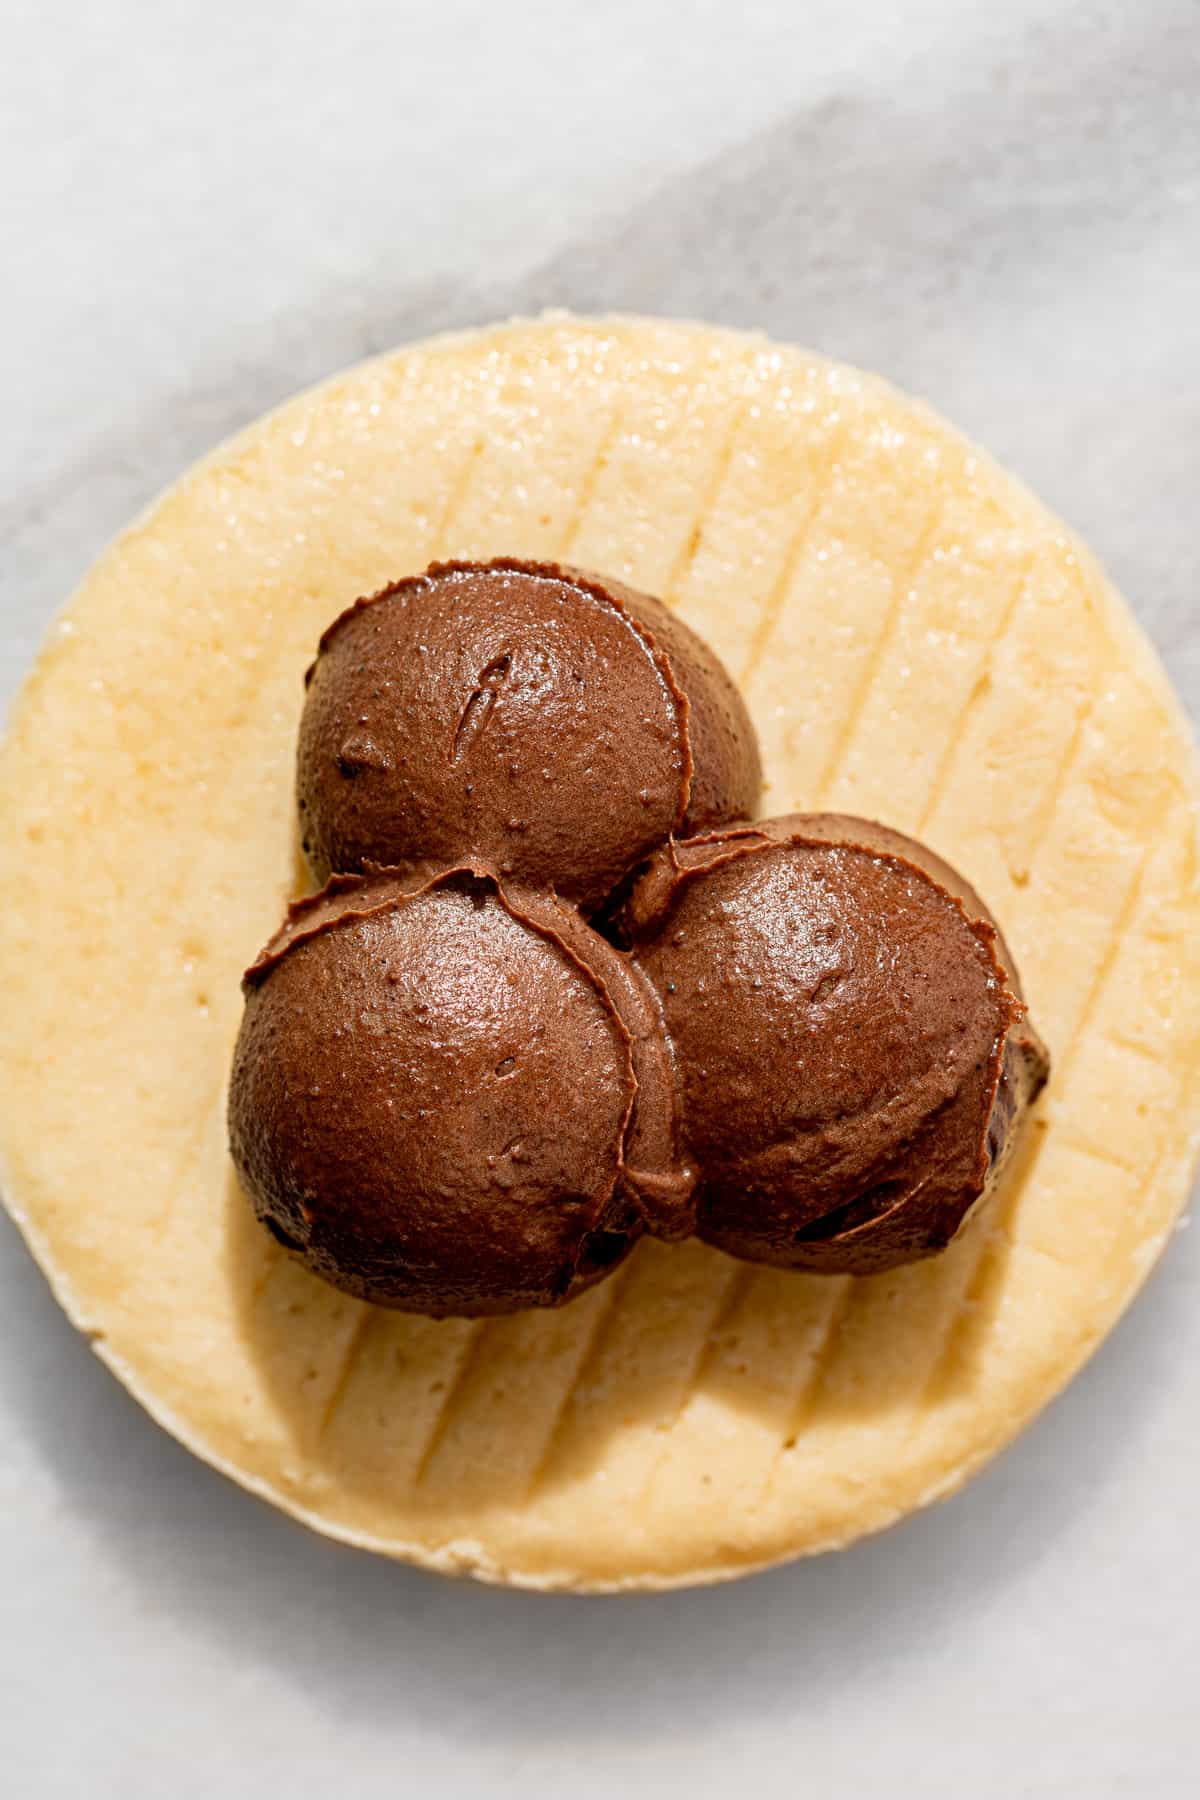
STEP 7: Assemble the cake. Place the first cake layer on a cake stand. Use a 3 tablespoon cookie scoop to add 3 scoops of frosting. Use an offset spatula to spread into an even layer. Repeat with the second cake layer.
STEP 8: Decorate. Add the last cake layer and top with a few more scoops of frosting. Use the offset spatula to smooth out the top, and spread the excess all over the sides. Continue decorating the cake as desired. Top the cake with confetti sprinkles, and enjoy!
Expert Baking Tips
- Use cake strips to create flat cake layers. Soak these wilton cake strips in ice water before starting the cake batter. Just before baking, wrap the cake strips around the pan. The cold temperature on the outside of the cake will prevent the edges from baking faster than the center, resulting in an evenly baked flat cake.
- Freeze the cake layers before decorating. Since this is such a moist cake, I highly recommend freezing the cake layers for at least two hours before decorating.
- If the frosting is chilled overnight... microwave it in 10 second increments until it softens up, then use an electric mixer to beat on low speed until smooth.
- Use a cookie scoop to assemble the cake. Use a 3 tablespoon cookie scoop to add an equal amount of frosting to each layer.
Recipe FAQs
The reverse creaming method is the process of beating room temperature butter into the dry ingredients. The fat coats the flour and inhibits the gluten from developing. With this method, the cake is sure to bake up flat without becoming too golden around the edges or on top. In contrast, the creaming method involves beating the sugar and butter together, which adds a lot of extra air into the batter. This is a great method for other bakes, but not with a white cake. With the reverse creaming method, the cake will bake up with an ultra fine, velvety crumb.
Cakes may dome in the middle when they bake because the outside bakes faster than the center, so the center has more time to rise. This is not ideal for layer cakes, because it is a pain to have to trim away the top of the cake. The best way to ensure your cake layers bake up flat rather than doming is to use cake strips. Soak the cake strips in cold water before wrapping around the outside of the cake pan. This will ensure that the outside of the cake does not bake faster than the center, resulting in an evenly baked, flat cake.
If you don't have cake strips on hand, you can make a DIY version! Dip a few paper towels in ice water and squeeze out some of the water so it isn't dripping. Fold them up so they're the same width as your cake pan, then wrap them in aluminum foil. Wrap your DIY cake strips around the sides of the pan just before baking.
Store this cake in an airtight container at room temperature for up to 5 days. You can also wrap individual slices with plastic wrap, place in a freezer bag, and freeze for up to 3 months.
Baking in Grams
All of the recipes on this blog are carefully developed with gram measurements so you can easily recreate them in your own kitchen with success. Volume measurements are extremely inaccurate and leave room for significant errors. Not all measuring cups are made equally, so your one cup of flour will be different from my one cup of flour. By providing precise measurements in grams (aside from minor ingredients, which are given in tsp/tbsp), you can make these recipes accurately and with less cleanup! All you need is this kitchen scale.
If this still isn't enough to convince you, I have provided volume measurements in the recipe card. If you are interested in understanding the conversions, this is the best conversion chart.
But trust me, once you try baking in grams you'll never turn back!
Happy baking! x
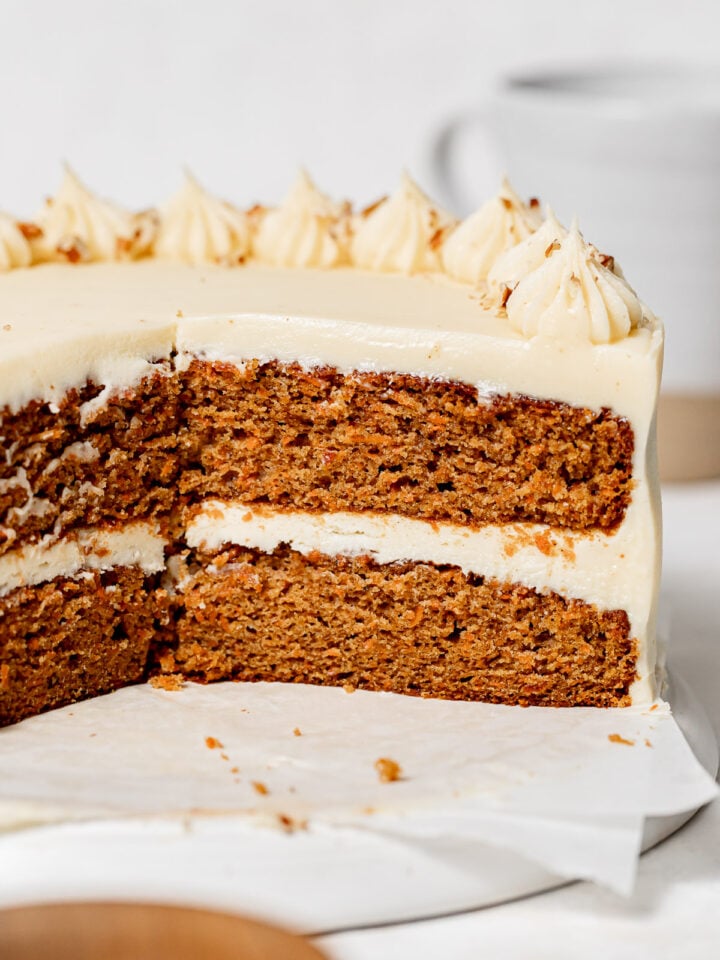
Other cake & cupcake recipes to try
If you tried this recipe, I'd love to know how it turned out for you! Leave a star rating & review below and post a picture (or video!) on Instagram and tag me so I can see your bakes! Not ready to make this recipe yet? Click the heart button on the right of your screen to save it for later 🙂
📖 Recipe
Yellow Cake with Chocolate Frosting
Ingredients
For the yellow cake:
- 210 g (1 ¾ cups) all-purpose flour
- 162 g (¾ cup + 1 tbsp) granulated sugar
- 2 teaspoon baking powder
- ½ teaspoon kosher salt
- 76 g (5 ½ tablespoon) unsalted butter, room temp
- 50 g (¼ cup) neutral oil
- 227 g (1 cup) buttermilk, room temp
- 1 egg, room temp
- 2 teaspoon vanilla extract
For the brown butter milk chocolate frosting:
- 227 g (16 tablespoon) unsalted butter
- 340 g (12 oz) milk chocolate
- 170 g (¾ cup) heavy cream
- 113 g (1 cup) powdered sugar, sifted
- 21 g (¼ cup) dutch process cocoa powder, sifted
- ½ teaspoon kosher salt
- 2 teaspoon vanilla extract
- confetti sprinkles, for topping
Instructions
For the yellow cake:
- Preheat the oven to 325 degrees F (160 degrees C). Grease and line three 6 inch cake pans with parchment paper.
- In the bowl of a stand mixer fitted with the paddle attachment, combine the flour, sugar, baking powder, and salt.
- Cut up the butter into small cubes and add to the dry ingredients. Mix on low speed until it resembles wet sand.
- Add the oil, buttermilk, egg, and vanilla, and mix until just combined.
- Divide the cake batter between the prepared pans.
- Bake for 22-25 minutes or until a toothpick inserted comes out clean. Immediately turn the cakes out onto a wire rack to cool completely.
- Once cool, wrap the cakes in plastic wrap and freeze until ready to decorate. (Frozen cake layers will be much easier to frost!)
For the brown butter milk chocolate frosting:
- In a large saucepan, place the butter over medium heat. As the butter melts, stir it with a rubber spatula to encourage even cooking. Once the butter has fully melted, it will alternate between rapid large bubbles and gentle small foamy bubbles. The butter will be ready once it turns a dark golden color and the fat solids have darkened and settled at the bottom of the pan.
- Add the milk chocolate, heavy cream, powdered sugar, cocoa powder, salt, and vanilla. Stir constantly until everything is melted and fully combined.
- Pour the mixture through a fine mesh sieve into a large bowl. Press plastic wrap up against the surface and place in the fridge for at least one hour or overnight. (If chilled overnight, microwave in 10 second increments until soft, then use an electric mixer to beat on low speed until smooth.)
For assembly:
- Place the first cake layer on a cake stand. Use a 3 tablespoon cookie scoop to add 3 scoops of frosting. Use an offset spatula to spread into an even layer. Repeat with the next cake layer.
- Add the last cake layer and top with a few more scoops of frosting. Use the offset spatula to smooth out the top, and spread the excess all over the sides. Continue decorating the cake as desired.
- Top the cake with confetti sprinkles, and enjoy!
Notes
- Use cake strips to create flat cake layers. Soak these wilton cake strips in ice water before starting the cake batter. Just before baking, wrap the cake strips around the pan. The cold temperature on the outside of the cake will prevent the edges from baking faster than the center, resulting in an evenly baked flat cake.
- Freeze the cake layers before decorating. Since this is such a moist cake, I highly recommend freezing the cake layers for at least two hours before decorating.
- If the frosting is chilled overnight... microwave it in 10 second increments until it softens up, then use an electric mixer to beat on low speed until smooth.
- Use a cookie scoop to assemble the cake. Use a 3 tablespoon cookie scoop to add an equal amount of frosting to each layer.
Kate says
Hi! I’m making the cake layers 2 days before the event. Is it ok to keep them in the freezer for that long? Thanks!!
Sloane says
Hi! Yes, you can freeze cake layers for up to three months.
Dee says
Would you say this cake is bigger/taller than your mini carrot cake ? I made your mini carrot cake yesterday which was delicious by the way ! And I loved the size of it
Sloane says
SO glad you loved the carrot cake! And yes, this yellow cake is taller, but still 6" with thinner layers. So I would say it yields about the same number of servings, if that's what you're wondering.
Kashish Sawlani says
The icing is very runny. Will it thicken after refrigeration?